
It’s worth your while to click on the image above to be taken to the full sized 360 view of the Shah-é-Chéragh Mosque taken by Audrey Scott and Daniel Noll of Uncornered Market.com. As DPS evolves, we’ll be adding in the ability to see these immersion style Shockwave files on the blog, but for now, take a look at this example before diving into this post.
Daniel And Audrey have been creating these wonderful images for years. I’ve been a bit addicted to the far-flung locations they show and the amount of detail they can pack into a full spherical image (which looks fabulous in full screen mode). I recently contacted them to find out how they capture their images as I wanted to present my panoramas (not full 360) in the same manner. This post will explore how they capture what they do and will point you to some resources you can use to do the same.
In an upcoming post, I will dive a bit deeper into a slightly different style I currently use to create similar images. But for now, on to the Q & A!
NOTE: I suggest subscribing to their blog as they post one of these images from around the world every week. Plus they have other great photography and travel stories on their site I think you will enjoy.
1 ) Starting with the photo shoot, list for us the equipment you use to capture your scenes.
Photo Shoot:
 Camera body (e.g., Nikon D300)
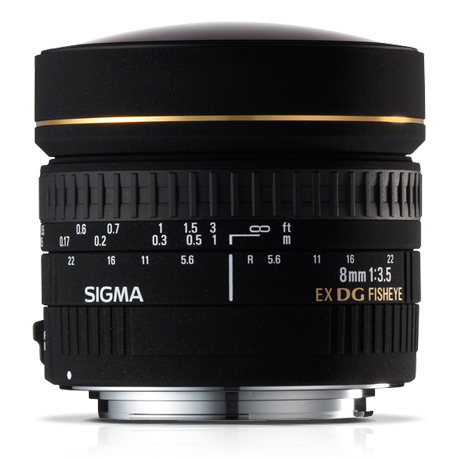
- Circular fisheye lens (e.g., Sigma 8mm f/3.5 EX DG Circular Fisheye Lens)
- Monopod Velbon RUP-43 (optional, we carry one)
- Panoramic tripod head (optional, we do not carry one)
Post-processing:
- Your favorite photo editing software (e.g., Photoshop)
- Spherical panorama stitching software (e.g., Autopano Giga)
- Spherical panorama tour software (e.g., Panotour Pro)
2 ) You’ve captured hundreds of 360 panorama images while traveling almost full time. Can we get some technique tips that will help those learning the technique shorten their learning curve, please?
For the purposes of this Q&A, we’ll assume you are shooting with an 8mm circular fisheye lens.
The shots: You will shoot in RAW format at least five images in portrait orientation – four images each at 90-degree angles to one another (think around a single axis), then a fifth shot overhead to be sure you’ve captured the entire sky or ceiling. If you are not shooting with a lens at least as wide as 8mm, you may need to take more images to be sure you’ve covered everything from a 360-degree perspective.
We take virtually all our panoramic photos without a monopod, tripod heads or other aids. After you’ve taken enough photos, you get a feel for properly aligning with the ground and horizon. An alignment trick: tie a string around a coin (or heavy item) and hang this from your lens so that you can be sure you are shooting at the same angle around the axis.
Exposure and focus: To ensure a consistent exposure, be sure you are in fully manual mode. As a general rule (there are exceptions), you’ll want to expose for the sky. Also make certain your lens is set to infinity focus. (There are exceptions to the infinity rule if the bulk of your subject and surroundings are close up, say inside a bus for example.)
 Subject area: Having some people or objects in the foreground can be useful to provide action or perspective. Because you are working with an 8mm lens, objects in the distance (e.g., mountain ranges) will appear especially far away, so they may not be as engaging in a spherical panorama as they might appear to the naked eye.
3 ) After you have the images, run us through your workflow (on a high level as this isn’t a complete tutorial).
The workflow consists of two parts: 1) image stitching, and 2) creating the 360-degree tour.
The stitch:
- Be sure that software settings are properly set at spherical panorama.
- Drop the five RAW images from the scene into a stitching software program in order to detect the control point (overlaps) between images.
- Examine the draft stitch. Adjust variables such as roll, pitch and yaw in order to correct for distortion and camera body angle.
- Render the stitched photos into a panorama. The output will be a flat .jpg file.
- Post-process the resulting .jpg file in your favorite photo editing software to tune exposure, contrast, saturation, etc.
- Use pixel clone/stamp to fill in the black/empty area at the bottom of the image.
Creating the tour:
- Take the post-processed flat panorama .jpg and drop the file into a 360-degree panorama “tour” software. We use Panotour Pro to create the flash-based tours you see on our website.
- Set your preferences, including logo/watermarks and button/user interface options (e.g., full screen) you’d like available on your tour.
- Render the flash tour. The resulting output will be a .swf file that you can upload to your website or blog’s media manager. More information on this Panotour wiki on how to format. WordPress users can also use PanoPress.

4 ) Which step is the hardest to master in this entire sequence?
Equally, subject selection and the actual shooting process. Not only are you concentrating to ensure that the photographs are properly exposed and aligned, but you must pay attention to people/cars/animals/etc. coming in and out of view. These can be wonderful in terms of showing action, but if they move too quickly, they may create “ghosts” (where heads, feet or body segments are missing) in the resulting stitched image.
5 ) Have you found any resources particularly useful while learning to create these shots?
We first became involved in 360-degree panoramas thanks to 360cities.net. The site has a tutorial for people getting started in panoramic photography, it offers inspiration in its collections, and it features the ability to host and serve panoramas.
6) What particular challenges have you had to face while creating these images while still on the road?
 We have one camera body to shoot photos for panoramic photography (with our 8mm Sigma lens) and two-dimensional photos. Often, we’ll be in the midst of a scene that is wonderful for both types of shots, but we have to make a quick decision to shoot one over the other if the scene is quickly evolving. Many of our best panoramas have also been shot in less-than-ideal physical conditions including dust, snow, heat, moisture, so we have to continually mind the camera sensor as we swap out lenses.
7 ) Including shooting and editing time, how long would you say it takes you to produce one solid 360?
If all goes perfectly, the process can take as little as 20 minutes: 5 minutes for the shoot, 10 minutes for rendering/photo editing, and 5 minutes to create & test the stitched 360-degree panorama and .swf file tour.
8 ) For beginners who love to travel, which three areas of the world would you suggest as havens for producing 360 panoramas?
1) India – so much color, activity, wonderful markets and temples. Good for interiors and exteriors.
2) Andean South America – surreal landscapes (e.g., Salar de Uyuni salt flats in Bolivia), mountains, active indigenous markets
3) Middle East and Central Asia – for Islamic art interiors, bustling spice markets.
4 Favorite panoramas:
 a) Disco Ball Mosque, Iran (awesome interior)
b) Petra By Night, Jordan (night, possibly our most popular panorama)
c) Udaipur Market (market action)
d) Crossing Thorong La Pass, Annapurna Circuit, Nepal (landscape)
Bonus Panorama in time for Valentine’s Day: Petronas Towers Fun (panoramic trickery)
Bio:
Daniel Noll and Audrey Scott are the husband-and-wife storytelling and photography team behind the around-the-world travel blog, Uncornered Market. More than five years and 70 countries later, they are still exploring the world, still taking panoramic photos…and still married. You can follow along with their adventures via Twitter, Facebook, Google + and by subscribing to their blog.


Some Older Comments