The best thing about trying your hand at real estate photography? You can practice in your own home – over and over until you’re happy with the results. Have you ever thought about it? Tried it? Share a photo in the comments or on our social media #dPSRealEstatePhotography — Updated 2025

Do you want to capture beautiful, eye-catching real estate photos?
You’ve come to the right place.
Real estate photography might seem difficult and even high pressure, but with a little know-how, you can start creating outstanding images right away.
I’ve spent plenty of time learning the ins and outs of real estate and house photography, and today, I’d like to pass that knowledge on to you. So if you’re ready to learn how to photograph houses like a pro, then let’s dive in, starting with:
Real estate photography: key camera equipment
To get started with real estate photography, you’ll need a few basic items:
- A camera
- A wide-angle lens
- A tripod
Your camera should allow you to add a cable release, a flash, different lenses, and wireless triggers. For cropped-sensor cameras, a lens around 10-22mm or 12-24mm is perfect, and for full frame sensor cameras, a lens around 16-35mm will do the job.
Tilt-shift lenses help avoid converging vertical lines such as wall edges and door frames. There are a handful of tilt-shift lenses available, but while these lenses are wonderful to use, they are fixed focal length. So if you need more flexibility, a 16-35mm zoom lens is a great alternative (or companion) to a tilt-shift lens.

Now, real estate shooting techniques can get pretty complex, from exposure blending and HDR to wireless flash and light painting with multiple exposures. No matter your shooting style, the camera should not be moved (to guarantee image alignment of multiple exposures), and the self-timer, a cable release, or a wireless trigger helps ensure zero camera movement. Certain apps will also trigger the camera and provide a preview of the photo on your smartphone or tablet.
The best lighting for exterior real estate photos

The first image a potential buyer (usually) sees when reviewing properties online is an exterior photo, so you must capture a beautiful outdoor shot. A big part of this is lighting, so you’ll need to carefully choose your time of day and lighting quality.
But what type of lighting is best for real estate photography?
Most exterior house photography benefits from lighting early and late in the day, when the light is soft and golden. The sun direction is also important, so you’ll want to use an app such as PhotoPills to determine the sun’s position prior to the photo shoot. In general, aim to photograph with light hitting the front of the home, like this:

In winter, some south-facing homes never have the sun hitting the front of the house. In such situations, I highly recommend keeping the sun at your back, even if it means shooting the home from an angle.

If you don’t like the result you get with morning or afternoon light, you might consider shooting on an overcast day. Cloudy skies can eliminate problems with the sun’s position, but discuss it with your client first, because white skies can lessen the impact of an otherwise great exterior image.
Also, if you’re struggling to find a good time to shoot during the day, you have one more option:
The dusk/dark technique, which gets you photos like this:

Simply head to the house around sunset and choose the best angle to showcase the home, ignoring the ambient light. Turn on all the lights or even add lights to the rooms; then wait until after sunset, when the sky’s exposure balances the room lights’ exposure. That’s when you can create a beautiful, pro-level image!
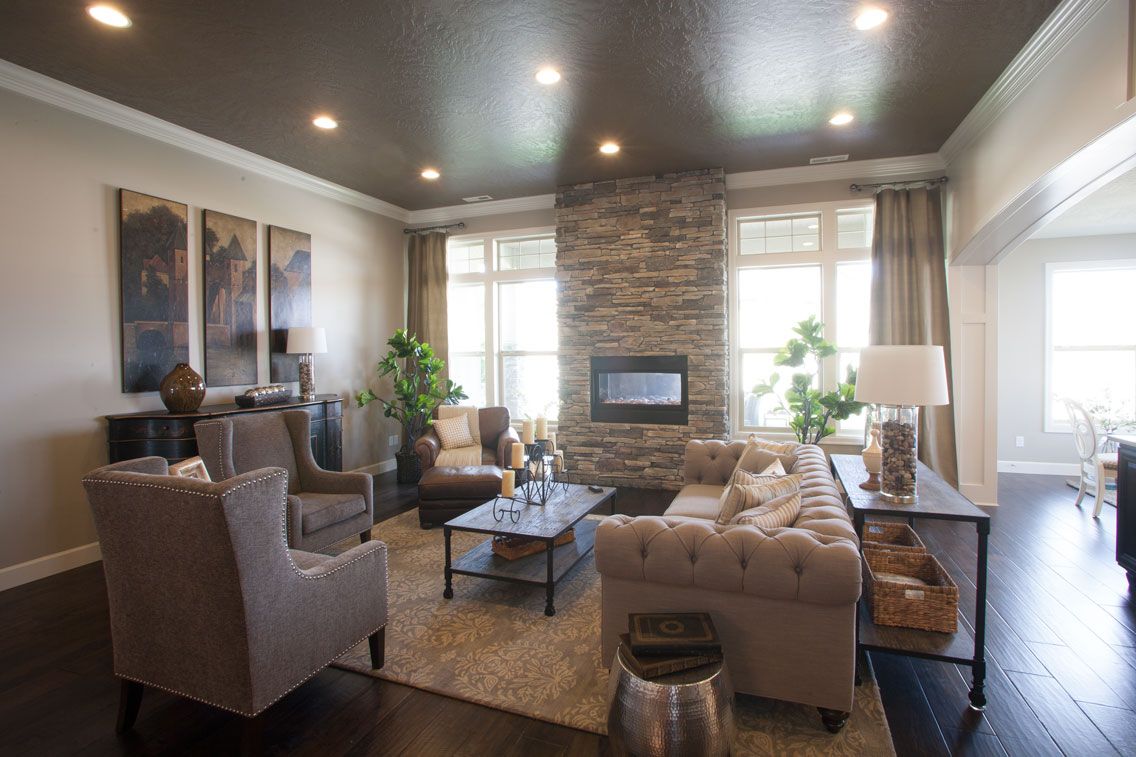
Getting started with interior photography: composition
After you’ve shot some stunning exterior shots, you’ll need to get on with the interior real estate photos. This can be tedious, but it’s essential you approach the task with care.
Homes come in all shapes, sizes, styles, and conditions. You want the house to look as good as possible, so I recommend you send your clients a task list for prepping the home prior to the photo session.
Once you’ve arrived, photograph the main rooms: the living room, kitchen, dining area, master bedroom, and master bath, all of which are “must-shoot” rooms. There could also be a library, office, large walk-in closet, and more. The client can often tell you what they deem important; don’t be afraid to ask.

Once you’ve entered a room and are preparing to take a photo, seek out the best perspective. I like to use indoor elements – furniture, windows, and room layout – to create visual flow. I generally try to avoid including a large element in the foreground that prevents the eye from flowing through the room.


Key composition tip: get the verticals right
In interior house photography, there is broad agreement among clients and photographers: Verticals must be correct! Most interiors feature plenty of verticals, including edges and corners of walls, door frames, and windows, and these edges need to truly be vertical. Wide-angle lenses that are not level (e.g., they’re tilted slightly upward toward the ceiling or downward toward the floor) will make vertical edges converge or diverge and no longer appear straight.
If you use a tilt-shift lens, the problem is solved right off the bat, but not everyone likes TS lenses. So what do you do? How do you prevent converging and diverging verticals from ruining your photos?
One common approach is to level the camera – that is, ensure it’s not tilting up or down – because a perfectly level camera will record straight verticals. While this is a simple solution, it doesn’t always make for the best compositions; a level camera at chest height can cut off foreground subjects like furniture at the bottom and leave too much ceiling at the top. Lowering the camera height will improve this problem, but how low can you go and still have an effective photo?


So what is the perfect camera height? There are many opinions. Some suggest chest height while others suggest door-knob height or even lower. I prefer chest height or close, and I also correct vertical lines using other methods, like a tilt-shift lens or the Lens Correction tool in Photoshop (or Lightroom).

Real estate photography settings: how to get the perfect exposure
Exposing for interior elements can be challenging, because you’re balancing bright window light with darker interiors.
You can deal with this contrast in many ways; one is to shoot when outdoor light levels are lower, such as during or after sunset, or on a cloudy day. Turning on every light inside increases the interior brightness, and if the outdoor brightness is lower, a RAW file can often capture the scene in one frame. Alternatively, you can shoot a series of bracketed images, then blend them together in post-processing.

Even in low-contrast lighting situations, I’d recommend you take a few extra shots to ensure you have all the necessary exposures for a great image. First, determine your base exposure, the image that has most of the data centered in the histogram. Then bracket in one-stop increments of varied exposures. You may not need these extra images, but if the dynamic range of the scene turns out to be too much, they can really save the day (i.e., you can blend them into a great final image!).

Real estate photography: interior lighting
While some real estate photographers stick to ambient lighting, just like a finely lit portrait, interiors can benefit greatly from carefully styled external lighting. Bracketing and blending can manage scene contrast but cannot create highlights and shadows in areas that have no directional light – and if you have a dark cabinet against a dark wall, for instance, adding supplemental light can bring out the much-needed detail.
Most interiors have two light sources: window light and interior lights. You can add continuous lights or use strobes/flashes. Personally, I recommend flashes or strobes, which provide flexibility when lighting interiors.
Before I dive into the basics of interior lighting, I’d like to emphasize its purpose: to bring out detail, balance the overall lighting effect, prevent distracting dark spots, and emphasize the key parts of the scene. Always think in terms of what the ambient lighting conceals and what your studio lighting will reveal.
Now, photographers shooting for architects or magazines often have plenty of time to photograph a property with finely crafted lighting techniques, but a real estate photographer’s time is usually limited, making flash the perfect tool. You can master the balancing act of using direct on-camera flash to fill in a scene, or you can bounce on-camera flash for great results.
Feel free to take a test shot without flash, then review the image on your LCD and determine the areas that require fill light. That’s what I did for the scene below:


Also popular are multi-flash wireless set ups allowing the flash to be placed around a room for styled lighting. Oh, and you might try the light-painting approach, where areas are selectively lit across several exposures, then all exposures are blended in post-processing.

By the way, you’ll need to be aware of lighting color temperatures and color balance, which can become a problem when indoor lighting (studio or otherwise) is combined with ambient outdoor lighting.
When you have mixed light, such as daylight-colored window light alongside tungsten-colored ceiling lights, and you then throw in a fluorescent kitchen light, you’ll end up with a palette of different light colors in your image. Walls closest to windows will be blue while the walls closest to the tungsten ceiling lights will be amber and the ceiling in the kitchen will have a green tint.
Here’s an image with mixed lighting:

So what do you do about mixed lighting? Two things:
- Work as much as you can to minimize mixed lighting by color-matching your studio lights to the lights in the scene.
- Use selective color adjustments in Lightroom, Photoshop, or another post-processing problem to neutralize the unwanted color casts after the fact.
Here’s a corrected version of the previous image:

Providing the client with the final images
Once you have photographed the house and done the necessary post-processing, you will need to deliver the image files. Clients usually request low-resolution files for the web and high-resolution files for print publication.
Be sure to save your files in the proper file format and size for the intended use. Most online listing services specify their accepted formats and acceptable sizes. I use low-resolution JPEGs and high-resolution TIFF files, then I make a final delivery of the images via Dropbox or a comparable online service.
Real estate photography: final words
Now that you’ve finished this article, you’re ready to rock some real estate photos! Here are a few items to remember before heading out to your first house:
- You are not photographing for yourself; you are photographing for clients who will expect professional-quality work.
- Don’t get all the best gear; only buy what is required to do the job well.
- Master the creative side of photography, such as angles, perspectives, and composition.
- Master the technical side of photography, such as exposure, HDR, supplemental lighting, color matching, and exposure blending.
- Be careful when processing real estate images; don’t misrepresent the property.
And above all, have fun!
