
Looking to capture creative photos filled with beautiful bokeh? Well, I’ve got good news for you: The process is easy, it’s fun, and it doesn’t require any sophisticated materials. As long as you have a bit of paper and some scissors (in addition to your camera and lens, of course!), you can get outstanding results with very little effort.
Below, I explain everything you need to know to make DIY custom bokeh shapes. I also share plenty of examples, so you’re (hopefully) feeling inspired when you head out with your camera.
Let’s dive right in.
What is custom bokeh?
Bokeh is a Japanese term meaning blur, and it’s used by photographers to describe the out-of-focus parts of an image.

Note that every photo has a depth of field – that is, the area of the shot that’s in focus. Some photos feature a shallow depth of field, which displays a very narrow plane of focus and strong background bokeh. Other photos feature a deep depth of field, in which most (or all) of the image is in focus; these deep-depth-of-field images often display limited (or no) bokeh.
Many photographers love smooth bokeh because it looks amazing, plus it helps the main subject stand out from the background. Portrait photographers, in particular, take steps to increase the quantity and quality of bokeh in their images. Specifically, they enhance bokeh by:
- Using a long lens and/or getting close to the main subject
- Widening the lens aperture to f/2.8 and beyond
- Ensuring significant distance between the main subject and the background elements
But while you can certainly improve the intensity of image bokeh by making such adjustments while shooting, you cannot change the shape of the bokeh so simply. Bokeh shape is determined by the shape of the aperture blades in your lens and is therefore round(ish); if you want different bokeh shapes, you need to take a different approach.
Enter the DIY custom bokeh technique, which allows you to effectively override your lens’s aperture blade shape. The strategy is simple: You create a (homemade) filter with a creative cutout, then you add it over your lens, as I explain in the next section.
How to make custom bokeh shapes: step by step
Creating custom bokeh shapes is easy, and you can use materials from around your house. Check it out:
What you need

- A camera
- A lens with a wide maximum aperture (if you don’t have an ultra-fast lens, just go with the widest-aperture lens you own)
- A lens cap that fits over the lens
- A sheet of black poster or construction paper
- Scissors
- A craft knife
- A pen
- A compass (optional)
Step 1: Create a paper filter

Start by placing the lens cap on the sheet of black paper. Carefully trace around the outside of the cap with a pen. (Alternatively, you can measure the diameter of your lens, set a compass to the correct measurement, and draw a circle on the paper.)
Using your scissors, cut around the outline of the lens cap so that you have a circle that fits snugly in front of your lens. The front lens element is generally about 0.5 mm smaller than the lens cap, so you may need to trim the edges of the circle for a tight fit, though I’d recommend leaving a little tab to help you pull out the filter once you’re done shooting.
Step 2: Cut out your bokeh shape
Determine the bokeh shape you wish to create. It can be anything: a tree, a triangle, a heart, a bird, or a star. That said, the simpler the design, the easier it is to cut. I recommend starting out with five-pointed stars, triangles, hearts, crosses, and even question marks.
Then, in the very center of the circle, draw the outline of the shape. Keep in mind that, to work properly, the shape can’t be too big or too small; if the shape is too small, it’ll block out unmanageable amounts of light, and if the shape is too big, you won’t be able to see the effect in your photos at all. This can be a bit frustrating and may take some trial and error, but I’d recommend keeping the shape to 5 mm at a minimum and 20 mm at most.
For reference, the shape in the image below is about 15-20 mm on the longest side:

Finally, use the craft knife to cut out your shape! Be sure to carefully tidy up messy corners, or they’ll appear in your photographs.
Step 3: Add the filter to your lens
At this point, you should have a filter with a custom bokeh cutout. Take the filter and press it into the front of your lens so it sits snugly in the ridges:

If you find that the filter doesn’t quite fit, you can always trim the edges further or start the process over. Of course, make sure you insert the filter carefully; lenses are fragile, and you don’t want to damage the front element.
Step 4: Adjust your camera settings and take some photos!
To make the most of your custom bokeh shapes, I’d recommend working with a few specific camera settings.
First, set your camera to Aperture Priority or Manual mode, then change the f-stop to its lowest value. (On my lens, the lowest available f-stop is f/1.8, but depending on the lens you use, you might be able to go even lower – to f/1.4 or even f/1.2).
Because the filter blocks out light, you’ll want to dial in a lengthy shutter speed and/or a high ISO. For the sharpest, cleanest photos, I’d recommend dropping your shutter speed and mounting your camera on a tripod. If you don’t have a tripod, a table will also do the trick!
Remember that only unfocused points of light in the photograph – that is, the bokeh – will be affected by the filter. Therefore, it helps to set your lens to focus manually, then to adjust the point of focus until it’s as close to the front of the camera as possible. (You’ll probably want to experiment with different points of focus as you photograph different subjects.)
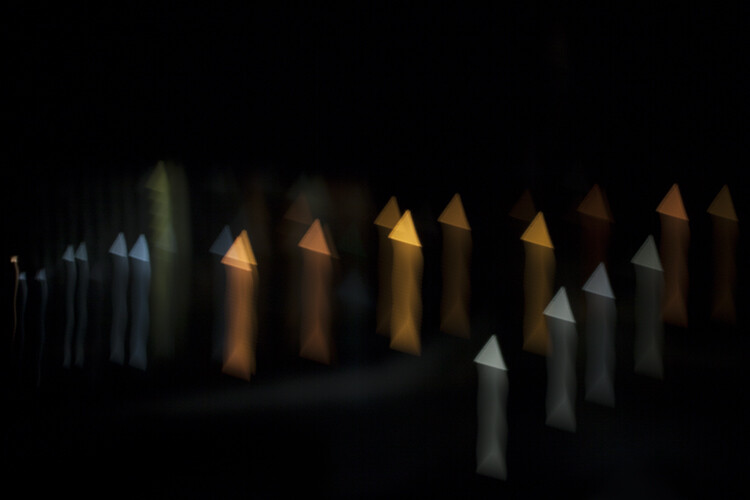
If you want especially dramatic bokeh shapes, try going out at night and pointing your lens at various lights (e.g., street lights, holiday lights, and car headlights). Then focus on a point close to the camera and capture a breathtaking result:

Make sure you frequently review your shots on your camera LCD; fine-tuning is often essential! You can also have fun photographing reflective objects, fairy lights, and even glitter.


How to make custom bokeh shapes: final words
Now that you’ve finished this article, I encourage you to head out with your camera and try your filters.
And if you don’t get great results from the beginning, that’s okay! Experiment by adjusting the size of your shape cutout, and fiddle around with your aperture and point of focus. After a bit of trial and error, you’ll be capturing beautiful bokeh like a pro!
What types of bokeh photos do you plan to create? Do you have any tips for enhancing custom bokeh? Share your thoughts (and images!) in the comments below!
