
Do you want to capture photos that feature a stunning bokeh effect? You’ve come to the right place.
In this article, I’ll explain everything you need to know about bokeh, including:
- What it is
- The perfect bokeh camera settings
- How you can produce bokeh for jaw-dropping results
I’ll also include plenty of bokeh examples along the way, so you know exactly what to expect in your own images.
If you’re ready to become a bokeh master, then let’s get started!
What is bokeh in photography?
Bokeh refers to the out-of-focus areas of an image, especially areas that are heavily blurred. It appears as characteristic rounded shapes in the background of photos.

Many professional photographers use this bokeh effect in their images; it helps the main subject stand out, plus it can add an element of artistry to the overall shot. Portrait photographers often rely on creamy background bokeh to elevate their compositions, but you can also find heavy use of bokeh in wildlife photography, product photography, food photography, and event photography.
Note that, generally speaking, the term “bokeh” refers to any background (or foreground) blur in an image. So you can get beautiful bokeh (when the out-of-focus areas are smooth and stunning), or you can get bad bokeh (when the out-of-focus areas are too detailed or appear jagged). Later on in this article, I’ll explain what causes good versus bad bokeh, but for now, just know that not all bokeh looks equally gorgeous.
The 5 factors determining the bokeh effect in your photos
Beginners often struggle to capture lovely bokeh effects, and it’s because bokeh can be complicated; it’s not as simple as adjusting one setting on your camera and calling it a day.
Instead, the bokeh quality in your photos is influenced by five factors:
- Aperture size (i.e., the size of the hole in the lens that lets in light)
- Lens choice
- Distance between the camera and your subject
- Distance between the subject and the background
- Quality of the background
Let’s look at each factor in turn, starting with:
1. Aperture size
The aperture is a hole in the lens, and the size corresponds to your camera’s f-number setting.
A low f-number such as f/1.8 or f/2.8 will give you a wide aperture, while a high f-number such as f/11 or f/16 will give you a narrow aperture. Ultimately, a wide aperture will create a better bokeh effect – because the wider the aperture, the more background blur the lens will produce.

A narrow aperture, on the other hand, produces images that are sharp from foreground to background; that’s why landscape photographers nearly always shoot at f/8 and beyond. They want everything in focus!

So when you see beautiful bokeh images, they’re generally produced at f/4 and wider (and most are produced at f/2.8, f/1.8, or even f/1.2).
Unfortunately, not all lenses allow you to shoot at ultra-wide apertures, as I explain below:
2. Lens choice
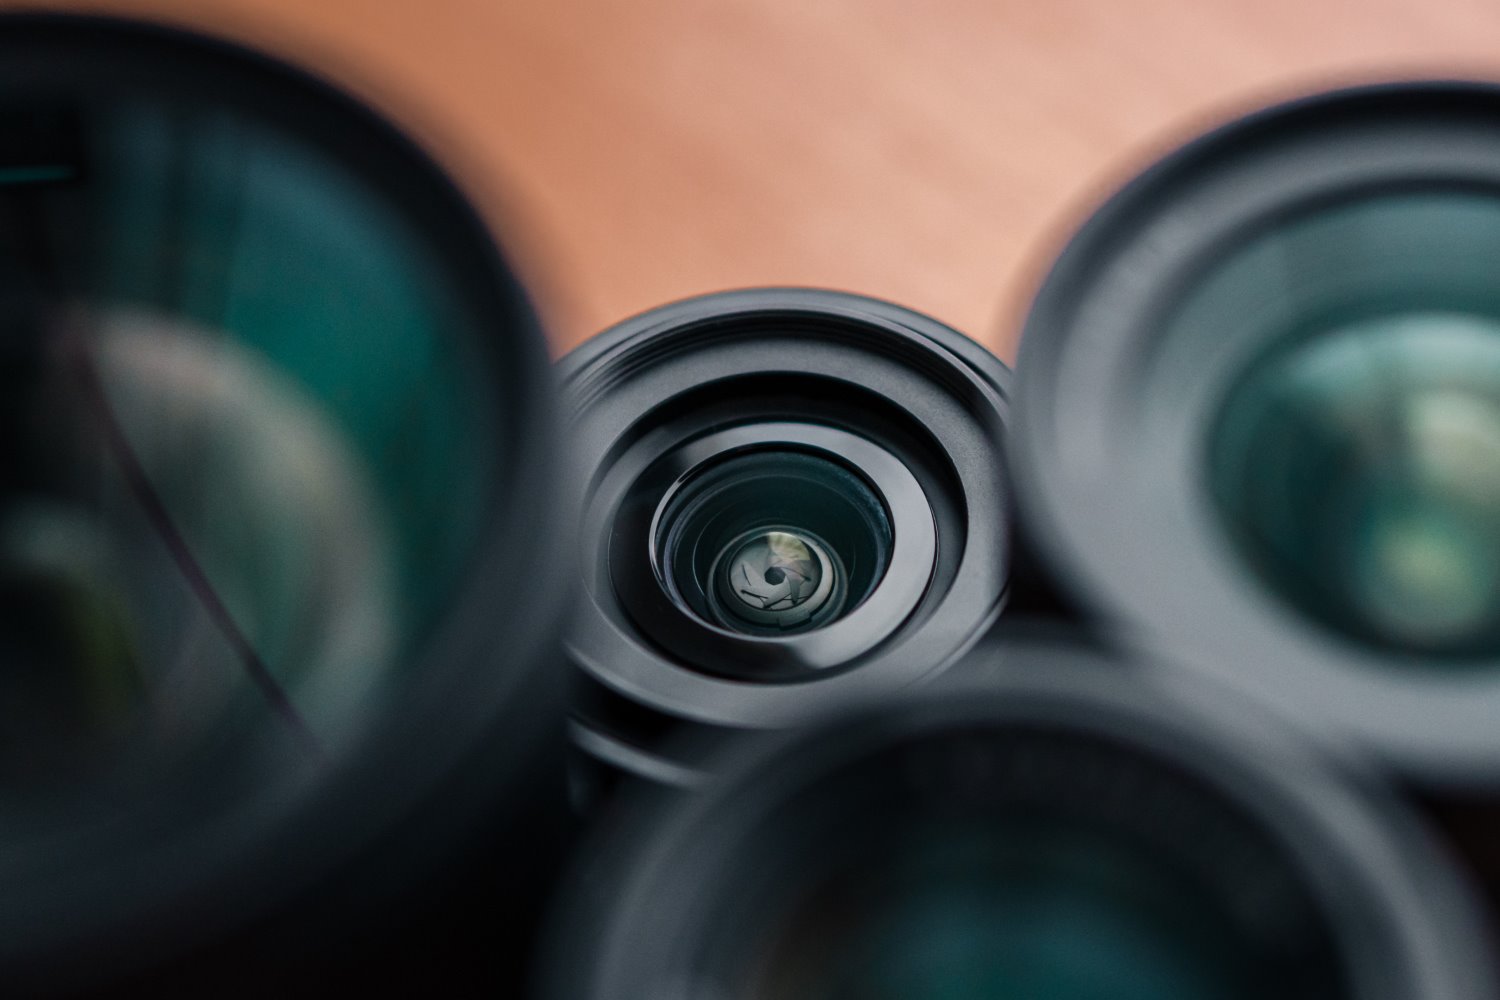
Certain lenses produce beautiful, creamy bokeh. Other lenses are rather underwhelming in their bokeh quality. Why?
It has to do with several factors.
First, the larger the lens’s maximum aperture, the better the bokeh quality. As discussed above, if you can open your lens’s aperture really wide, the bokeh will look great – whereas a closed-down aperture will produce nervous, distracting bokeh that doesn’t complement the subject.
Second, some lenses offer more circular apertures, whereas other lenses have hexagonal, septagonal, or octagonal apertures. Because aperture shape generally determines the shape of the bokeh, the more circular the aperture, the smoother the bokeh effect.
(Note that aperture shape is primarily determined by the aperture blade count, which you can find on the specification sheet of every lens. More blades equal a more circular aperture, which in turn corresponds to more pleasing bokeh. Got it?)
Third, the longer the lens, the more it compresses the background, and the blurrier the background becomes. With bokeh, longer equals better.
So for the best bokeh, purchase a lens with a long focal length (e.g., 200mm), a wide maximum aperture (e.g., f/2.8), and plenty of aperture blades (9+).
3. Distance between the camera and your subject

As you get closer to your subject, the background bokeh effect will magnify – and as you step away from your subject, the bokeh effect will disappear.
So the closer you get, the better the bokeh effect.
Now, you can get close to your subject in two ways:
You can move toward them physically and literally bring the lens close.
Or you can use a telephoto lens with a 300mm, 400mm, or even 800mm focal length. These lenses will zoom right up to your subject (and you don’t have to change your position).
The telephoto lens option is often convenient, especially if you’re working with skittish subjects (e.g., birds and wildlife). But sometimes it’s nice to get up close and personal, especially if you’re going for a more intimate perspective (as I often recommend for portrait photography).
4. Distance between the subject and the background

If your background is close to your subject, it will be less blurred – and hence the bokeh effect will be weaker.
But if your background is far from your subject, it will be more blurred, and will generally look very nice.
Say you’re photographing a child in front of a tree. If you put them just in front of the tree (so the bark touches their back), both the child and the tree will be in focus, and you’ll get very little bokeh to speak of. But if you bring the child out and away from the tree, the bark will begin to blur.
In fact, increasing the subject-background distance is one of the easiest ways to create better bokeh, especially if you don’t own a wide-aperture lens. The farther your subject moves from the background, the more beautiful the result.
5. Quality of the background
Some backgrounds are easy to blur, and other backgrounds are much more difficult.
This often works as you’d expect, where uniform elements (e.g., a forest of green leaves) create very smooth bokeh, while messy, jagged elements (e.g., a crowd of people, cars, and houses) create very distracting bokeh.
But there are other background qualities to consider, too.
For instance, if you compose your image so that the light shines through an area of the background, you’ll often capture stunning bokeh effects. That’s how you can get a shot like this one:

Do you see how the light from the sky shines through the leaves in the background? It creates a very well-defined, circular bokeh effect, which a lot of photographers love.
Bokeh photography factors: putting it all together
The five factors I discussed above work together to achieve optimal bokeh quality.
So even if you can’t adjust one factor (e.g., lens quality), you can still adjust other factors to get a nice result.
Of course, the best bokeh effect comes from maximizing each and every one of the factors discussed above, though this isn’t always feasible. Sometimes, you need a narrow aperture for an unrelated reason, or you need the subject to stay close to the background, or you can’t get close, etc. And that’s where you’ll need to consider the other bokeh factors and work with the ones you can control.
Bokeh and sensor size

Have you ever wondered how the size of your camera’s sensor affects bokeh? You’re not alone! Many photographers, especially when choosing a new camera, want to know if there’s a link between sensor size and beautiful background bokeh.
Let’s start with the basics. If you compare side-by-side images from APS-C and full-frame cameras, both using 50mm lenses, you’ll notice that the photos are different. The image from the APS-C camera will look tighter, while the full-frame image will be wider. This difference is not because of the sensor’s inherent properties but rather because the smaller sensor effectively crops the image.
Technically, the images reaching the back of the camera will be identical, but as they’re captured by the sensor, the APS-C file gets cropped. This means that the depth of field (the area in focus) will match perfectly in both files, even though the APS-C image appears tighter. To achieve the same composition as the full-frame image, the APS-C camera would need to be moved forward several feet.
So what’s the bottom line? The larger the sensor size, the better the bokeh will look in a similar composition. It’s not a property inherent to larger sensors but a result of the internal cropping that happens with smaller sensors. Understanding this will help you get the most out of your camera, no matter the sensor size.
How to achieve nice bokeh: the step-by-step process

I’ve already explained the theory behind good bokeh, but in this section, I’d like to share, in practical terms, how to get the best possible bokeh for any given situation.
Step 1: Use the right lens
Bokeh starts with lens choice. Go for a lens with a wide maximum aperture (ideally, f/2.8 or wider, but f/4 can work, too).
If possible, pick a lens with a high number of aperture blades (remember: the more circular the aperture shape, the better!).
And go with a standard or telephoto focal length, not wide angle.
2. Select a large aperture
Bokeh is only affected by one camera setting: the aperture. So make it count!
For the strongest bokeh effect, dial in your lens’s lowest f-number. (Though if your lens goes to f/1.2 or f/1.4 and you’re shooting from up close, you may want to narrow the aperture just a bit to prevent your subject from going out of focus.)
If you’re not sure how to adjust the aperture, by the way, consult your camera manual. You’ll generally need to shift the mode dial to Manual mode or Aperture Priority mode, then rotate the corresponding aperture dial until it gives you the result you want (though some lenses offer an aperture ring on the barrel, which you can turn to manually set the aperture).
3. Get close to your subject

Determine the subject you want to photograph, then get close. Remember, you can either move close physically, or you can use a long lens for a tighter perspective.
If you have the time, try both; the effect will be slightly different in each case (longer lenses compress the background, which gives smooth bokeh, but you may lose a bit of intimacy), and you may find you prefer one look over the other.
4. Position your subject for the best background

If you can move your subject (or, in the case of portraits, if you can ask your subject to move), then put them in front of a uniform, non-distracting background.
And bring them far away from the background, so the bokeh effect is more pronounced.
If you can’t move your subject, then try to adjust your perspective. By getting down low, you can remove distracting background details from the frame; by moving to the side, you can increase subject-background distance; and so on.
5. Dial in your remaining settings for a good exposure
At this point, you’ve done everything you can for the best-possible bokeh.
So determine the remaining settings you need for a good exposure (e.g., your shutter speed and your ISO). Focus on your subject. Check one last time to ensure the background doesn’t include any distractions.
And take your photo!
After you capture a shot or two, check your camera’s LCD. Pay careful attention to the quality of the background. Ask yourself: How does the bokeh look? Is there anything I can change to make it better?
Make the necessary changes, then shoot again.
Tips and tricks for creating beautiful bokeh effects
Looking to take your bokeh to the next level? Here are a few of my top tips to really elevate that creamy background blur:
1. Shoot during the golden hours

Golden hour lighting is a magical time for photographers, and it can add a special touch to your bokeh photography. The term refers to the hour just after sunrise or before sunset when the sun bathes everything in a warm, soft light; the warm light casts a wonderful glow on backgrounds, which looks simply stunning when rendered as bokeh.
One of the techniques you can try during the golden hour is backlighting. Positioning your subject between the camera and the sun can create a luminous effect that makes the bokeh look extraordinary. Experiment with different angles and lighting positions; you’ll often be rewarded with some truly breathtaking images.
And if you’ve never taken photos during the golden hour before, don’t worry! There are plenty of apps and websites that can tell you exactly when the golden hour occurs in your location. With a bit of practice and an eye for lighting, you’ll find that the golden hour is one of the most beautiful times to create eye-catching bokeh.
2. Try using a macro lens

Macro lenses encourage you to shoot up close, and this can result in some truly breathtaking bokeh photography. As I explained above, the closer you are to your subject, the better the bokeh usually appears – so because macro lenses have this unique ability to focus on subjects that are very close, they open up a whole new world of creative possibilities.
You can use a macro lens and dial in an ultra-wide aperture to create a very narrow window of sharpness. This allows for creamy background bokeh, paving the way for soft-focus images of flowers, plants, insects, and more. If you haven’t tried this before, you’re in for a treat!
Choosing the right macro lens for your camera system can be a fun exploration. Look for one that offers a wide aperture and suitable focal length for your subjects. Experimenting with different lenses and settings can lead to some surprising and delightful results!
3. Make sure to focus carefully

Focusing accurately is one of the most crucial aspects of creating captivating bokeh photography. When you’re working with a shallow depth of field, the margin for error in focusing is slim. If your focus is even slightly off, it can ruin the image, causing the main subject to go out of focus.
To avoid this issue, you’ll want to be very deliberate in where you set your focus. Using autofocus can sometimes lead to errors, especially if you’re close to your subject. Manual focus can give you more control.
Regardless, start by choosing the point of focus carefully. If you’re photographing a person, for example, focusing on the eyes is usually a good strategy. Use your camera’s zoom-in feature in Live View mode to really hone in on the focus point and adjust it as needed (either manually or using your camera’s autofocus).
Practicing is key. Try working with different subjects at different distances, and use both autofocus and manual focus to see what works best for you. Over time, you’ll develop a feel for getting it just right. You’ll find that the effort is well worth it, as the precise focus will make your bokeh photography truly stand out.
4. Create some bokeh abstracts

Bokeh isn’t just a beautiful background effect; it can also be the main subject of a photo. In my experience, you can use bokeh to capture abstract images that are both mysterious and visually appealing. The process of creating bokeh abstracts is creative, fun, and a little unconventional.
You’ll need a subject with small points of light, like Christmas lights, car headlights, or fairy lights. Wait until it’s dark out or find a dark room, and then dial in a wide aperture on your lens. You’ll also want to switch your lens over to manual focus.
Now, here’s where it gets interesting: Deliberately focus in front of your subject. This will cause the pinpricks of light to turn into soft, glowing orbs, creating the bokeh effect. You can experiment with different angles, distances, and focus points to see how the appearance of the bokeh is changed.
Bokeh abstracts are a fantastic way to explore your creativity. You can display them on their own, or you can combine these abstract patterns with other elements or use them as backgrounds in composite images. No two bokeh abstracts are the same, so don’t be afraid to experiment and find your own unique style.
5. Create custom bokeh shapes

Adding custom bokeh shapes to your images is a creative way to personalize your photography, and it’s easier than you might think. This technique allows you to transform ordinary bokeh orbs into various shapes like hearts, stars, or even letters.
First, you’ll need to cut out a lens-sized piece of paper, then cut out a custom shape within that piece. Place the paper directly on top of your front lens element (like a filter), and make sure to use a wide aperture. Finally, identify a subject that can produce strong bokeh (such as fairy lights), adjust the focus until the subject becomes a background blur, and start shooting!
Experimentation is key here. Play around with the size and shape of your cutout, the distance to your subject, and your focus settings. You might need to adjust and tweak things to get the results you want.
The beauty of custom bokeh shapes is that they add a unique flair to your photos and can be tailored to fit the theme of your image. Whether it’s hearts for a romantic portrait or stars for a magical night scene, custom bokeh shapes offer endless possibilities for creativity.
Remember to be patient and enjoy the process. It may take some trial and error, but once you master this technique, you’ll be over the moon.
Bokeh photo examples
Below, I’ve included a few images with nice bokeh so you can see exactly what you can achieve with the right approach.
First, we have a photo with the lens focused somewhere between the foreground grasses and the background people. Note that both the foreground and background are blurred in a nice bokeh pattern, though the blur isn’t extremely strong.

In this next shot, I’ve focused on the subject’s feet and used a wide aperture. Note how the feet are sharp, but the rest of the image is blurred (it’s a fun trick that I highly recommend you try!):

Also, I occasionally prefer my bokeh in the foreground, not the background. Instead of focusing on a close subject, I focus on a distant subject (the father and son) but include a large object in the foreground (the tree). A wide aperture serves to blur out the foreground object, and the background subject looks nice and sharp.

Of course, there will be times when bokeh isn’t desirable. Sometimes you want the entire shot in focus from front to back, like in this family portrait:

So while bokeh is great, and while I highly recommend you learn to create a nice bokeh effect, don’t get so obsessed that you use it all the time!
How to get a bokeh effect: final words
Hopefully, you now feel ready to head out with your camera and capture some stunning bokeh.
Just remember to choose the right lens, adjust your camera settings, position yourself well, and pick the right background.
Pretty soon, you’ll be shooting bokeh like a pro!
Now over to you:
Do you plan to take some beautiful bokeh pictures? Which strategies will you try to use? Share your thoughts (and images!) in the comments below.

Some Older Comments