
This article was updated in November 2023 with contributions from Darren Rowse, Kevin Landwer-Johan, Kav Dadfar, Rick Berk, Post Production Pye, and Jaymes Dempsey.
Unlike standard portraits – which focus solely on the subject – environmental portraits show the individual with their surroundings. These images are often uniquely captivating in how they offer a window into the subject’s world, but let’s be clear: achieving a compelling environmental portrait is no walk in the park.
You’ll need to juggle various elements like setting, lighting, and composition. It’s an intricate balancing act that, when done right, results in powerful photographs that tell a story.
And that’s what this ultimate guide is all about. I’ll explain all of the basics of environmental portrait photography, then I’ll offer essential tips and techniques to help you start capturing meaningful environmental portraits.
Let’s dive right in.
What is an environmental portrait?
Simply put, an environmental portrait is a portrait that includes more than just the subject. The idea is to capture an individual within a broader context, offering a glimpse into their life, personality, or occupation.

Environmental portrait photography does not involve capturing your everyday headshot or head-and-shoulders image. Instead, the photographer generally uses a wider lens to show the subject as well as nearby elements.
Note that environmental portraiture isn’t always posed, but it always involves an awareness from your subject. In other words, your subject knows they’re being photographed. While unplanned candid photography has its own charm, environmental portraits usually involve a level of interaction between the photographer and the subject. If your subject isn’t aware they’re being photographed, you’re likely venturing into the realms of street photography.
The setting for your environmental portrait can be diverse – and your choice of background, whether a bustling marketplace or a tranquil beach, can significantly influence the image’s mood and meaning. Some photographers like to capture subjects in their natural habitat: a chef in a kitchen, a musician in a studio, or a hiker on a mountain trail. The key is that the setting should add to the story you’re trying to tell, not distract from it.
Why are environmental portraits so powerful?

Ever wonder why some portraits just speak to you? Many of the best portraits do more than showcase an individual – they tell a story or at least offer insight into who that subject is. And environmental portraits excel at storytelling. Because they include a subject’s surroundings, these portraits add extra layers of information about that subject. Instead of just a face, you have a person in a place, doing something or being part of a bigger scene.
This additional context helps the viewer to better understand the subject. A musician photographed in a rehearsal space, surrounded by instruments, can tell you more about their dedication and passion. Similarly, a teacher captured in a classroom, even without students, gives a sense of vocation.
The power of environmental portraits also lies in their authenticity. Because you’re incorporating real-world elements, the photos feel grounded. You’re not just capturing a face; you’re capturing a relationship between that face and its surroundings.
Tips for beautiful environmental portrait photography
Capturing gorgeous environmental portraits can seem tough, but there are actually a few simple ways to improve your results, starting with:
1. Spend time getting to know your subject

Before you select a location and start shooting, spend some time getting to know your subject.
Find out where they spend their time, what the rhythm of their life is like, and how they behave.
This will not only help you find appropriate locations but will also help you get a feel for the style of shots that might be appropriate for the session.
Plus, you’ll begin the process of helping your subject relax! If you can, you might even want to accompany your subject to some possible locations; that way, you can see both whether the location suits them, as well as how they behave and interact there.
2. Get your subject talking
Now that you know a little about your subject, what they like to do, and where they like to do it, it’s time to point a camera at them.
This can be the “make-or-break” point of the shoot. If your subject is uncomfortable in front of the camera, it’ll come across in the images – unless you find a way to get them to relax.
Fortunately, one of the easiest ways to get them to relax is to just start a conversation. Make them forget that you are taking their photo by asking them about themselves. Have them talk about the location, their hobbies, their families, their job – anything to get their mind off of the camera in front of them.
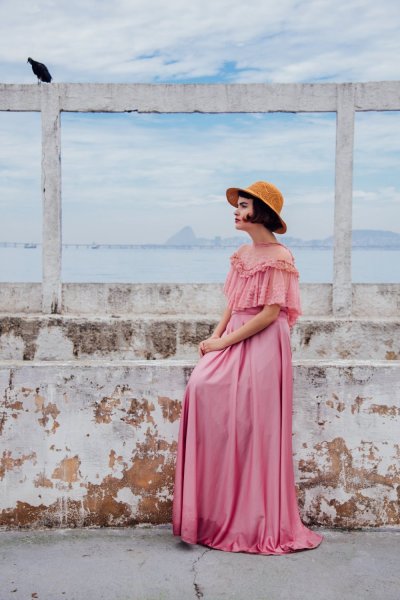
For the portrait below, my subject was a New Yorker and lived nearby. This was an impromptu session after a private tutoring session, and she was reluctant to let me point the camera at her. She wanted to learn photography herself, so I wrapped a lesson into the banter and pretty soon she was just talking photography and forgetting I was snapping images!

3. Choose the right location

Sometimes a location chooses you – but on other occasions, you need to be quite deliberate and purposeful when making your choice. It can take a lot of searching.
You ideally want to find a location that:
- says something about your subject. After all, that’s what this style of photography is all about.
- adds interest to the shot. As I’ve written in previous tutorials, every element in an image can add or detract from the overall look. The environment in which you place your subject needs to provide context and interest without overwhelming the composition.
- doesn’t dominate the shot. Sometimes the location can dominate the image so much that it distracts your viewer from your main focal point (i.e., the subject). So try to avoid cluttered backgrounds (and foregrounds) and colors that are too bright, etc. Keep in mind that you might be able to remove the distractions with clever cropping, depth of field, and subject placement.
4. Try to tell your subject’s story
Once you’ve chatted for a while, or at least observed keenly, tell their story.
Concentrate on what will communicate most visually about the person, where they are and what they’re doing. This is the whole nature of environmental portraits.
Are they a quiet and reserved kind of person? Or are they a loud and boisterous character? Some people change when they get in front of a camera.
If they’ve been chatting away in an animated manner and freeze when you point your camera at them, it’s your job to help them relax. Frozen is not who they naturally are.

5. Use props, but keep them natural

The use of props in environmental portraits is a double-edged sword. While they can add value, they can also easily distract. The trick lies in selecting props that enhance rather than detract from the image. Imagine you’re photographing a writer; a pen and notebook on the table can add a layer of context and meaning.
Clothing, too, serves as a kind of prop. What your subject wears should be harmonious with the environment. If you’re shooting a fisherman, it makes sense for them to be in overalls and rubber boots. A business executive? A suit or formal attire fits the bill. The idea is to avoid anything that feels out of place or forced.
Props should be natural extensions of the environment or the subject’s personality. A chef photographed in a kitchen might have a wooden spoon in hand, but a medieval sword? Not so much. The same principle applies to less tangible props like lighting or even pets. If you’re capturing a family at home, a pet cat wandering into the frame can be a lovely addition.
Be discerning. Every element you introduce should serve the image’s overarching narrative. The rule of thumb is: if the prop doesn’t add to the subject’s story or seems incongruous in the setting, it’s probably best left out!
6. Watch for distractions

As you broaden your frame to include more of the environment, be cautious. Including too much can introduce distracting elements that steal attention away from your subject. The last thing you want is for a stray telephone pole, an oddly placed trash can, or a flashy billboard to become the unintended focal point of your image.
Being mindful of your surroundings is crucial. Scan the setting for anything that might clash with the overall mood or tone you’re aiming for. Sometimes, even a vibrant patch of color or a bright light source in the background can disrupt the composition.
A simple fix often involves minor adjustments. Asking your subject to move a couple of feet to the right or left can make a world of difference. Likewise, you can change your own position or angle to exclude distractions from your frame. These small tweaks can refocus the viewer’s attention where it belongs: on your subject.
7. Work with the light

Lighting can make or break any photograph, and environmental portraits are no exception. The source and quality of light can greatly influence the mood, texture, and overall impact of your image. Whether you’re dealing with the harsh midday sun or the soft, diffused light of a cloudy afternoon, the goal is to use it to your advantage.
Hard, contrasty light can create heavy shadows, adding a layer of drama to your subject and their environment. While this may work for some scenes, it’s not always a desirable effect. On the other hand, on cloudy days, the overcast sky acts like a natural softbox, providing flattering light that evenly illuminates your subject.
Golden hour, the period shortly after sunrise or before sunset, offers yet another lighting opportunity. The warm, directional light during these times can add a three-dimensional feel to your images. It brings out textures and casts long, soft shadows – so I highly recommend you use it whenever you get the opportunity.
8. Consider modifying the light
I try to go as minimal as possible with gear for environmental portraits and use natural light. However, there are always times when the light is less than optimal (for instance, extremely harsh) – in such cases, you need to modify it in some way.
This can be as simple as adding a reflector in a strategic location or setting up a flash with a softbox or umbrella. It will all depend on the available light and the look you are going for. One thing I always try to do is keep the light looking as natural as possible.
This next shot was a business portrait, but my client wanted more than a simple headshot. It was taken late in the day, meaning I had to create my own light. She wanted her team in the background working (because she wanted to show that, when you worked with her, she had a whole team backing her up). I used a speedlight to illuminate the background by bouncing it off a white wall and the ceiling. I then used a second speedlight modified by a 28-inch softbox to light my client. I adjusted the intensity of the lighting so that the background light was at a 2:1 ratio with my main light.

9. Think about posing your subject

Not every environmental portrait needs to be carefully posed. However, some polished poses can make a big difference to the final results.
So don’t be afraid to direct your subject to sit, stand, or act in a way that fits the environment. Some of the poses might seem slightly unnatural and dramatic, but it’s often these purposely posed shots that are more interesting and give a sense of style to your photography.
The expression on the face of your subject is also very important in environmental photography, and you should consider how it fits with the overall scene.
For example, if you’re shooting in a formal environment, it may not be appropriate to photograph your subject with a big, cheesy smile; you might prefer a more somber or serious look.
Ultimately, just mix it up to see what does and doesn’t work!
10. Consider capturing a series of images

If a single environmental portrait can tell a story, imagine what a series of them could do. This approach allows you to dig deeper into your subject’s life, painting a fuller picture of who they are and what matters to them. Capturing a series can ensure a nuanced representation of your subject that one photograph alone might not capture.
For example, you could follow your subject throughout the day. Document them at work, catch them during a quiet moment at home, or even capture them in the midst of a hobby or social event. This approach can produce a captivating series that speaks volumes about your subject’s life and passions.
Another idea is to photograph your subject in different settings over an extended period. This not only shows the subject in various contexts but also allows for the possibility of capturing change and growth. It can be a compelling way to explore themes like aging, career development, or even the impact of significant life events.
11. Deliberately choose your camera settings (especially your aperture!)

There is no right or wrong way to set up your camera for an environmental portrait. It will depend completely upon the effect you’re after and the shooting scenario.
You might find that shooting at a smaller aperture (i.e., a larger f-number) will be appropriate as it’ll help keep the foreground and background in focus.
I generally shoot environmental portraits with a wider focal length to give the environment prominence in the shot. (For more on choosing a lens for environmental photography, see below!)
Of course, that doesn’t mean you can’t shoot with a longer lens or with a large aperture and shallow depth of field. In the end, anything goes!
12. When photographing indoors, raise your ISO
As a rule, you should aim to keep your ISO as low as possible whenever you are photographing.
However, in low light conditions such as markets, and inside buildings, you might have to raise it to guarantee you can capture your photo at a fast enough shutter speed for sharp shots.
My advice: You should test your camera at different ISO settings to get an idea of the acceptable noise it will produce so that when you are on location you don’t go above that!

13. Know your camera
Your subject is likely to lose interest in what’s happening if all they see is the top of your head as you peer down at your camera.
Preset your camera so you know the settings will be right. Do this as soon as possible so you will have time to concentrate on communicating with your subject and other important things.

14. Use Live View
This plays right along with the item above. Most people tense up when you raise the camera to your eye, waiting for the image to be taken. Some may even inadvertently shut their eyes, expecting a flash. If you can use Live View on your camera, you can get it away from your face. Your subject will be looking at you, and not at the camera, and will not necessarily anticipate you pressing the shutter button. This works especially well with cameras that feature articulating screens. It can be helpful to mount the camera on tripod as well, using a remote release to trigger the camera.
This is an image of my friend Chris (below), taken while he was supposed to be shooting me and my kids. We were discussing what shots we wanted next when I clicked this, using Live View to frame the shot and focus.

15. Choose your lens carefully
Showing the surroundings is important. So is communicating with your subject while you are working.
If you have a telephoto lens on your camera, you’ll have to position yourself a long way from your subject to include enough of their environment.
With a medium to wide lens on you can be close enough and also include more of the setting. I love using my 35 mm f/1.4 lens on a full-frame body for environmental portraits. It allows me to be close enough to converse comfortably and still show a decent amount of background.
Be careful if you are using a lens much wider than 35mm as you will be at risk of distorting your subject.

16. Time your shots

In environmental portraiture, timing is everything. You want to catch your subject in a state that’s true to them – and if they’re interacting with their surroundings, that’s even better. This harmony can convey a profound message about the person and the place they’re in.
Always be prepared. Keep your finger ready on the shutter button. And consider that a valuable image doesn’t just involve the subject’s facial expressions or body language. It could be a fleeting moment where they interact with their environment in a way that perfectly encapsulates their relationship with it. For example, a musician lost in the rhythm of a song, a cook immersed in the sensory delight of spices, or a child’s pure joy while playing in a park.
17. Capture multiple people interacting

Environmental portraits aren’t limited to solo subjects. Including multiple people can add another layer of depth and emotion to your photograph. But here’s the key: when more individuals are in the frame, it’s crucial to keep an eye on their interactions.
A well-timed shot of two or more people interacting can tell a compelling story. It could be a couple sharing a tender moment, coworkers immersed in a project, or even a family enjoying a simple meal. Try to capture genuine interactions that feel organic rather than staged.
With more subjects, you’ll also have to be extra cautious with composition. Their positioning should complement the shot as a whole, and if you can arrange them in a way that directs the viewer’s eye through the photo, it’ll enhance visual flow. Each person should ideally contribute to the overall narrative you’re trying to convey, ensuring a cohesive and impactful photo.
Bottom line: Including multiple people in a single portrait shot be challenging to pull off but incredibly rewarding when done right!
18. Write good captions
A good caption will provide added detail that you may not be able to clearly convey in your photo. Informative captions help hold people’s interest by further stimulating their imaginations.
Offer a little more information about the person. This is another good reason to engage with them while you’re photographing them.
If you’re not clear on what to write, search the internet.
Recently I watched this documentary about the photographer Dorothea Lange. She is most well known for her work in the midwest USA during the Great Depression. The documentary emphasizes the need for the well-written captions she provided with her photographs.

19. Don’t be afraid to shoot tight
While it’s true that an environmental portrait normally means showing some of the area around your subject – the environment – you can get close and still show your subject’s character. Take an element of your subject’s hobby, and show them participating in the hobby. If they’re a model builder, you could do a tight shot of them applying glue or assembling the pieces. This is your chance to be creative, trying different angles, focusing on different aspects of their personality and character. Emphasize features that stand out, in a flattering way, if that’s the goal. Find out what makes the person in front of your camera special, and capture it!

This is the same girl as the shot in front of the bridge. She’s a photographer as well now, but back then she was just a hobbyist who wanted to know more about her camera. I used the beautiful sunset light I was getting, and set up a reflector to camera right to bounce the light back into her face. I wanted her peeking out from behind her camera, illustrating that she’s into photography.
20. Remember to apply some editing!
If you shoot your environmental portraits in RAW – and I highly suggest you do! – then you’ll need to add some minor adjustments to ensure your photos closely match the scenes that you saw with your eyes.
Boosting the contrast, adding a touch of sharpening, recovering shadow and highlight detail, punching up the saturation slightly – these are all effective methods of creating a more natural result.
And once you’ve done that, you can always enjoy some creative editing to take your portrait to the next level. You can add a vignette to put focus on the subject’s face, you can reduce the exposure in the sky for some added drama, and you can even use dodging and burning to add some three-dimensionality to the scene!
Environmental portrait photography: additional resources
Interested in even more content on capturing outstanding environmental portraits? If so, do yourself a favor and watch this video of a training session by photographer David Handschuh and what he has learned about the topic from the last 20 years of his doing environmental portraits:
Thanks to the team at BHPhoto for putting this video out there.
How to photograph environmental portraits: final words
Environmental portrait photography opens up a realm of creative possibilities and allows you to delve deeper into your subject’s story. But remember: Crafting an impactful environmental portrait involves a fine balance. It’s an interplay of subject and setting, mood and moment, light and shadow. Each element contributes to the overall narrative, shaping how the viewer perceives and connects with the image.
By applying the techniques discussed in this guide, you’ll be well on your way to creating compelling, emotionally rich portraits. The journey might be challenging, but the rewards are incredibly fulfilling.
So the next time you’re doing portrait photography, try applying some of these tips, and see what you can create!
Now over to you:
Have you done any environmental portrait photography? What tips would you give other readers? Feel free to share your tips (and images!) in the comments below.
Note: This article was updated in October 2023 by dPS’s Managing Editor, Jaymes Dempsey.
Table of contents
Portrait Photography
- GENERAL
- PREPARATION
- SETTINGS
- LIGHTING
- POSING
- COMPOSITION
- GEAR
- ADVANCED GUIDES
- How to Create Environmental Portraits (Tips and Examples)
- What is an environmental portrait?
- Why are environmental portraits so powerful?
- Tips for beautiful environmental portrait photography
- 1. Spend time getting to know your subject
- 2. Get your subject talking
- 3. Choose the right location
- 4. Try to tell your subject’s story
- 5. Use props, but keep them natural
- 6. Watch for distractions
- 7. Work with the light
- 8. Consider modifying the light
- 9. Think about posing your subject
- 10. Consider capturing a series of images
- 11. Deliberately choose your camera settings (especially your aperture!)
- 12. When photographing indoors, raise your ISO
- 13. Know your camera
- 14. Use Live View
- 15. Choose your lens carefully
- 16. Time your shots
- 17. Capture multiple people interacting
- 18. Write good captions
- 19. Don’t be afraid to shoot tight
- 20. Remember to apply some editing!
- Environmental portrait photography: additional resources
- How to photograph environmental portraits: final words
- CREATIVE TECHNIQUES
- POST-PROCESSING
- BUSINESS
- INSPIRATION
- RESOURCES

Some Older Comments