
As a landscape photographer, I am constantly seeking out that perfect shot: an image that leaps from the screen and demands the viewer’s attention.
However, producing compelling photos is hard. If you spend an hour or two on a photosharing website, you’ll note that a very small percentage of the shots stand out from the crowd. So how do you do it? How do you create the kind of images that really take the viewer’s breath away?
There’s more than one approach here, but when it comes to landscape photography, I encourage you to strive for dynamic shots. And in this article, I delve into the mysteries of dynamic landscape photography, including what it is and how you can use it to elevate your portfolio.
Let’s dive right in!
What is dynamic landscape photography?
Dynamic landscape photography isn’t really a conventional form of shooting. There’s no dictionary definition for the approach, and I’d say that it’s somewhat subjective.
But I’ll give you the definition that best explains what I’m talking about in this article. For me, a dynamic landscape image is one that conveys the energy and scale of the natural world. Dynamic images also often seek to breach the confines of their two-dimensional medium by creating the illusion of depth. In fact, many truly dynamic images possess an almost three-dimensional quality.
Note: As far as I am aware, the term “dynamic landscape” was first popularized by the late Galen Rowell, one of the most influential American landscape photographers of his generation. Rowell used the term to separate his work from the somewhat literal color landscape photography that dominated in the early 1970s. Although he was certainly not the only photographer employing these principles in his photos, he appears to have been an excellent self-promoter and the term is somewhat synonymous with his name.
Are all good landscape images dynamic?
Definitely not! You can create stunning shots by deliberately avoiding almost all of the techniques I discuss below. Dynamism is an effective approach, but it’s just one style of landscape photography. Therefore, if you don’t like capturing dynamic images, that’s completely okay.
In fact, many of my favorite landscape images captured by other photographers feature static, flat compositions. These shots respectfully comply with the two-dimensional constraints of the photographic medium and rely upon a separate set of visual devices in order to succeed.
On the other hand, if you do like the dynamic look, then I certainly encourage you to pursue that interest! It may not be the only game in town, but it certainly is a great way to capture eye-catching photos.
How to create dynamic landscape photos: 7 tips
In this section, I share a variety of tips so you can use the dynamic landscape approach in your own images:
1. Use leading and converging lines
One of the simplest ways to really draw the viewer into an image is by including leading and converging lines.
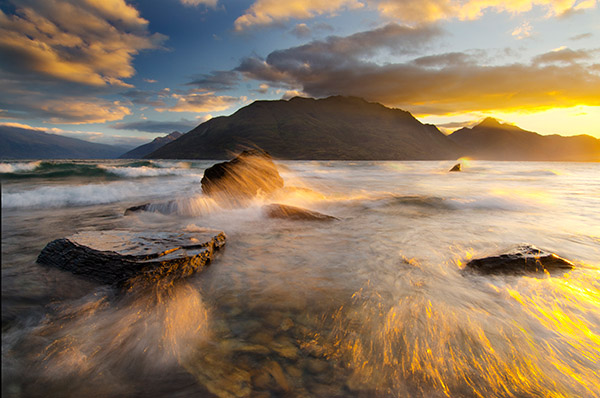
Leading lines guide the viewer’s eye around the frame, the way the white lines of the waves push the eye toward the colorful horizon in this next image:

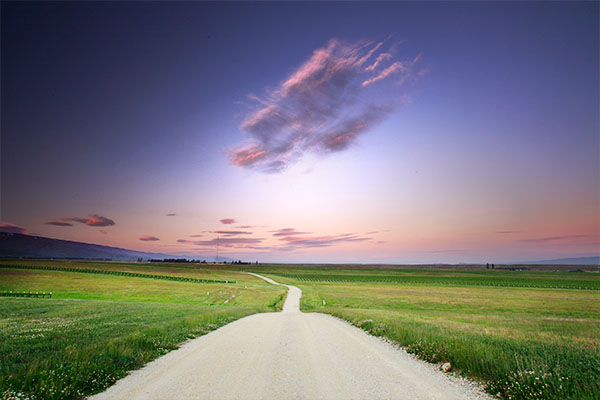
Converging lines are a type of leading line. They start in the foreground or midground and converge in the background, like the lines of this dock:
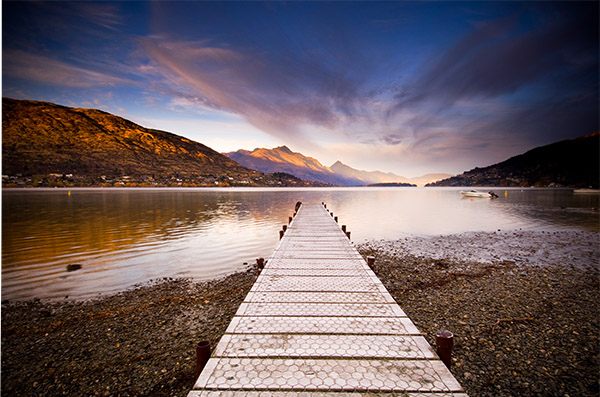
Converging lines are a particularly effective way of creating depth in your shots, which is one of the key elements of dynamic landscape photos.
Leading lines are the reason why wharves, roads, and rivers make such successful photographic subjects. They provide predictable leading lines, and when shot from the right direction, they move from foreground to background (creating a sense of depth along the way).
Although many consider wharves and roads to be over-photographed, I strongly advise my workshop students to shoot them heavily. That way, they can build an awareness of the power of a line in an image, and they’ll get better at recognizing more subtle lines in nature.
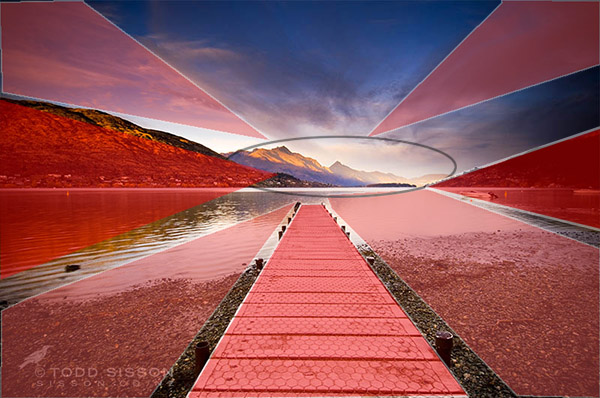
By the way, leading lines don’t just capture the viewer’s attention and create depth; they can also hold the eye within the confines of the frame. Check out how the lines of the wharf image below push the eye toward the mountains in the background:
So look for these lines whenever you are shooting. You might not notice them at first, but they’re almost everywhere!
2. Be sure to include foreground elements
Dynamic landscape photographers love foreground elements, and for good reason: They act as a visual entrée, tantalizing the viewer and drawing them into the shot. (Then, once the viewer is engaged, your leading lines will take them around the frame to the background!)
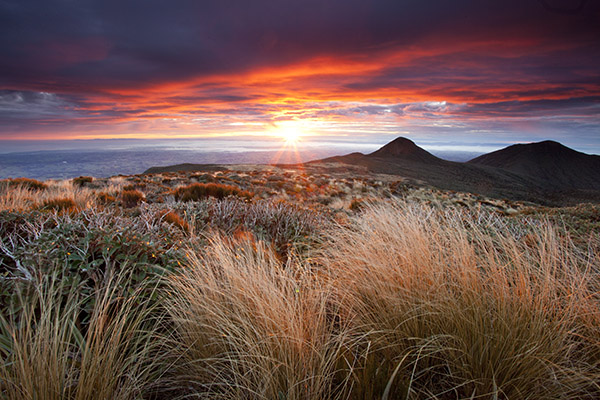
In my view, a dynamic image almost always possesses a strong foreground element or two. When shooting a sunrise, for instance, the light and clouds may look amazing, but if all you capture are vast expanses of red clouds, the viewer likely won’t be engaged. Instead, it’s important to include a captivating foreground subject, such as an interesting rock, flowers, plants, fallen logs, waves, or patterns in ice/sand.
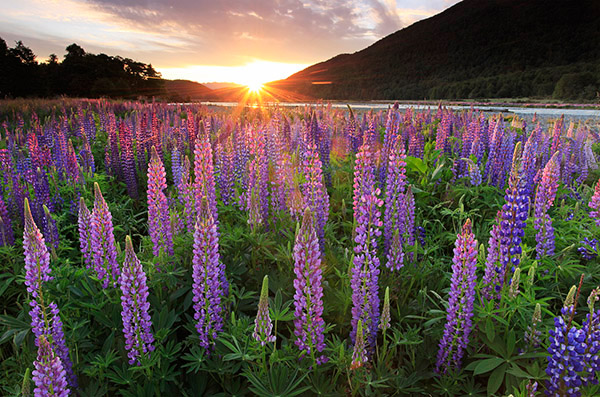
Note that the best foreground elements don’t look out of place. Instead, they complement the greater scene! Note how these lupine flowers act as a powerful foreground feature in this composition and fade gracefully into the background:
By the way: If your foreground element is visually compelling and includes leading lines, you’re quite possibly on the way toward that vaunted money shot.
3. Use an interesting angle
As a photographer, you are an artist, not a forensic documentarian. Don’t aim to create images that show the scene as a passerby might see it. Instead, find an unusual perspective that suggests a new way of seeing to the viewer.
For this reason, I rarely shoot from my natural standing position. Instead, I get down low, which magnifies foreground elements and really helps hit the viewer over the head. Put another way, compositions get far more dynamic the closer you are to the ground, so don’t be afraid to get dirty.
The power of a low angle is especially apparent when using an ultra-wide lens. With ultra-wide focal lengths, subjects tend to lose their visual power when viewed from even a few feet away – but if you get uncomfortably close and low, the results are often magnificent.
You should also aim to find interesting high angles. Try scrambling up banks, standing on cars, and even sitting on your partner’s shoulders (if they’re willing, of course!) in an effort to find that high-angle perspective. I find that higher shots often look especially nice when shooting with telephoto lenses.

4. Include powerful background elements
As I emphasized above, it’s important to include interesting foreground elements for dynamic photos – but it’s also essential that you include interesting background elements, as well. In other words, you need to provide the viewer with both foreground and background elements that’ll keep them occupied and engaged with the photo.
My advice is to compose from back to front. Start by finding a nice background subject, such as a spectacular sunset playing out on mountains. Then search for a nice foreground that’ll complement the background and complete the photo.
Note that composing landscape shots with both foreground and background elements is something of a balancing act. You have to decide whether you want the foreground or the background to dominate, then frame your subjects accordingly.
Ideally, the viewer’s eye will ultimately gravitate to the background, so I don’t recommend making your foreground too powerful. Instead, the foreground should be a key supporting element, not the main event.

5. Use vivid color or incredible light
Including intense color and/or incredible light in your images is perhaps the most difficult part of landscape photography. After all, you can create dynamic compositions that feature leading lines, strong foreground and background elements, and an interesting perspective pretty much anytime. Gorgeous color and light, however, are much more difficult to come by.
If you have the time, it often pays to scout out compositions in advance. Then return when the forecast looks promising and get that award-winning shot! You can generally find the best light at sunrise and sunset, though ensuring gorgeous colors is a bit trickier; here, it helps to have a smattering of clouds.
And make sure you pay attention to the direction of the light. Sidelight can help add a sense of three-dimensionality, though frontlight and backlight can also look great!
By the way, as great as these elements are – and as much as they’ll enhance your dynamic compositions – it’s important that you don’t go overboard. I genuinely feel that vivid color needs to be kept in balance, and I definitely don’t think you should rely solely upon lots of super-saturated colors to hold your image together.
Remember: For a dynamic landscape photo to work, balance must prevail. Try to avoid filling the frame with too much color, and spend some time post-processing your landscape image to ensure that the color doesn’t dominate.
6. Include artificial or natural vignettes
Vignetting refers to an effect where the edges of the frame are darker than the center, and it can make a huge difference to your photos.
You see, the eye is drawn toward lightness and pushed away from darkness, so if you can darken down the edges of your composition while also featuring a bright center, the viewer will experience a greater sense of depth and movement within the shot.
You can create a vignette through compositional ingenuity – by placing darker elements in the outer portions of the frame and lighter portions toward the center. However, not all scenes are amenable to this approach, and adding a vignette while editing is another viable option. Most editing programs offer easy methods of vignette creation (and if you prefer to customize your vignette shape, you can always use some sort of brush).
Don’t go overboard, though! While a subtle vignette tends to look amazing, if you take it too far, the result will look far too unnatural.
7. Look for suggested motion
By “suggested motion,” I’m referring to real movement within a photo: rushing waves, streaking clouds, waving grasses, babbling brooks, and more.
This is probably the least important element in dynamic compositions, and it’s certainly not essential. But if you can include a bit of movement, it can add an extra layer of interest and intensity to your shot.
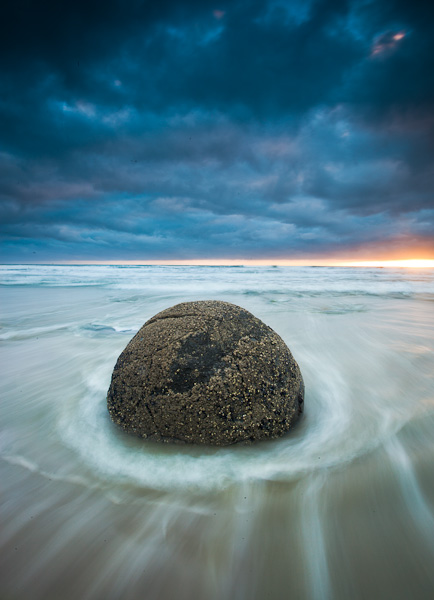
Many photographers create that sense of motion by using long-exposure techniques, which often work great. (That’s how I got the streaking effect in the shot displayed above!) But don’t get locked into shooting long exposures; in my experience, frozen or partially frozen motion can also convey movement beautifully.
Dynamic landscape photography: final words
Hopefully, you can now appreciate the power of dynamic landscape shots and are ready to create some stunning photos of your own.
Remember that you don’t need to follow every tip I’ve shared for great results – but the more tips that you can follow for each image, the better your shots will turn out.
So head outside with your camera. Amazing images await!
Now over to you:
Do you have any tips for dynamic images that we missed? How do you feel about dynamic landscape photos? Share your thoughts in the comments below!
Todd & Sarah Sisson are full-time landscape photographers based in Central Otago New Zealand. Their work can be found as fine-art and canvas prints at www.sisson.co.nz. Todd also offers private and group photographic tuition.


Some Older Comments