
What are diagonals in photography? And how can you use them to create stunning compositions?
In this article, I share everything you need to know about composing with diagonal lines, including:
- What diagonals in photography actually are
- How to find diagonals when out shooting
- Easy tips to improve your diagonal pictures
Are you ready to capture diagonal photos like a pro? Then let’s dive right in!
What are diagonal lines in photography?
Diagonals refer to any slanted lines that appear in a photo, from tilted trees and road paint to partially raised arms and bent flagpoles.
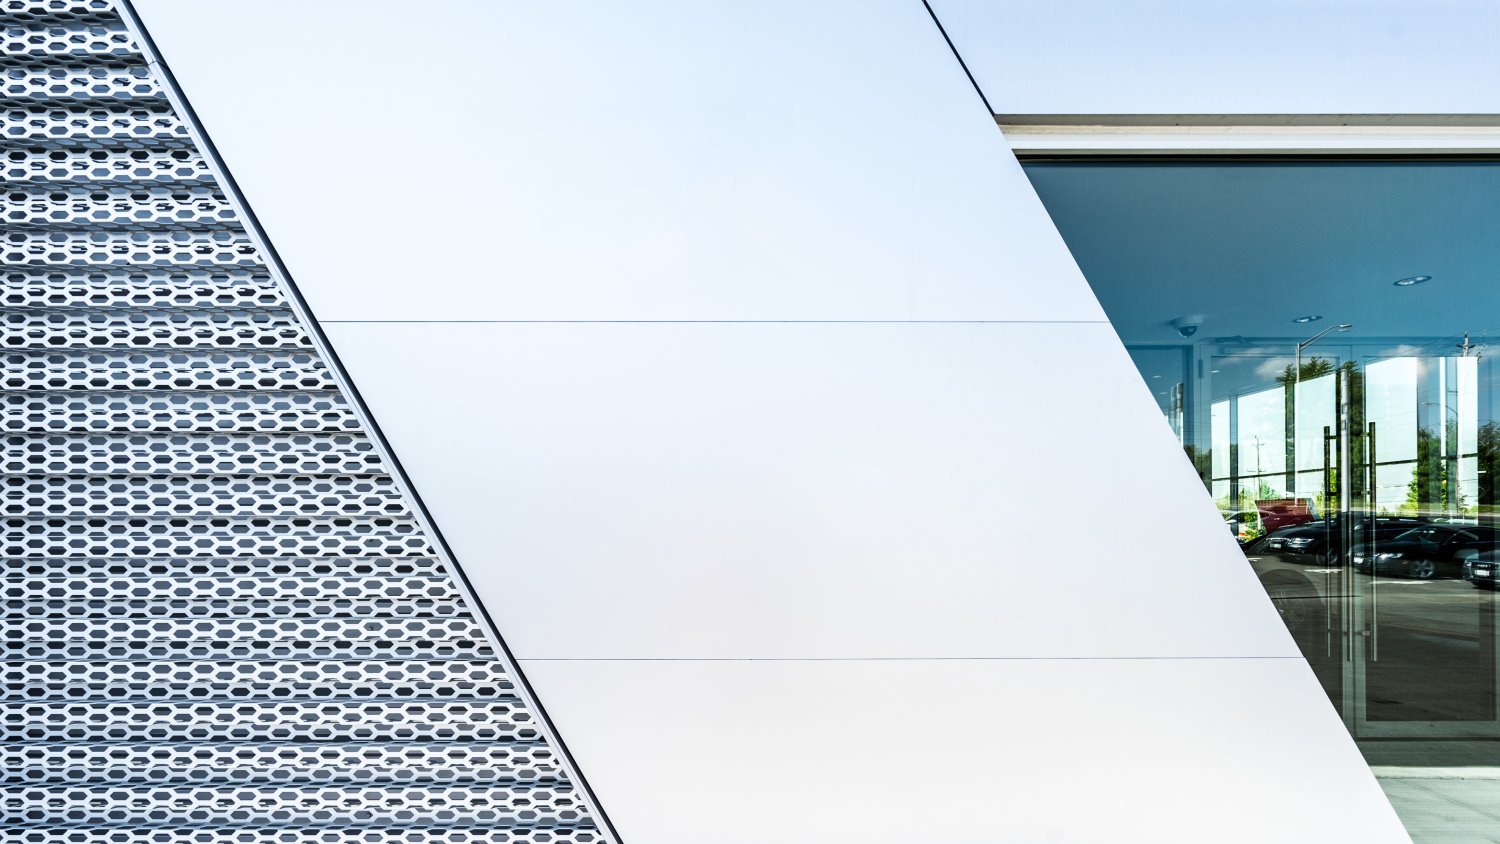
Here, diagonal lines stretch across the entire image:

In fact, diagonals are pretty easy to find; most scenes include a strong diagonal or two, plus you can turn any straight line into a diagonal simply by slanting your camera!
But what makes diagonals so great for photography?
For one, diagonals act as leading lines: they lead the viewer’s eye through the scene. In other words, they help take the viewer on a visual journey (which is pretty much always a good thing). Look at the image featured above; do you feel the diagonals pulling you through the shot?
Diagonal lines also add a sense of dynamism, or action, to an image, which is perfect for dramatic landscapes and intense street shots. When used carefully, diagonals can even give a composition depth by suggesting perspective.
So while you don’t always need to incorporate diagonals into your compositions, it is often a good idea, especially if you’re after more dynamic, engaging results.
How to find diagonal lines when shooting
As I emphasized above, diagonals are not especially difficult to find – you just have to know where to look!
Every scene has a few diagonals just waiting to be discovered. Over time, you’ll get better at spotting them, but when you’re just starting out with diagonal compositions, I’d recommend you look in a few specific places.
First, if you’re capturing landscape photos, search for lines that stretch from the foreground to the horizon, such as:
- Fallen logs
- Rivers
- Blades of grass
- Lines in the sand
Any of the above options work great as diagonals. Simply slap a wide-angle lens onto your camera, get down low over your foreground subject, and adjust the shooting angle until you get a beautiful diagonal moving through the scene.

Second, if you’re capturing portrait photos, ask your subject to position their arms so they point – diagonally! – to their face. You need to be subtle about it, and the effect should appear natural.
Third, when doing street photography, pick a clear subject, then look for lines in the surrounding environment that’ll lead the eye in the right direction. A wide-angle lens – such as a 28mm or 35mm option – can be helpful. You might then use:
- Building edges
- Street signs
- Road paint
- Curbs
- A person gesturing
For the best results, you can get down low over a curb or line of road paint so the diagonal cuts straight toward the main subject. Alternatively, you might capture your subject moving between a maze of structures full of interesting diagonals and diagonal edges (to amplify the effect, try tilting your camera!).

4 easy tips for beautiful use of diagonals
You know all about diagonal lines and how to find them – but how can you work with diagonals for the best results?
In this section, I share my favorite tips for diagonal compositions, starting with:
1. Avoid positioning diagonals in the image corners
When you’re just starting out with diagonals in photography, it can be tempting to find a strong diagonal – like a log on a beach – and compose so that the line cuts directly from the bottom corner toward the horizon.
But while corner positioning will certainly give you powerful results, the resulting compositions often feel a bit static; they look too obviously designed.
So instead of positioning diagonals in corners, I recommend you adjust your camera for a slightly off-corner effect. By moving your camera downward, for instance, you can ensure that the diagonal intersects with the vertical edge of your shot, and by moving your camera to the right or left, you can ensure that the diagonal intersects with a horizontal edge.

How far away from corners should you keep your diagonals? Honestly, that’s your call, and there’s no easy answer. The best advice is to experiment – over time, you’ll start to determine the diagonal positioning that you like.
(Note, by the way, that you often do have the option to adjust your diagonal positions in post-processing. A little cropping can go a long way! Though it’s always best to get it right in camera when you can.)
2. Combine diagonals and straight lines to create points of interest
If you’ve read up on the rule of thirds, then you know that, while solitary lines are nice, it’s points of intersection that really draw the viewer’s eye.
In other words, the points at which two lines intersect can be very powerful.
So the next time you’re composing, find your diagonal – but then look for a second line, which the diagonal can intersect with to create a potent area of interest.

Note that your second line doesn’t need to be a diagonal; you can get good results simply by combining a diagonal line and the horizon line, for instance.
But be careful: While line intersections are great for getting the viewer’s attention, you shouldn’t use them aimlessly. Instead, try to adjust your composition so that the subject is at the point of intersection. That way, when the viewer follows the lines, they go straight toward the subject!
3. Don’t include too many diagonal lines
Diagonals are great for a whole host of reasons, but it is possible to have too many diagonals, at which point your composition will start to feel messy and difficult to appreciate.
An over-diagonaled image will be especially problematic if the diagonals are crossing from different directions (whereas a handful of diagonals all moving in the same general direction can create interesting patterns; see my next tip!).
So if you do come upon a scene with dozens of diagonals, carefully evaluate your composition before hitting the shutter button. Ask yourself: Does the image feel cohesive? Or do the diagonals make it chaotic?
If a scene does feature many diagonals, you can always adjust your composition to exclude some of the more problematic areas. Try switching to a telephoto lens (zooming with your feet works, too!).
Alternatively, you can embrace the chaos. But if you do decide to go that route, make sure there are a few especially eye-catching diagonals – that is, diagonals that stand out above the rest – to keep the image coherent. Make sense?
4. Look for patterns
In the previous tip, I mentioned that a few diagonals, when moving together, can create eye-catching patterns.
And as you might expect, you can use these patterns to create highly compelling compositions (though you should be careful to avoid compositional chaos, as discussed above).
Keep an eye out for repeating diagonal elements, and when a pattern becomes clear, do what you can to incorporate it into your images. One trick is to get extra close so you can make the pattern the subject of your photo. (That way, you can create a stunning abstract shot.)

Another option is to move back and/or use a wide-angle lens to make the pattern a small – but powerful – part of the scene.
Note that diagonals in patterns tend to be stronger than diagonals on their own, so make sure that you position patterned diagonals carefully in relation to the main subject. You want to make sure the diagonals lead the eye toward the subject rather than away from it!
Diagonal lines in photography: final words
Now that you’ve finished this article, you’re ready to capture some stunning photos featuring diagonal lines.
So remember the tips I’ve shared. And start practicing your diagonal compositions!
Now over to you:
What type of diagonals do you plan to incorporate into your photos? Share your thoughts in the comments below!
