
If you shoot in RAW and you want your photos to look realistic, photo editing is a necessary step in the photographic workflow. Unedited RAW files simply do not look like what you saw with your eyes! For instance, in high-contrast lighting, the human eye can see more detail in the highlights and the shadows – and when faced with colorful subjects, RAW shots just don’t have the same pop as the real-life scene.
That’s where RAW photo editing in Lightroom comes in handy. With a bit of effort, you can balance the light and color to get your photos looking lifelike – so they more closely match the view you experienced.
In this article, I offer five easy tips to ensure you can effectively edit your RAW photos in Lightroom. That way, the next time you capture a batch of RAW files, you know exactly how to process them for outstanding results!
Let’s dive right in.
1. Don’t believe what you see
Many photographers review their images on the camera’s rear LCD screen and find them to be colorful and punchy – but then are confused when the shots look flat and dull on the computer. “What happened to my vibrant, contrasty image?” they ask.
Here’s what’s going on: What you see on your camera screen is a JPEG photo, not a RAW file. The JPEG is automatically processed by your camera to look more true to life, but when you import the RAW image into Lightroom, all your camera’s processing disappears, and you gain access to the original, unaltered file.
Fortunately, this has major benefits. For instance, the JPEG image may show a lack of detail in certain areas – the extreme highlights and shadows – yet the RAW file retains that information. When you process the RAW file in Lightroom, you can carefully tweak the tonal sliders to recover this detail and create a far superior image.
But it’s essential that you account for this when out shooting with your camera. If you want to capture the most detail, spend time understanding precisely how your camera renders JPEGs and RAW files, and know how your camera’s RAW files respond when you post-process them. That way, you can have a sense of what’s achievable when you view the images in the field.


2. Don’t be afraid to use (and make) presets
Lightroom has many presets, which let you make dramatic changes to your shots in a single click. Some of these presets come with the software, while others can be downloaded online and added to your Lightroom collection.
Many presets, when applied, will give your photos a somewhat surreal look. You can create images with cinematic effects, incredible vibrancy, artistic fades, film-like colors, and more. Many of these looks will be gimmicky, but if you put in the effort, you can find presets that will make your images look natural and lifelike.
Spend some time looking through Lightroom’s built-in preset collection. Test out the different options, and see if you can find any you like. As I mentioned above, you can also find presets online, so if you don’t like any of Lightroom’s included offerings, that’s a solid option.
Another approach is to make presets of your own. This isn’t hard to do, and it’s a great way to develop presets that are particular to your editing style.

You can choose presets that look however you like – it’s your photos, after all! – but if you’re looking to make your RAW photos more realistic, then you should be somewhat restrained in your approach. When making your own presets, don’t push the sliders too far, and don’t go for wild color shifts or major tone curve adjustments.
Also, when you develop presets for a natural-looking result, keep in mind how you saw what you photographed. How was the lighting? Was it high or low contrast? Did it have a warm or cold cast? Was it more neutral? What did the colors look like? If you consider the reality of a scene, then you can accurately recreate it during RAW photo editing.
Thinking about what you saw when you were taking your photos will help you create more realistic edits, but it’s not always possible to remember clearly. That’s when you need to think objectively and aim to find a balance in lighting, contrast, and color when you working on editing, as I explain in the next section:
3. Find a balance
As I emphasized in the previous tip, it’s easy to go off the rails when editing RAW photos in Lightroom and end up with highly unrealistic results. Now, a lack of realism isn’t bad if it’s your goal, but most shooters are interested in creating images that accurately reflect how they saw the scene.
Therefore, it’s important that you always think about achieving the right balance when shooting. You generally don’t want to adjust every slider, but should instead focus on using small tweaks to the main sliders until you get a nice result. In Lightroom, the sliders I use most often to achieve a natural effect are:
- Temp
- Exposure
- Highlights
- Shadows
- Blacks

I use the other sliders less often (their use depends on the lighting conditions at the time of capture). At times, I will make alterations to individual colors using the Saturation and Luminance sliders, which you can find in the HSL panel.
Photos taken at different times of the day and night require different edits to suit the lighting. For instance, photos taken on a sunny day will require different editing compared to photos you take when it’s cloudy or indoors. Whether the light is high contrast or low contrast will also make a difference.
I know I mentioned this above, but it bears repeating: Don’t overdo your adjustments. Avoid pushing sliders to their extremes. This will help you achieve a far more realistic outcome. Additionally, once you start maxing out the sliders, you’ll find that image quality begins to deteriorate. Pixelation, banding, and other imperfections will begin to appear, plus you’ll often lose detail in key areas.

4. Adjust the highlights and shadows
Lightroom’s RAW photo editing technology – and RAW photo editing technology in general – has its limits. These depend primarily on the original file; if your RAW shot doesn’t contain detail in the highlights and shadows, you won’t be able to bring it back, even with extensive Lightroom processing.
However, every RAW file contains more detail than might be immediately apparent, and bringing back this detail is essential to creating realistic edits. That’s why I recommend you check the highlights and the shadows of each image, and if you notice a loss of detail, take steps to recover it.
Specifically, bringing down the highlights and boosting the shadows will bring back lost information and make the file look more true to life. You can use Lightroom’s Highlights and Shadows sliders to do this – however, it’s important that you first correct the exposure (using the Exposure slider), or else you may struggle to get a good result.
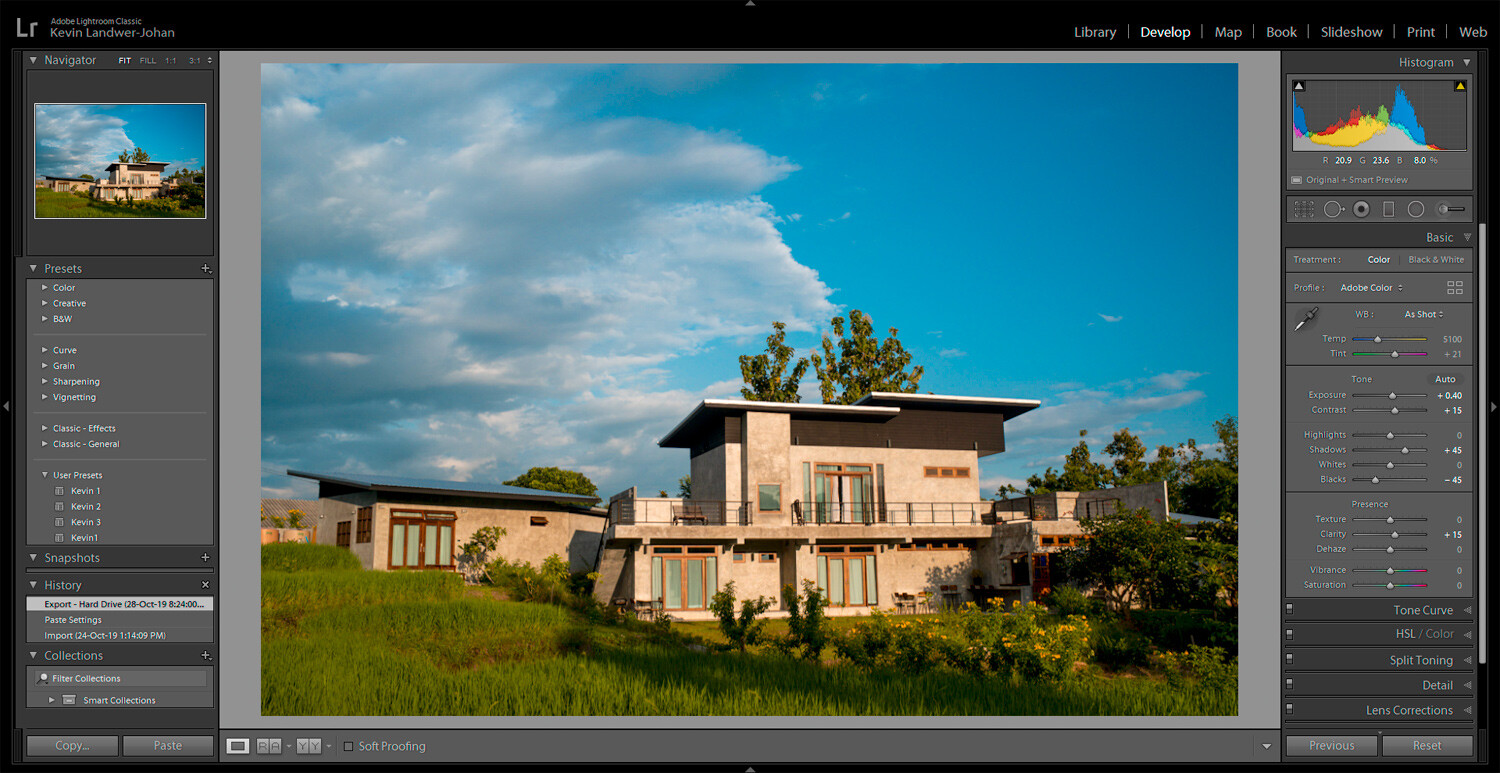
Here, the histogram is your friend. While there’s no single best histogram, watch for peaks that push up against the sides of the graph (because these indicate a loss of detail!).
And don’t just think about exposure and detail recovery when processing. Make sure that you also get your settings right in the field, and compose your photos carefully so that the contrast range you capture is within the dynamic range of your camera. If you’re faced with very bright and very dark areas in the same frame, you may want to simply recompose.
That said, if you’re in a situation where you desperately want to take the photo but can’t avoid a loss of detail, I’d recommend allowing the highlights to be overexposed while making sure to retain some shadow detail. This mimics how our eyes naturally handle bright lighting conditions; we often can’t see detail on light-colored or very reflective surfaces, but we can see detail in the shadows.
5. Think about Lightroom RAW editing when you take photos
Make sure that your editing process and your shooting process aren’t completely separate. In other words, when you take photos, consider the changes you can make to your RAW images later; that way, you can optimize your settings and your compositions to fit your imagined final shot.
To some, thinking about what you can do in post-production might seem like cheating, but I don’t see it that way. It’s a matter of working with the tools we have available! Modern digital technology gives us opportunities to make photos look more realistic, and you should take advantage of that fact. Knowing how your RAW file can be adjusted later on is a major help, not a harm.
So whenever you head out with your camera, always keep various processing possibilities in the back of your mind. Recognize what detail you can recover and what detail you can’t, and recognize how different RAW files will appear (and how you can adjust them later to create a natural look).
Editing RAW photos in Lightroom: final words
There you have it:
Five key tips to improve your RAW photo editing! I hope you found this article useful; learning to successfully edit your RAW shots is an essential skill, and while it will take time to master, it’s certainly a worthwhile pursuit.
So head into your archives and find some photos to edit. Try to remember how the scene looked when you took the shot, and practice making adjustments so it looks more true to life!
Now over to you:
Do you have any additional tips for RAW editing in Lightroom? What does your workflow look like? Share your thoughts in the comments below!

