A wedding photographer has to be prepared for pretty much anything. Big belly laughs, impromptu outbursts of song and bear hugs can happen at any moment. Not to mention that the light is constantly changing and you’ve got yourself a schedule to keep. Let’s just say weddings keep you on your toes.
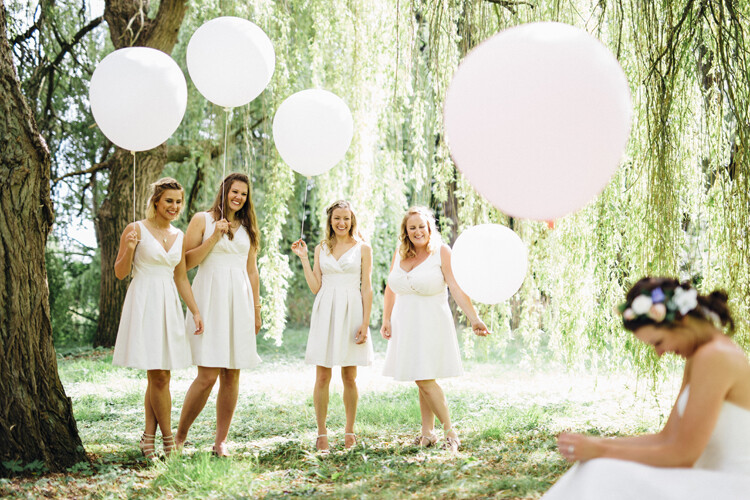
That’s why it’s always worth planning ahead and being prepared. Weddings rarely take place in just one location and moving from indoors to outside, or from sunshine to shade can cause a huge change in exposure. When not competing with the sun, indoor lighting poses new problems. Tungsten bulbs mixed with daylight causes all sorts of white balance issues. But this is why we love weddings, they keep us sharp.
Being prepared and practice is key to achieving consistent results. Here are three top tips on how to make the most of difficult lighting situations.
Couple portraits – How to find good light on a dull day
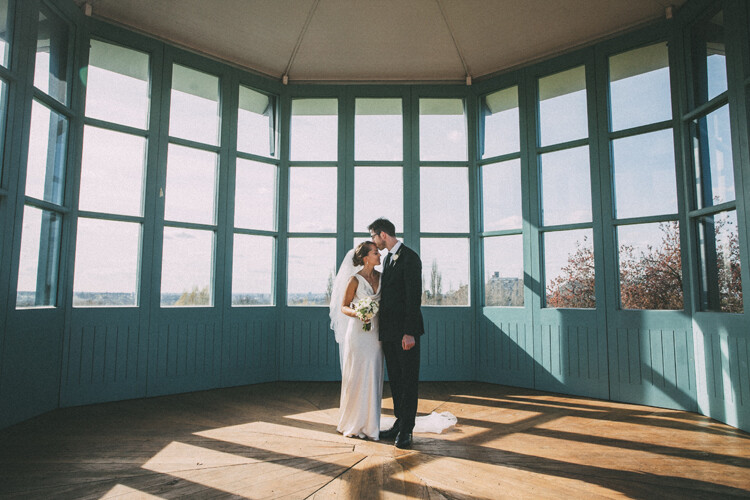
Believe it or not, it is raining at the point of capture in the image below. This photograph was taken in July in Surrey, UK. The British weather was doing all it could to play up to the stereotype it would seem.

Not every wedding takes place on a gorgeous sunny day and it’s not always feasible to shoot at sunset to capture the golden hour of light. What can you do to create images that your clients will love and to which you’re proud to put your name? Especially when the heavens decide to play against you. Here is the process I use when assessing lighting conditions and how this photograph was taken.
Understanding the principles of lighting is fundamental in any photographer’s quest to a beautifully lit photograph. Fortunately, these principles are consistent regardless of where you are located in the world or how expensive your equipment is. Whether you’re using the latest Canon or a generation old Smartphone, light can be manipulated to your advantage.
Approaching every scenario with the same set of questions can radically change how you see light and ultimately how you take pictures. Where is the light coming from, where is the even light and where are the greatest differences in the light?
Place the subjects in shade

Here you can see the scene exposed to what the human eye sees. The background is correctly exposed which throws the foreground into darkness. What we want is to do is correctly expose the foreground to create a clean canvas with an overexposed background. In this scenario, there is about three stops difference in exposure, which is perfect.

By placing the couple under the branches of the tree they are instantly evenly lit. There are no stray light rays coming through branches or dappled light on faces, and the pebbles on the driveway aid in reflecting light back onto the subjects. By exposing for the skin tones the background will be overexposed, providing a clean canvas.
A few tweaks in Lightroom to warm the skin and recover some of the highlights and voila! An evenly lit portrait on a rainy day. The added benefit of the tree branches is that they, of course, provide shelter from the wind and rain. This technique of using trees as shelter can also be employed on dry days that are windy. Even if the sun is shining, a venue on a hill can increase the risk of a veil blowing away!
Confetti
Why is this difficult? Depending on the location of the venue or church, you may be competing with changing light that the couple will walk through as they process down the confetti line. This is problematic as you are going to be walking backward, trying to capture the action, as well as tracking the changing light.
It is quite common in the UK for churches to have tree lined pathways, this creates a lighting issue as a break in the trees will cause the couple to walk from light to shade to light, etc. This can mean a dramatic jump in exposure.

Take pictures of your hand
This is probably the easiest method to test the exposure of skin tones which can and should be used to test all of the techniques in this article. Take a photograph of your hand, inspect the screen and adjust accordingly. The wedding guests may look at you in an odd way, but when you’re working at a fast pace this can be a life saver.
Take images of your hand in both the light and the shade and note the difference in exposure before the bride and groom appear. Depending on how you shoot, it makes sense to only change one setting as you will be multi-tasking. The control for shutter speed on Canon cameras is located where the index finger naturally rests, and logically is the easiest of the settings to change.
Pay attention as the couple moves from light to shade, remembering the readings of your hand. The camera settings are displayed in the viewfinder and alternate between the two as the light changes. Where possible, pre-plan your shots, performing a mental run through of where people are likely to be and what lighting difficulties you may encounter.

First dance
Who knows what kind of lighting setup the DJ will have. Will they make a beautiful white spotlight for the first dance, or will they bust out some crazy laser snowflakes? Anything could happen. One method to overcome this is to shoot into the DJ’s lights and use them as compositional features rather than compete with them.
This isn’t the only option, sometimes shooting with the lights are beneficial as it gives you scope to capture the guest’s reactions. To create this shot, one flashgun at both corners of the stage (pointing at the center of the dance floor), elevated on tripods, and attached to Yongnuo wireless triggers were used.

This setup offers two things. Firstly, by backlighting the subject even exposure on the skin can be achieved with no unwanted shadows. Secondly, you don’t have to worry about what the DJ is doing with their lighting setup.
It pays to ask the DJ before any dancing commences, what they plan to do and work with them. You would certainly be unlucky should you encounter anyone who wasn’t amiable in having a discussion. However, the point remains that they have a job to do. If they feel the song warrants a change in lighting then they will adapt it for the benefit of the wedding, not for your advantage. This is completely understandable, however, lighting surprises aren’t often welcome. This is why it makes sense to pre-plan and take control of the lighting.
Lens chimping technique
A caveat to shooting in this way is that it is possible to end up with equipment or the DJ themselves in the background. For this reason, an interesting tactic to employ is Sam Hurd’s lens chimping technique. By placing a convex lens element in front of your lens it creates cool flares and throws the background out of focus.

Practice is certainly recommended as an incorrect application of this technique can result in the lens element focussing all lights onto your sensor and completely blowing out the shot. The first dance is often a tricky one to shoot, it would be interesting to hear about your ideas and innovations below. Happy shooting!
Conclusion
Hopefully, these quick tips will help you deal with challenging lighting situations at weddings or any other photography opportunities. Do you have any others you want to share? Please do so in the comments below.
Table of contents
Wedding Photography
- GENERAL
- PREPARATION
- LIGHTING
- How to Overcome Difficult Lighting Scenarios at Weddings
- COMPOSITION
- GEAR
- ADVANCED GUIDES
- CREATIVE TECHNIQUES
- POST-PROCESSING

