
Want to capture stunning travel photos? Then you must learn to master lighting.
You see, while camera gear, composition, and post-processing are all essential parts of travel photography, lighting is often the make-or-break factor. If you get the lighting right, your images will look eye-catching and even dramatic – but if you get the lighting wrong, then your images will turn out boring, flat, and otherwise unpleasant.
(I’m not talking about artificial lighting. I like to use natural light in my travel photos, and I very rarely travel with an external flash because of the extra weight. I’m also not a huge fan of the flashed look.)
Therefore, in this article, I share four fundamental tips for travel photography lighting, including:
- The best times of day to shoot travel photos
- How to think about the weather and its effect on lighting
- How to adjust your position in relation to the light for amazing results
So if you’re ready to become a travel lighting master, then let’s dive right in!
1. Start by shooting at the right time of day
Natural light changes constantly.
Depending on the time of day, you’ll get very different types of lighting – and very different results. That’s why you should always pay attention to the time when planning your travel photography outings.

You see, while there is no best time of day for travel photography, different types of lighting work well for different scenes, so you should always tailor your lighting to your subject (or vice versa).
Specifically:
- If you want to create beautiful silhouettes or soft, golden-lit travel photos, schedule your outing during the golden hours (the hour or two after sunrise and the hour or two before sunset). Golden-hour lighting is great for dramatic architectural photography, it’s great for landscapes, and it’s great for portraits, too.
- If you want to highlight color and detail, schedule your outing for a heavily overcast day. Obviously, it’s not always possible to predict this in advance, but do the best you can, and don’t be afraid to change your plans as required. Overcast light is wonderfully diffused, and it’ll allow you to capture intimate portraits, architectural details, and landscapes that focus on the subject (not the sky!).
- If you want to create street-style shots, then plan to shoot when the sun is bright and high overhead. Look for interesting shadows, embrace the high-contrast effect, and experiment constantly.
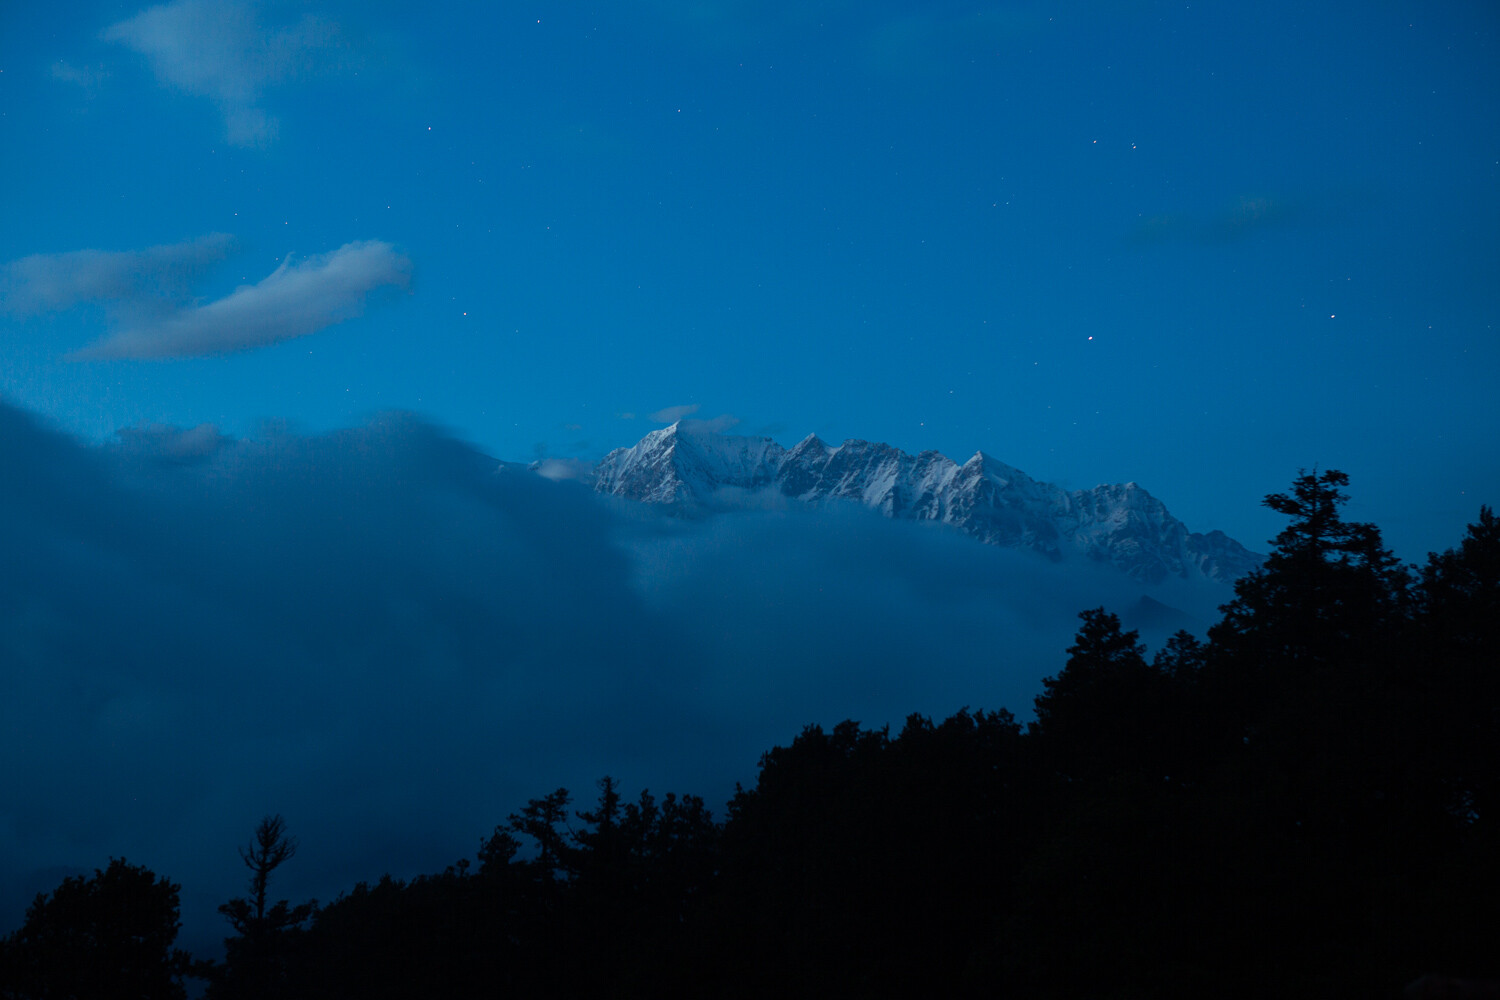
- If you want to create magical, ethereal landscape or cityscape photos, plan your photoshoot for just after the sun sets. This time is known as the blue hour, and it’ll give you stunning skies as well as enough light for some foreground detail.

Bottom line: When planning a travel photography photoshoot, check the weather. Then, just before you leave, check it again. And always have a backup plan in place, just in case!
2. Carefully analyze the location when you arrive
Once you arrive on location, before you take out your camera, spend some time looking around and evaluating the light.
In particular, pay attention to the lighting quality and the lighting direction.
The lighting quality primarily depends on the time of day and weather factors discussed above, but these can change rapidly, so it always pays to take one more look before you shoot. Also, if you’re shooting indoors, the light may be diffused or blocked by walls and windows, so it’s a good idea to really look at the light and see how it falls.
The lighting direction is determined by the position of the sun (if you’re outside) or the position of the windows (if you’re inside). And by working deliberately with different lighting directions, you can radically improve your photos.
Front light, for instance, is great for illuminating subjects evenly. It’ll get you highly detailed photos, but it tends to lack drama. (A lack of drama isn’t necessarily a bad thing; it’s just an effect you should be aware of.)
Backlight, on the other hand, is full of drama. It creates silhouettes, it creates lens flare, and it creates rim effects that look incredibly artistic. On the other hand, backlight isn’t great if you want to create detailed and/or documentary images.

Finally, sidelight is a great way to produce dramatic-yet-detailed images. Because sidelight falls on the subject from an oblique angle, you get beautiful shadows, plenty of texture, and a well-lit subject. It’s a great way to create captivating landscape and architectural images, especially when the sun is low in the sky.

Of course, the lighting direction is often fixed – you can’t ask landscape or architectural subjects to move, after all! – but by selecting subjects based on the light, you can maximize the quality of your shots.
3. Select gear based on the lighting situation
Before you head out on a travel photoshoot, make sure that you bring the right gear for the job.
If you plan to be shooting in bright, midday light, you can often take only your standard camera and lens. You won’t need a travel tripod, you won’t need a special lens, and you won’t need a remote shutter release.
If the sky is overcast or you’re working indoors, I’d recommend bringing a good travel tripod, especially if you plan to shoot landscape or architectural scenes. You’ll want to narrow your aperture for sufficient depth of field, but that will require a slow shutter speed – and if you don’t have a tripod, you’ll end up creating blurry shots.
If you’re shooting around sunrise or sunset, a tripod will again come in handy. The light will be too dim to allow for a deep depth of field at handholdable shutter speeds (plus you can use the tripod to create beautiful long-exposure images). A remote shutter release is a good idea, too; it’ll let you fire the shutter without generating camera shake.

And if you’re shooting after dark, a tripod and a remote shutter release are absolutely essential. The exception is if you plan to do travel street shots – and if you do, I’d recommend using your largest-aperture lens and a camera with impressive high-ISO capabilities.
By the way, if you plan to do nighttime astrophotography, a wide-aperture lens and a high-ISO camera are also important. You’ll need to shoot at f/2.8 or wider to prevent movement in the stars, plus you’ll often need to crank your ISO up to 1600 and beyond.
4. Don’t be afraid to photograph in bad weather
I’ve talked all about the value of golden-hour lighting, blue-hour lighting, and bright sunny days…
…but sometimes you’ll get stuck with bad weather, and you’ll wonder whether it’s worth going out at all.
You want to know what I think? Bad-weather days are amazing for travel photography.
You see, while bad-weather lighting is often dim, it’s also very soft, which helps bring out colors and emphasize details.
Plus, bad weather can also produce dramatic lighting, especially when the sun breaks through the clouds before, after, or during a rainstorm.
And rain, snow, or sleet can add that extra bit of oomph that’ll make for award-winning shots.
Of course, you will need to protect your gear – I’d recommend carrying a waterproof rain cover at all times – and you’ll need to keep yourself safe, too. But if you’re adequately prepared, bad-weather photography can be incredible!
Travel photography lighting: final words
Now that you’ve finished this article, you know all about lighting in travel photos – and you’re ready to head out and capture some beautiful images!
So think about the weather. Think about the time of day. Think about the light direction.
And enjoy your travel adventures!
Now over to you:
Do you have a favorite type of light for travel photography? How do you plan to adjust your travel photoshoots in the future? Share your thoughts in the comments below!
Table of contents
Travel Photography
- GENERAL
- PREPARATION
- LIGHTING
- COMPOSITION
- GEAR
- ADVANCED GUIDES
- POST-PROCESSING
- BUSINESS
- INSPIRATION

