When talking about perspective, you step into a deep and somewhat complicated subject. It has to do with geometry, history of art, viewpoint and so on. However, solving that big issue won’t be the point of this tutorial. Instead, it focuses on solving perspective issues in your photography using photoshop. So keep reading to learn which Photoshop tools can help you out.

Because perspective can be a broad term, in this article, I’m going to narrow it down to one aspect, and that is the way straight lines seem to converge as they get further away. This can be used as a creative element of the picture, or it can help convey a sense of depth and tridimensionality as per this example:

You may be familiar with this effect, such as when you’re walking on the street, and you tilt your camera up to photograph a building. Now, this might be your intention, but sometimes you don’t want or need this distortion. Of course, you can correct this issue by using tilt and shift lenses, or with a large format camera. However, many of us don’t have access to that equipment. This is where Photoshop is handy to fix perspective in post-production.

As usual, Photoshop has different ways of dealing with the same problem. One may work better than others in different cases. However, I find that more often than not, you need to combine them to get the job done. So here’s an introduction to some different approaches:
Lens correction and transformation
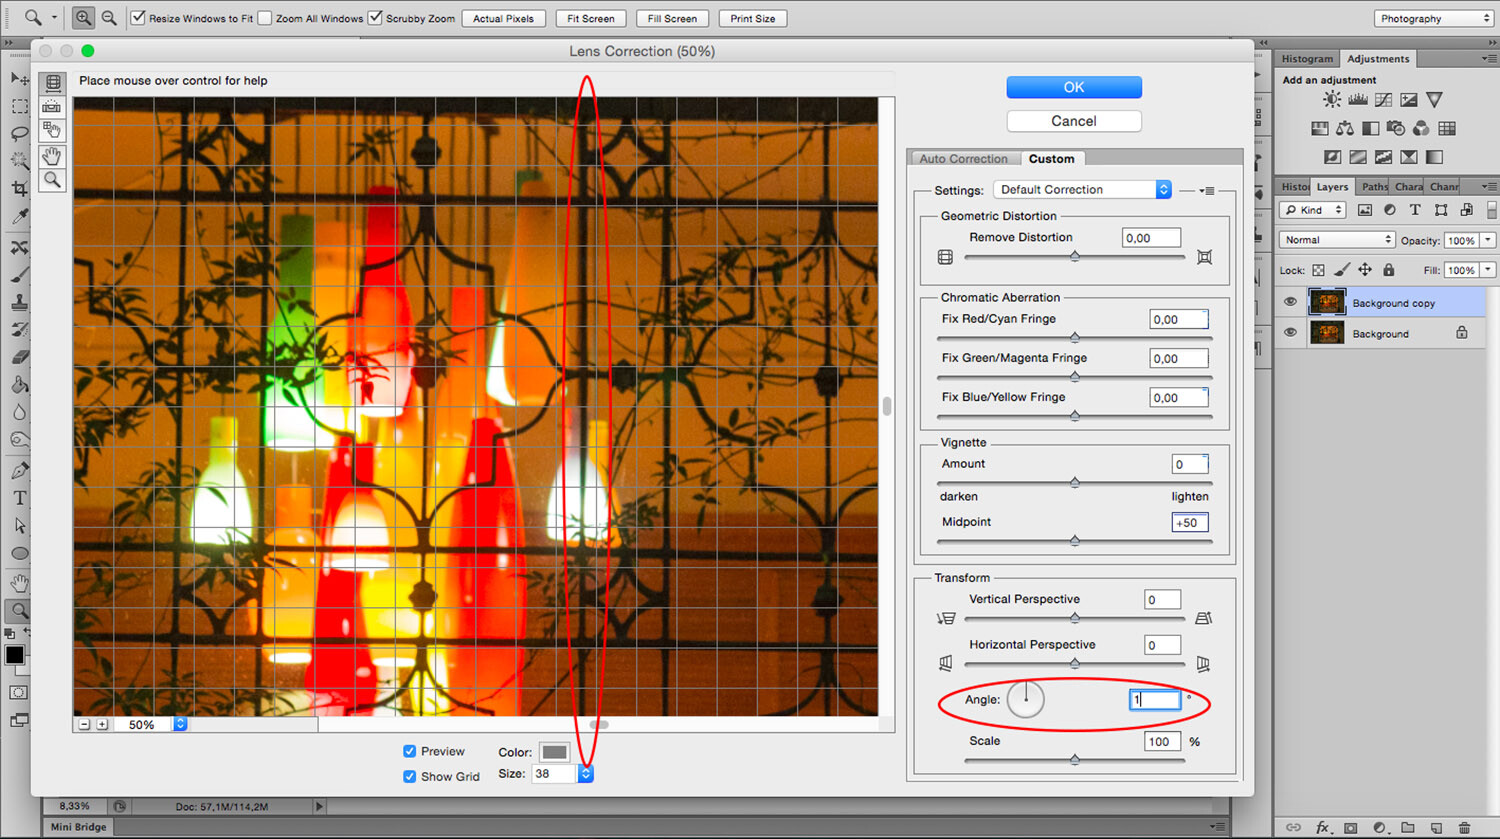
One way to correct perspective distortion is by using the Lens Correction Filter. You can find it under the Filter Menu. When you choose this, a new window pops up. To start working on it, ensure you’re in the Custom tab to access the settings and set your grid with the bottom slider so that you can have it as a reference.

For this exercise, you’re only going to need the Transform part of the panel that you’ll find in the bottom right. I find that starting with the center point saves time as the changes you make after happen on both sides simultaneously. So I zoomed in to the center and rotated the angle so that the central line aligned with the grid. Remember, you can make the grill tighter if you need to.

Now you can start fixing the vertical and horizontal lines with the sliders. On the sides of each slider, you can see an icon showing the way the image gets affected. If you pull the vertical slider to the left, the top part gets wider or sliding to the right the bottom part is the one that becomes wider and so on.

As you move the lines around, you may be losing part of the image towards the edges. To bring everything back in, use the scale slider. After you’re done, you’ll have to crop out the blank pixels.

As you can see the Lens Correction Tool can be handy, but sometimes you still have to make some adjustments here and there. For this step, you can use the different Transform tools found under the Edit menu.

In this case, I’m using the Skew tool which allows me to move all the corners and middle points independently. Whenever you’re using any of these tools, you can pull out Guide Lines by clicking on the ruler and dragging. That way you can work more precisely without leaving the transform mode.

For this image that’s all I needed to do. However, remember that all the transformation tools can help to correct perspective, so experiment with them to find the one that works best for you and your image. Here, you can see on the left how I started, and on the right, is the new corrected version.

Perspective Tool Crop
Another way of fixing the problem is with the Perspective Tool Crop. This feature corrects the lines almost automatically. However, I wanted to give you the option of doing it manually first so that you have more control over the perspective. If you want to try it out, draw a rectangle around the image with the Perspective Tool Crop active and then drag the corners to match the grid with the distorted lines.

It usually does a good job, but you might still need to tweak it a little bit with the transform tools. Be aware that the Perspective Tool Crop, as the name says, crops your image. You might lose some information from the borders. In any case, you can give it a try and decide which method is best for you.
If you have any other tips to correct perspective distortion, share them with us in the comment section.

