Shooting indoor sports isn’t always easy, but you can get professional quality results by following a few tried and true tips. 1/180, f/4, 80mm, ISO 1250, flash.
A few weeks ago, we asked our dPS Facebook followers what topics they’d like to see covered here on the blog, and a few of you were in search of tips for indoor sports photography. For purposes of this article, I’m going to concentrate heavily on high school basketball, because it brings all of the challenges of shooting indoor sports together; bad lighting, fast action, ornery coaches, inconsistent referees, and–of course–the unpredictability of sports.
The Right Gear for the Job
I’m not going to spend a lot of time here discussing camera bodies. As long as you are photographing with a reliable DSLR, your bigger concern should be the glass. Fast glass. That doesn’t mean I advocate running out and spending all of your money on the most expensive lenses that you either can ,or can’t afford, but a long zoom with a large aperture is going to be a must.
Unfortunately, while many gyms may be well-lit for sports, most are poorly lit for photography. Adding to the challenge, many high school sports have a prohibition against using flash. You have to do your homework. In my experience, I’ve never had a problem using flash for basketball. As long as you are shooting from an off-center angle, you should be fine. You have to be careful, though, because you don’t want to blast a player in the face with flash full, and possibly change the outcome of the game. That’s the best way to make sure they never let you in with your camera again. Flashing action on the floor? Shouldn’t be a problem. Flashing a player on the free throw line before the ball leaves his hands? Not so much. As with any type of shoot, make sure you have all of the necessary backups: batteries, memory cards, etc., as well as a backup body if possible.
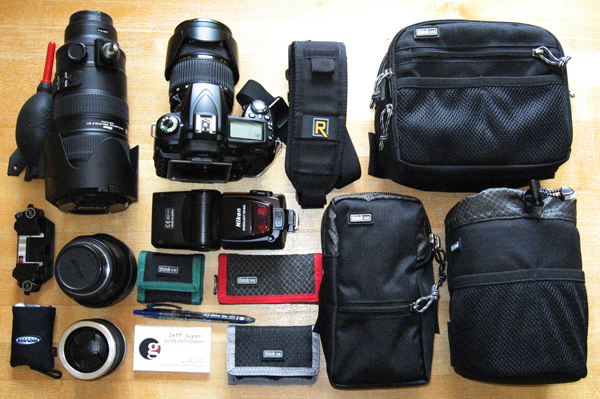
Contrary to popular belief, it is possible to travel light while shooting sports. Shown: Nikon D90, 24-70mm f/2.8, 70-200mm f/2.8, SB800 speedlight, plus spare batteries, memory cards, etc., that all pack into modular components shown for the Think Tank Pro Speed Belt.
Get There Early
Trust me when I tell you that you are going to want to get there early. Pre-game warm-ups offer some of best opportunities for quality shots of individual players. For starters, players tend to move a little more slowly in warm-ups than in the actual game. You’ll have an easier time capturing motion, and more of an opportunity to isolate individual players in the frame. You can get a little closer to the action during warm-ups, but PLEASE BE CAREFUL! Each half of the court is going to be filled with players, coaches, managers, officials, and other personnel. The players are big, fast, and not paying attention to you. Their job is to play basketball–not give you the best photo op.
Know the Sport
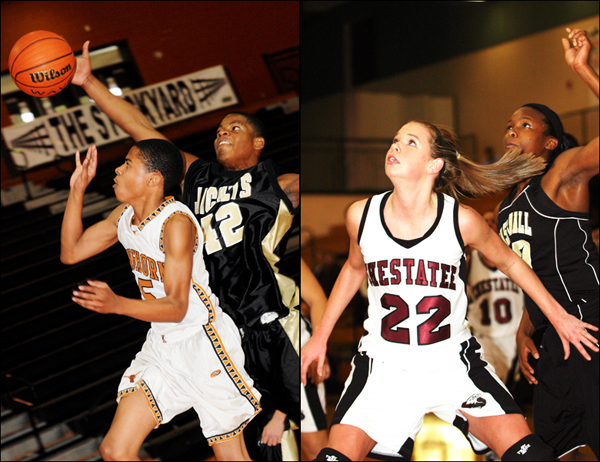
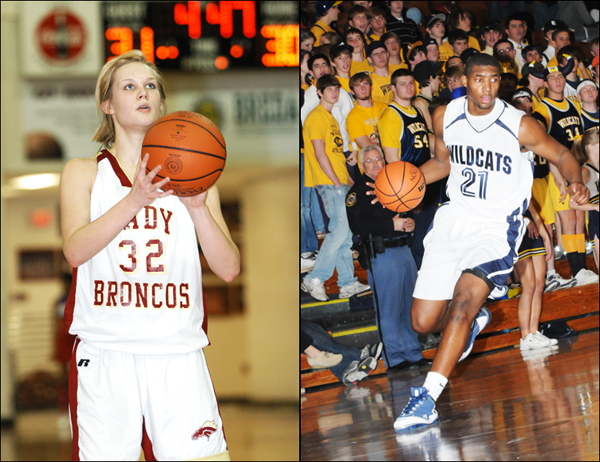
The most compelling shots will have offense, defense, and the ball. You can get good shots without the ball, but they will be better with it. LEFT: 1/250, f/5, 80mm, ISO 2000, flash. RIGHT: 1/320, f/2.8, 80mm, ISO 1250, flash.
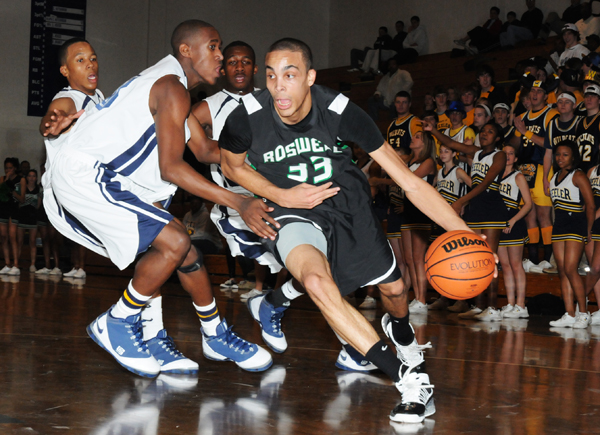
The biggest key to getting quality photos of any sport is to have a solid understanding of the game and how it is played. Every sport has a rhythm all its own. Are they playing a zone defense or man-to-man? Is it a run-and-gun, or are they burning the clock? Can #33 sink the three with impunity, or is he dishing it off to the open center for a lay-up? Do you need to be on the sidelines or under the bucket? Which side is best: the home side of the stands or the visitors’?
Remember that there is a big difference between shooting as a media photographer and shooting as a parent. As a reporter or school photographer, you are there for “the big picture.” As a parent, you are mostly concerned with getting photos of your son or daughter, and they’ll be easy to track with the number on their back. In either case, the more you understand the subtleties of the game the better prepared you will be.
Focus
When I say “focus” I’m not just talking about your photography. I tell this story a lot because I think it’s important. You have to be aware of your surroundings. I once saw a photographer stand his ground on the sidelines at a football game, despite the fact that a player was being pushed out of bounds right at him. I watched as his camera, lens, and monopod all went flying in three different directions–as he flew in a fourth. He was wheeled off the field with cuts to his face, and a leg that had been broken in two places. He was out of commission for six months. No photograph is worth that. Be safe. Focus on where you are and what is going on around you.
Now let’s talk about the other kind of focus. Obviously, it’s an action sport and you want action photos. Some of the best sports photos are those that capture the eyes. Things move fast, though, and your subjects are not always going to be standing still long enough for you to focus on their eyes. Your camera’s auto focus works by looking for contrast. Uniforms usually have a lot of contrast between the color of the jersey and the color of the numbers. If you can get the eyes, great. If not, your best bet is to try locking on either those numbers or the ball once players start moving.
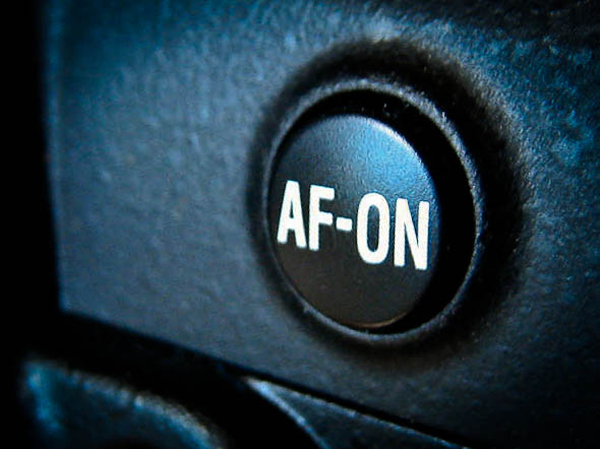
Most professional sports photographers use back-button focus.
Check your manual if you aren’t sure where to find this feature in your camera’s menus.
Try Back Button Focus
Another focus option you might wish to try is back button focus. Most DSLRs have an option that allows you to assign auto focus functions to a button on the back of the camera. When AF is linked to the shutter button, the camera continuously maintains focus as long as the shutter button is pressed halfway.
When a player passes between you and the player you’d been focusing on, your focus will be shifted to the new player in the frame. Pressing the shutter button halfway down to regain focus on your original target starts the process over again and probably means missing the intended shot. With back-button focus, however, all you have to do is remove your finger from the button when another player enters the frame. Pressing the back button again when the distracting player leaves the frame resumes your original focus.
Continuous Focus Mode
Part of the secret to shooting sports is using AI Servo (AF-C on Nikon) auto focus mode. With “one shot” AF (AF-S on Nikon) focus locks on a point and cannot move until you release and reengage the auto focus. In AI Servo (AF-C), however, the camera continuously focuses whenever you are pushing the AF button (or shutter button halfway if you haven’t reassigned it). It not only helps you lock focus, but also keep it when trying to photograph bodies in motion.
Camera Settings
As with any type of photography, there is not necessarily a “right” or “wrong” exposure. But this is a sport, after all, and if you come home with 300 blurry photos you aren’t going to be happy–nor will your editor, or your daughter, the MVP. Remember that since shutter speed controls ambient exposure, the faster your shutter speed is the better your chances will be of freezing the action. I generally like to start with a shutter speed of 1/500 and adjust my settings accordingly until I get the look I want. Since this is an indoor sport, your lighting will probably be consistent over the course of the game, unless the gym has windows. Don’t forget, though, that “consistent” can also be “consistently bad.”
If you are using flash, it’s going to be important for you to determine the maximum shutter speed your flash will allow (usually 1/250, check your manual for “flash sync speed”). Start with that and adjust your aperture and ISO accordingly. This is going to take some practice, so be prepared for some trial and error. The good news is that cameras are getting better at capturing action in low light.
Look for interesting or dramatic backgrounds, like the game clock or crowded bleachers. LEFT: 1/180, f/3.5, 135mm, ISO 800, flash. RIGHT: 1/200, f/8, 80mm, ISO 1600, flash.
Vantage Points and Camera Angles
Obviously, the closer you are to the action the better your photos . Unlike some sports, you’re going to be a bit more confined to certain areas. You really only have access to one sideline in basketball because the player benches and scorer’s table take up one complete side of the court. The end zones are often the domain of the cheerleaders, so your time there might be sporadic at best. As noted earlier, a solid understanding of the game will definitely help you decide where to be and when. This is one reason why veteran sports photographers are hardly ever in one place for very long.
Basketball is a very vertical sport, but don’t forget to get some horizontal shots as well. 50mm, 1/250, f/8, ISO 1600, flash.
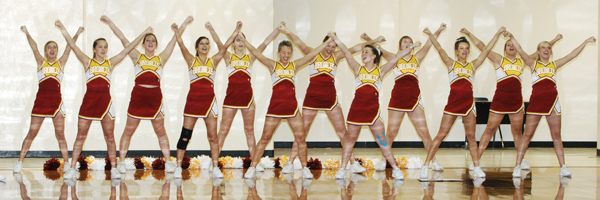
The entire length of the court opposite the player benches offers some great angles. It gives you great vantage points not only for the action on the court, but also for coach and player reaction shots on the bench. Be sure to also take advantage of higher angles from the bleachers (timeout huddles) and the track above the court (players jostling under the net), as well as getting down low for those dramatic larger-than-life shots.
Be Creative: the Action’s Not Just Between the Lines
It’s sports. They go one direction. Then they go the other direction. Four quarters of back and forth. That doesn’t mean, though, that you can’t be creative with your angles and composition. Look for interesting or dramatic backgrounds. In the set below, including the game clock over the coach’s shoulder as it ran down provided interesting contrast to his calm demeanor.
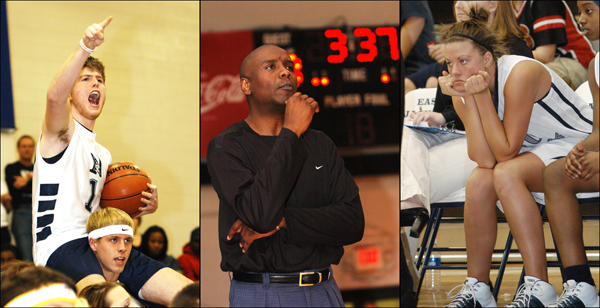
Keep your head on a swivel. Don’t miss the fans, coaches, and player reactions.
Don’t fall into the trap, though, of assuming that everything worth photographing is right there on the court in front of you. Spend some time in the stands. Shoot the crowd reactions. Photograph the band and the cheerleaders. Capture the traditions. There is so much more going on in that gym than just a basketball game. Turn your back on the action once in a while and take a look around. There are stories everywhere. Use your camera to tell them.
Get Your Motor Running?
Welcome to photography, where five photographers will give you five different answers for everything, and tell you why the other four are wrong. When I first started shooting high school sports I had a slow camera with an even slower buffer that couldn’t handle me just leaning on the motor drive and hoping for the best. I hated it at the time, but it was probably a good thing. I learned to compose my shots and choose my moments more carefully. I developed a pretty fast shutter finger, and, I think, a better eye for the action. Even now, with better equipment, I still tend to leave my camera set for single clicks. That may put me in the minority, but it’s what works for me.
Etiquette
If you are covering a particular school or team over the course of a season, introduce yourself to the coaches. Your job will be easier if they know who you are and why you are there game-after-game. These kids may be big and strong, but they are still kids and it’s a coach’s job to look out for them. If a coach or official tells you something, listen to them. If they ask you to move, you move. You’re in their house and you have to play by their rules.
If one of those rules is no flash, then it’s no flash. It may sound silly to you, but you have no idea what the consequences might be. There may be college scouts in the stands, and you momentarily blinding the point guard with your flash might have an impact on whether that kid gets a scholarship, or if he’s even recruited at all.
If play stops for an injury, show some respect and PUT YOUR CAMERA DOWN. While it might make for compelling photography, it is entirely possible that you just witnessed the end of a kid’s dream or their only chance of going to college. You don’t want them or their parents seeing you clicking away while everyone else in the gym is holding their breath. This is high school, not the NBA. Be sensitive and keep it in perspective.
Any seasoned photographer will tell you that photographing sports is not easy– particularly indoors. We can debate endlessly on which sport is the hardest to shoot, but with practice, preparation, and the right gear, you’ll see your images start to improve quickly and steadily.
Stay tuned for Part 2, where we take a closer look at some of the other indoor sports you may find yourself shooting.
For additional reading, one of the best books ever written on the subject of sports photography is “Peter Read Miller On Sports Photography.” Miller has been photographing the NFL, the Olympics, and portraits for “Sports Illustrated” for almost 40 years. He has over 100 S.I. covers to his credit, as well as 35 Super Bowls, 9 Olympic Games, and countless other sporting events around the world. You can check out my review of the book, as well as my conversation with Peter, by clicking here. The book is available on Amazon.com.

