
Softbox photography looks incredible – but what is a softbox? What does it offer? And how can you use one for stunning photos?
In this article, I share everything you need to know about softboxes, including:
- Why softboxes are so great for photos
- How to use a softbox, even as a beginner
- Plenty of softbox lighting examples (with lighting diagrams)
That way, by the time you’re done reading, you’ll be ready to capture softbox images like a pro.
Let’s do this!
What is a softbox?
A softbox is a lighting modifier that mounts over a flash or studio strobe, and it diffuses, directs, and more evenly distributes the light.
Softboxes look like this, though you can purchase softboxes in plenty of other (larger and smaller) sizes:

Also note that softboxes come in wider (e.g., square) and narrower (e.g., strip) varieties, though this article mostly focuses on the standard 4:3 version.
Softboxes are just boxes covered with diffusion fabric. They’re often fitted with silvery material on the inside to help bounce the light around and ensure it spreads evenly through the diffusion fabric at the front.
When light passes from a flash or studio strobe into the softbox, the diffusion fabric effectively becomes your light source; in essence, the light source becomes bigger, which turns the light quality from hard to soft (hence the “softbox” name).
Why are softboxes so good for photography?
As I emphasized in the previous section, softboxes create soft light.
And, generally speaking, softer light is flattering, while harder light is not. Hard light features intense shadows and high-contrast effects, and while there is a time and a place for hard light, most subjects look far better when illuminated by beautiful, soft, softbox light.
This is true for products, it’s true for flat lays, and it’s especially true for people, which is why softboxes are hugely popular among portrait photographers.
Of course, a softbox isn’t the only method of softening the light – you can use umbrellas, octaboxes, beauty dishes, and so much more – but it offers a few key advantages, especially for beginners.
First, softboxes create a beautiful soft effect right out of the box, one that looks great on pretty much any subject. Softboxes are also easy to control; yes, the light is soft, but it doesn’t go everywhere, in contrast to lighting modified by an umbrella.
Softboxes are also reasonably sized and – this is a big one! – reasonably priced. You can grab a nice softbox for under $50, especially if you don’t need it to be huge and/or portable.
At the end of the day, softboxes are insanely easy to use, which is why I recommend them to beginners – but they’re also powerful, and nuanced, and capable of creating pro-level images, which is why they’re also great for professionals.
And as I explore below, careful setups featuring a softbox or two will create beautiful, soft light that suits just about any subject you can think of.
How to use a softbox: the basics

Getting started with softbox photography is easy. In addition to a camera and lens, here’s what you’ll need:
- A softbox
- A flash or studio strobe (on a lighting stand)
- A flattering backdrop
You can capture softbox photos of most studio subjects; while I reference portraiture in the ensuing discussion, the principles are similar or identical for products and still life scenes.
Start by mounting your softbox to your light source. Make sure the light source – whether a flash or a studio strobe – is mounted to a sturdy lighting stand.
Then position the light near your subject (which should in turn be positioned a few feet in front of the backdrop). I’d recommend you start with a 45-degree angle, which will create a flattering sidelit effect without adding too much contrast and drama (though feel free to experiment by moving the light source back and forth in front of the subject).
Note that the distance between the softbox and the subject is important. The greater the distance, the harder the light will become, while a close softbox will enhance the soft effect. Of course, adjusting the softbox distance will also affect the size of the illuminated area (e.g., a close softbox may only light a person’s head and shoulders, while a distant softbox may cover a whole group).
My recommendation? Start by placing the subject a few feet from your subject; that way, you’ll get a soft effect and plenty of illumination.
Next, turn on your light and choose a power setting. Picking randomly is okay.
Then turn on your camera, compose a shot, and adjust your camera settings. I’d recommend using your camera’s native ISO (usually ISO 100), a relatively narrow aperture (such as f/8), and your camera’s flash sync speed (often 1/200s or so).
Finally, take a test shot, then review the results on the back of your camera. If you can, check the camera’s histogram (and once you get serious about studio portrait photography, I highly recommend camera tethering).
If your exposure looks great, then you’re good to go; you can have some softbox fun! However, if your exposure is not perfect – as is often the case – you’ll need to adjust your lighting power up or down to compensate for any issues. Then take another test shot, review the results, and so on, until you get a perfect exposure.
And that’s it! That’s the softbox photography basics. Once you can set up consistently good exposures and you know how to get a decent look with a softbox, you can start adjusting your light position, you can add a reflector, and you can even add additional softbox-modified lights. With softbox photography, the sky is the limit!
6 softbox lighting examples to elevate your images
Have you mastered the softbox basics? Are you looking to use softbox lighting like a pro?
In this section, I share six of my favorite softbox lighting setups (with both diagrams and example images so you know exactly what to expect). I highly recommend you practice each lighting setup until you can do it smoothly and effectively – then start making subtle modifications to achieve additional unique looks.
Note that a few of these setups do use a 5-in-1 reflector, but you can always make one of these yourself using a piece of white poster board.
1. Frontal loop lighting
To get a flattering, three-dimensional image, position the softbox a foot or two in front of your subject, then move it slightly to the side:

(You don’t need a white backdrop, though it often does look nice!)
The offset light will create soft, subtle shadows on your subject’s face, adding a bit of drama and depth. But because the shadows are rather small and subdued, this is a great softbox setup for family portraits and other standard portrait sessions.
Note that the subject’s nose shadow should fall slightly down and to the side, creating a “loop” (hence the pattern’s name, loop lighting). Here are a few example loop-lit images:

2. 45-degree loop lighting
For this softbox lighting setup, the goal is to create a more dramatic loop-lighting effect. Instead of positioning the softbox in front of your subject, you’ll want to move it about 45 degrees to the side (just as I discussed in the softbox basics section, above). Then elevate the softbox slightly, so it’s pointing slightly downward, and keep it close to the subject’s face:
The result is a softly lit portrait with more shadows on the face. Notice how the loop shadow beneath the nose is still present:

One final note: As you can see in the lighting diagram, I moved the subject away from the backdrop, which caused the light to fade into darkness.
3. Loop lighting with a reflector
This setup is almost the same as the previous setup, except the softbox is slightly farther away and there’s a white reflector at camera right:

Pushing the softbox back a few feet will reduce the speed of the light falloff, so the shadows will dominate less. The reflector will also help reduce shadow presence.

4. Clamshell lighting
This is a classic glamour setup, and it works great with a medium-sized softbox.
Simply place your softbox directly in front of and above your subject (it should be pointed downward at 45 degrees). Then place a reflector in front of and below your subject (it should be pointed upward at 45 degrees). The two items should form a clamshell shape, which is why this pattern is often referred to as “clamshell lighting.”

The result is a flattering, well-lit portrait setup that’s perfect for fashion and glamour photography:
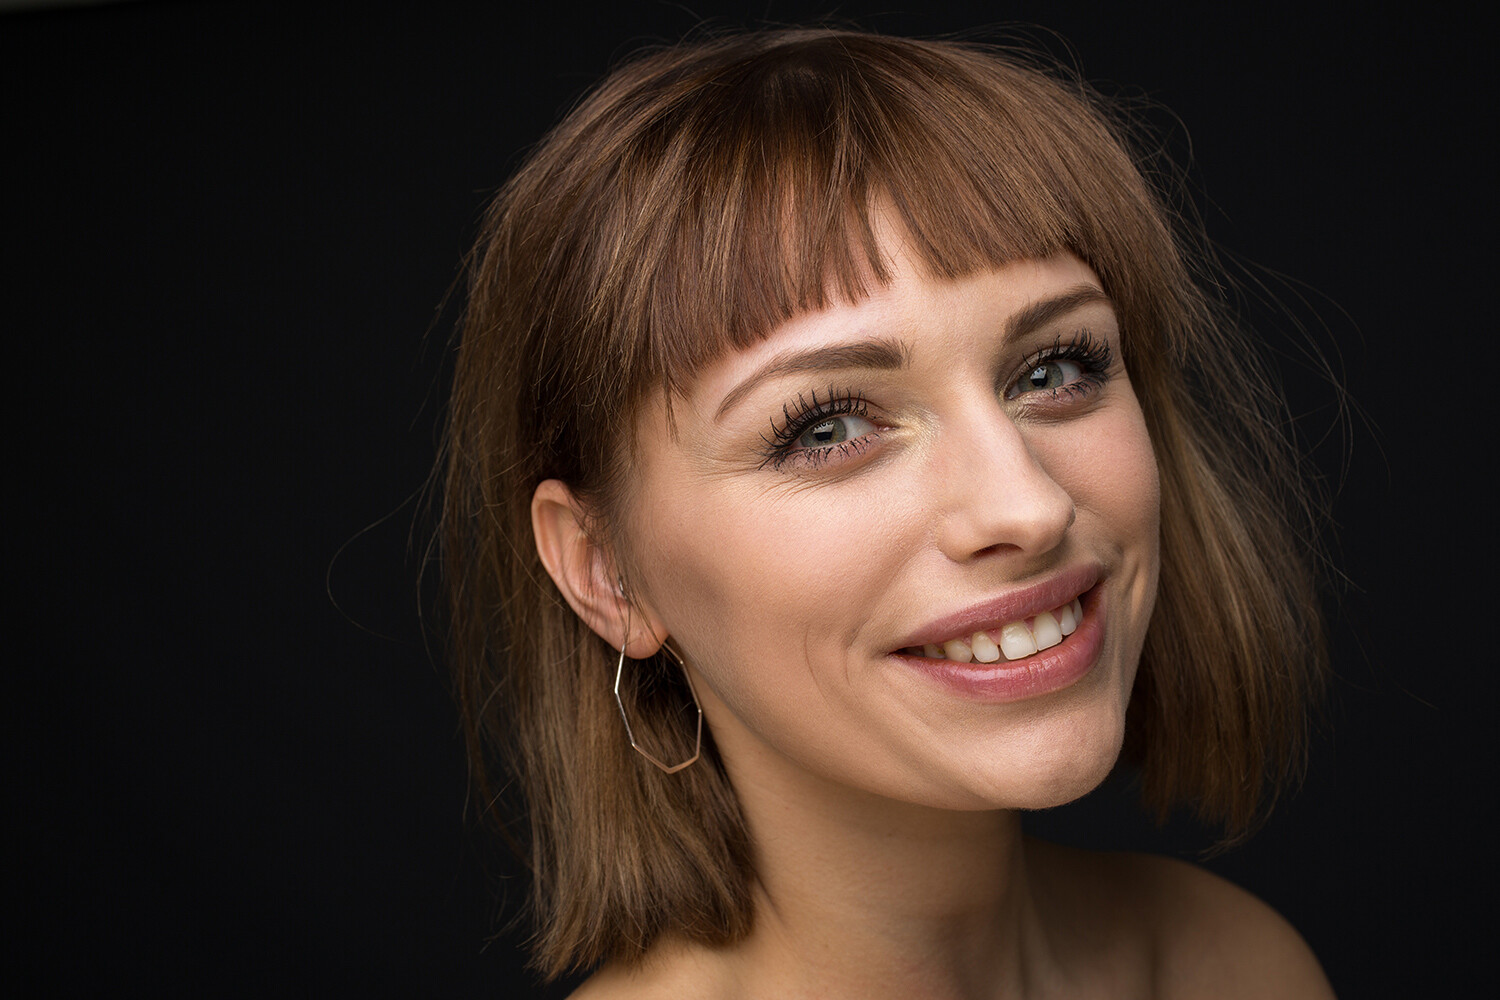
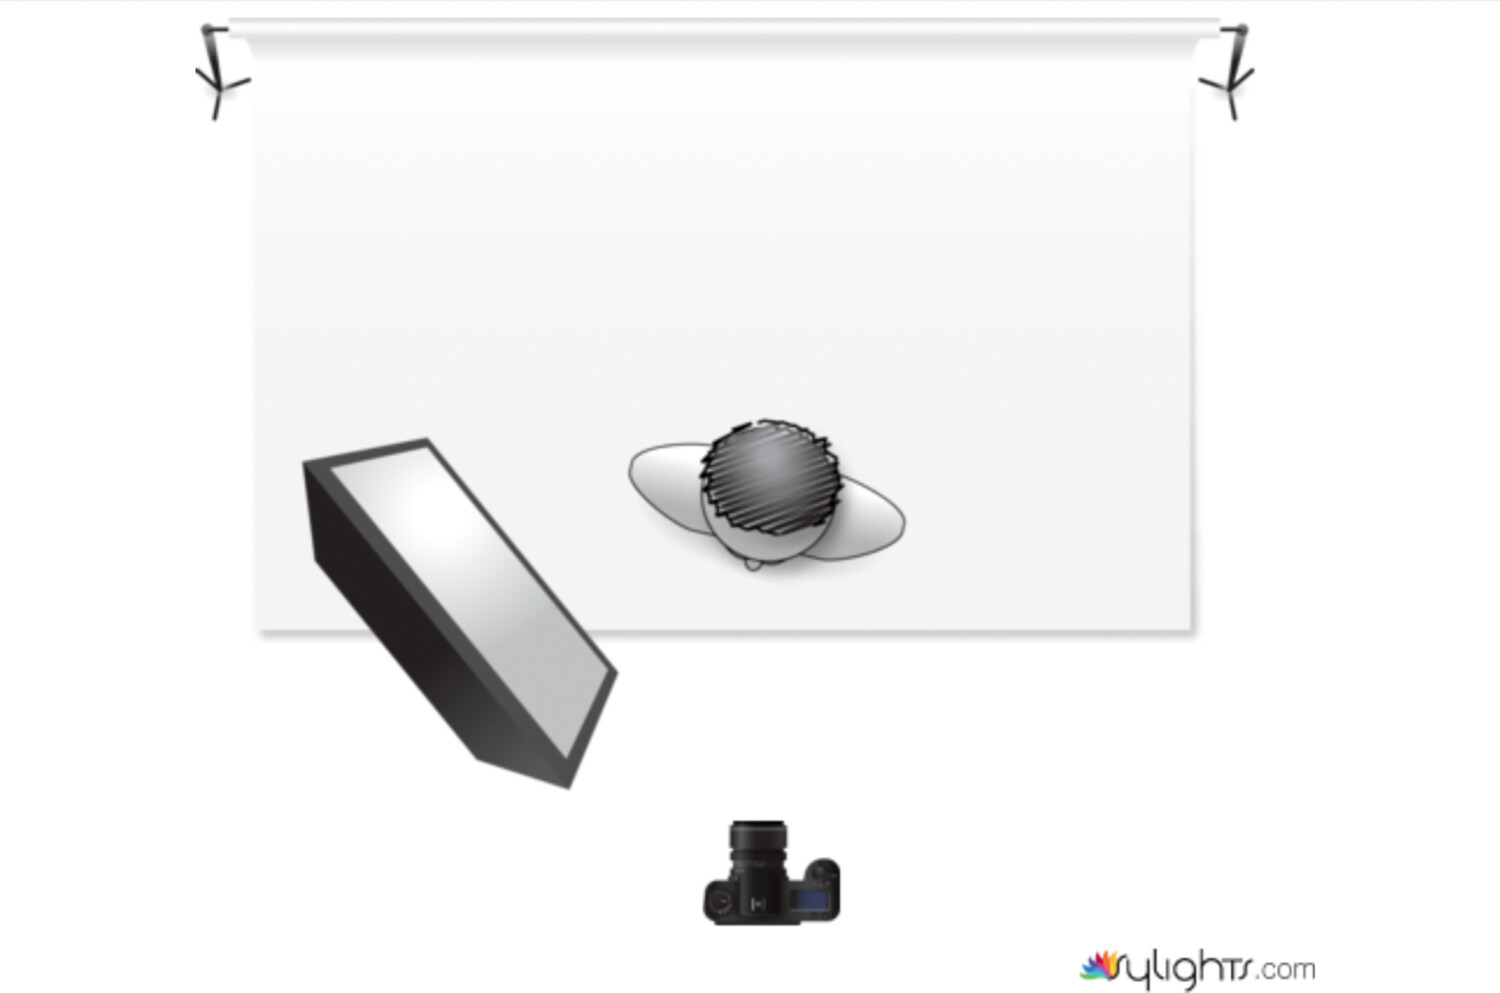
5. Soft sidelighting
Here’s another easy softbox photography setup – one that guarantees a moody, shadowy shot:

Put the softbox off to the side of your subject (so that it’s sitting at 90 degrees in relation to the camera). Then ask your subject to turn toward the light:

Have fun experimenting with slightly different head turns!
6. Distant softbox
For each of the previous examples, I suggested keeping your softbox close to the subject. But if you’re after more intense lighting, you might try pulling back the softbox:

Be sure to pay attention to the transitions between the shadow and highlight areas:

Softbox photography: final words
Softboxes are powerful lighting modifiers – and as you now know, you can use a softbox to create all sorts of beautiful images!
So purchase a softbox, then start practicing. And have plenty of fun along the way!
Now over to you:
What type of subjects will you shoot with a softbox? Which of the softbox lighting setups did you like most? Share your thoughts in the comments below!

