
When I first started out in photography, I was told that shooting in RAW was a waste of time. “You won’t need all that information. Shoot in JPEG; it’ll save space.” Unfortunately, that advice, while well-intentioned, wasn’t right for me – and it probably isn’t right for you, either.
Yes, it’s true: JPEGs are far smaller than RAW files (and they require less post-processing work, too). But RAW files come with several outstanding advantages that are especially valuable to landscape photographers. In fact, if you’re a landscape photographer and you’re not shooting in RAW, I encourage you to head over to your camera right now, find the Image Quality setting, and change it to “RAW.” Working this way will be a game-changer, and while you will likely need to grab an external hard drive to handle all those big files, you certainly won’t regret the shift.
Why is RAW so great? In this article, I share my top five reasons why every landscape shooter should work in RAW, starting with:
1. You get extra detail

As I mentioned above, RAW files are bigger than JPEGs. But this isn’t because they contain unnecessary data; instead, it’s because the RAW format doesn’t discard image information that’s captured in the scene. When you shoot a JPEG, however, the JPEG algorithm tries to discard information without changing the way the image looks. That is great for saving space on your memory card, but not so good if you intend to edit your images in Lightroom, Adobe Camera Raw, or other RAW processing software.
The reality is that your camera can capture lots of data that never makes it to the JPEG file – but if you shoot in RAW, you’ll retain the data, which in turn gives you much more flexibility when editing. On average, a normal JPEG file will be a handful of megabytes, but the same image shot on the same camera in 14-bit lossless RAW format will be far, far larger (often 25 MB, 50 MB, or even 125 MB).
While you often won’t notice the loss of data when comparing a RAW file and a JPEG straight-out-of-camera, that extra information often proves critical in post-production. You can get so much detail out of a RAW image – when pulling back blown-out highlights and bringing back detail in the shadows – that would be impossible to recover in JPEG format.
Here’s an underexposed image that I captured in RAW:

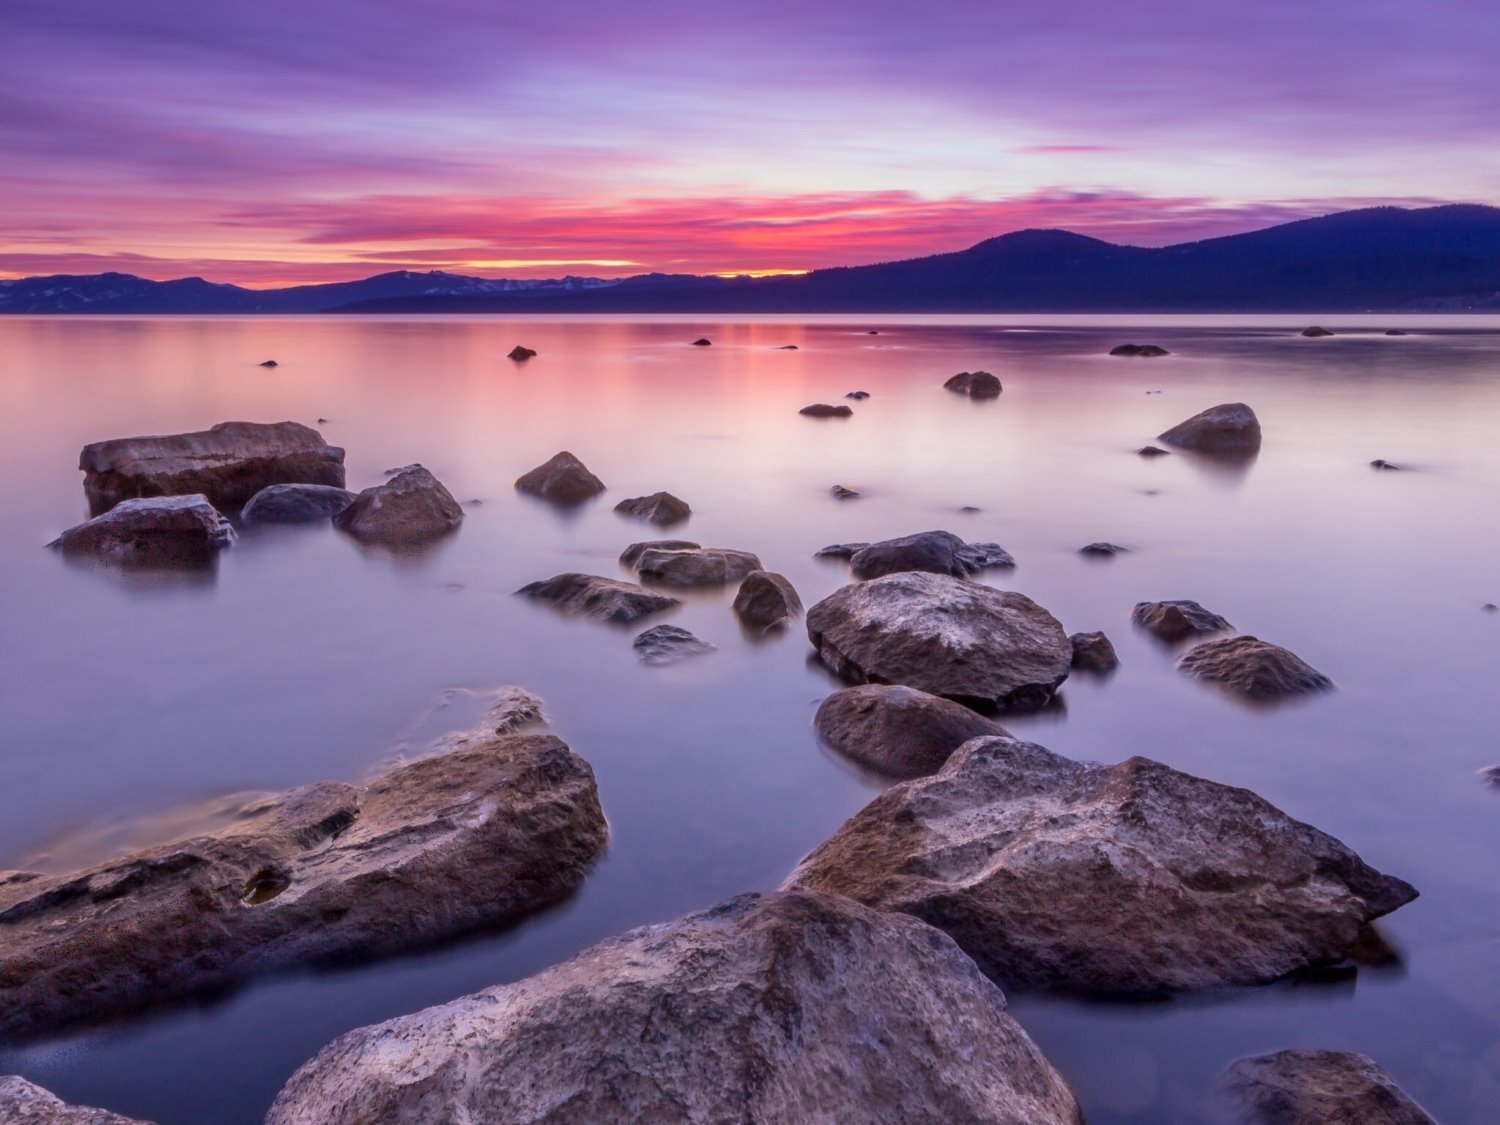
And here’s the same image after a bit of tweaking in Adobe Camera Raw, Photoshop’s RAW processor:

This doesn’t mean you should be sloppy and not pay attention to your exposure, but it does mean that in tricky lighting conditions, you will be able to get a shot that’s usable (even without using HDR techniques). And because landscape photography often deals with high dynamic range scenes, a RAW file is often the difference between a keeper and a reject.
2. You have more flexibility with colors

JPEG files save fewer colors than RAW files. Therefore, by shooting in RAW, you’ll capture as much color information as possible – which can then make a big difference when processing your images.
You see, while JPEGs do contain plenty of colors for most scenarios, you may start to notice a banding effect when colors are gradual, such as in a beautiful pink sky. This can become especially noticeable if you try to adjust the colors during post-processing; as you push the colors of that pink sky, banding will become more and more obvious, until your image is unusable.
And if you’re shooting a landscape scene, you undoubtedly want to get as much color information as possible. That way, you can make subtle color adjustments in post-processing, such as color shifts (e.g., turning a blue sky more purple) that help unify the scene and create a refined effect.
Note that RAW files are designed to look rather flat, so it’s important that you do a bit of color adjustment to pretty much every RAW landscape photo that you take. It’s often enough to simply boost the Vibrance or Saturation slider until the scene looks the way you remember it:

3. You can capture cleaner images

The exposure refers to the overall brightness of your scene, and in general, the best exposures feature detailed highlights, midtones, and shadows.
But in recent years, some photographers have started using a technique called expose-to-the-right (ETTR). Basically, by deliberately overexposing your images, you can ensure that as little noise as possible appears in the shadows for the sharpest, cleanest results. (Of course, you won’t want to leave your images overexposed; you’ll need to drop the exposure back down in post-processing!)
Now, the ETTR technique technically works when shooting in RAW or JPEG. However, if you try the technique on a JPEG file, you’ll have far less latitude, and it’s very easy to expose too far to the right and lose key details.
RAW files, on the other hand, handle the technique far better. You can push the exposure further, and once you get back home and process the shots, you’ll have plenty of gorgeous images that are full of beautiful detail!
4. Your images will be future-proof
What’s the best part about RAW files? They give you flexibility. When processing a landscape shot, you’ll have tons of information to work with, and you can use that information to create the best possible image.
Even if you try editing a RAW file and a JPEG file side-by-side and don’t notice a huge difference, it’s difficult to predict the sorts of editing tools that’ll be available down the line (and it’s difficult to predict the editing style that you’ll find interesting in a few years, too). You don’t want to shoot JPEGs because they seem sufficient in 2023, only to realize – five years later – that you could really use some extra detail.
I myself have gone back and reworked older images in light of new editing tools, and because the RAW file had lots of information, the added functions brought out the best of that scene!
5. You get the best quality

Every RAW image must be edited; there’s no way around it. RAW files aren’t displayable on browsers, plus they’re huge and difficult to send over email. Instead of trying to display RAW files, photographers edit in RAW, then convert the image to a JPEG (without destroying the original file!) for sharing.
Therefore, editing a RAW image is a two-step process. The first step is working on it via a RAW processor. (Lightroom can handle RAW images, as does Adobe Camera Raw and many other image editors.)
Then you must convert the file. If you plan to work on it in Photoshop, you can convert it to a PSD – and if you plan to share the photo directly, you can simply convert it to a JPEG.
Personally, I like to work on my images in Photoshop, and it’s only if I’ve first done some RAW processing that I know that I’ll have the best possible image quality to work with. And remember: image quality is basically the holy grail of photography. Ask any photographer what’s most important to them, and it will often just boil down to image quality.
(To be clear, when I say “image quality,” I’m talking about sharpness, noise, dynamic range, color, tone, chromatic aberration, and so on. Anything that adds to the overall look and feel of the image.)
Here’s what I’m getting at: If you carefully work on a RAW file in your RAW processor and then edit it in Photoshop, the image quality will be fantastic if you work carefully in your RAW converter and edit well in Photoshop. You can get good image quality in JPEG, but you will be able to squeeze that much more out of the image if you shoot in RAW.
RAW landscape photography: final words
RAW is a great format to use no matter the type of images you shoot; whether you do fashion, food, architecture, or portrait photography, I’d really recommend considering a RAW workflow. However, RAW is especially essential for landscape photographers. A RAW file will contain key details that you simply cannot recover from a JPEG, which will let you capture sunrises, sunsets, and other high dynamic range scenes in a single shot.
Remember, however, that RAW will require a different post-processing workflow. You can’t upload a RAW file straight to social media – instead, you’ll need to spend time carefully processing each shot. It’s the cost of working in RAW, but the benefits are truly incredible!
If you’re skeptical, why not test it out for yourself? Shoot some high dynamic range scenes as RAWs and JPEGs. Then compare them side by side. Try adjusting different editing sliders and see if you can recover lost details. I bet you’ll be impressed by the RAW files!
Now over to you:
Do you plan to shoot RAW in your landscape photography? Why or why not? Share your thoughts in the comments below!
Table of contents
Landscape Photography
- GENERAL
- PREPARATION
- SETTINGS
- 5 Tips for Setting the Focus in Your Landscape Photography
- 5 Reasons To Should Shoot Your Landscape Images in RAW
- LIGHTING
- COMPOSITION
- GEAR
- ADVANCED GUIDES
- CREATIVE TECHNIQUES
- POST-PROCESSING
- INSPIRATION

