In the following post I’m not going to remind you again that you need to bring your tripod with you. I’m not here to warn you that weather is unpredictable and you should check the latest forecast before heading out the door.
Nope this post won’t cover the fact that you should bring a flashlight and a few other miscellaneous tools just in case something goes wrong. And of course I won’t be telling you that you should tell someone where you’re going and when you’ll be back incase you do get lost, hurt or otherwise incapacitated and need help getting home.
Instead of rehashing the basics or providing some motivational tips to get you off the couch I’m going to show you three ‘behind the camera’ photographs that I took with my iPhone, share the final shot, and talk a bit about how I made each image.
Sound good? Okay let’s start!
First Up – A Small Cascade Near Trap Falls in Ashby MA
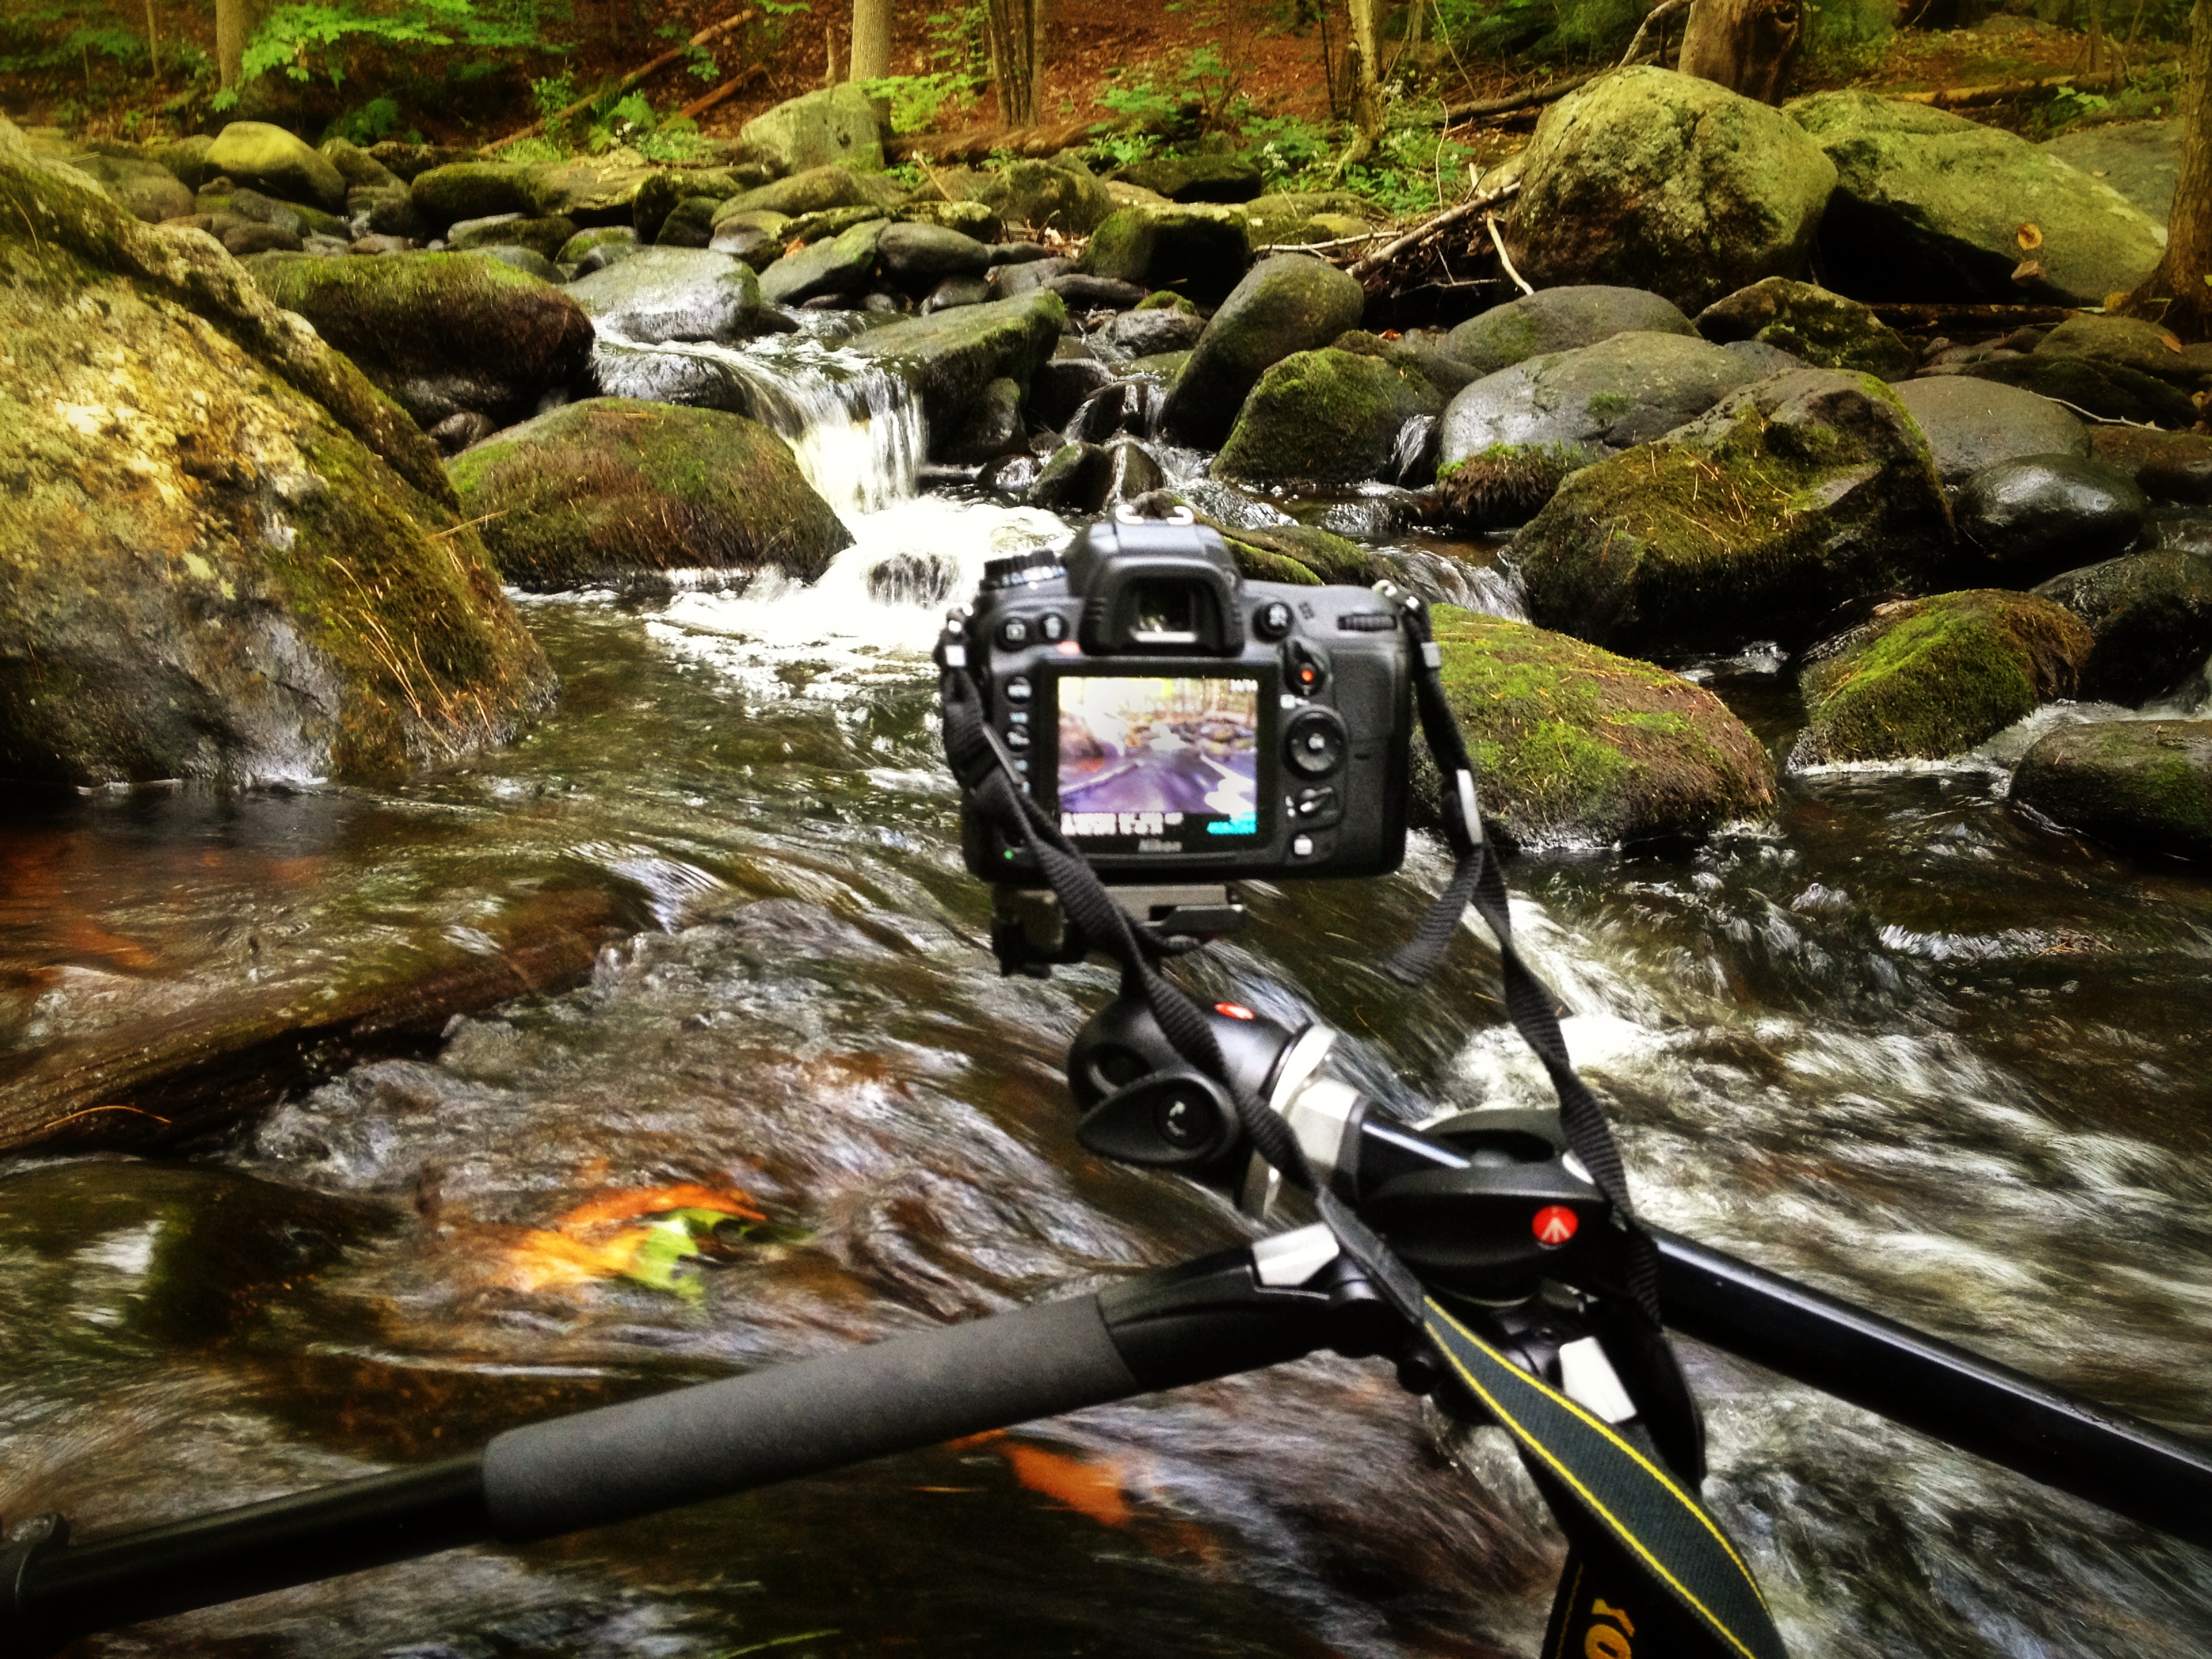
As you can see the camera was positioned as close to the water as I could comfortably get it – one wrong move and it’s all over for me and my love of photography.
So does the fear of putting my camera in the drink stop me from attempting to grab a photograph? Not in the least!

This shot was something I saw from 100 yards up the bank of the river. I noticed the cascade and knew that it’d be the perfect place to set up my D7000 and Tokina 11-16mm, but how was I going to get into the middle of the river?
As I got closer to the scene I noticed that there were a few wet stones no larger than an iPad leading out into the middle of the river – right where I wanted to be. All I needed was a little balance and some luck and both my camera and I would make it back to the shore dry and one ‘keeper’ richer.
Standing on a rock in the middle of the river the size of an iPad is no easy task and trying to fiddle with camera settings and frame a shot doesn’t make it any easier. I used the Manfrotto’s center-column design, which allows you to swing the center column out so that it is parallel to the ground, to get as close to the water as I could, and I used the live view feature on my DSLR to frame the shot and achieve perfect focus.
After taking a few test shots and fine tuning my exposure I settled on the following settings for the shot: ISO 100, 11mm, f/14, 13.0 seconds. (Note: There is also an ND filter in play here which allows for the longer exposure time).
Next Up – A Stunning Sunset at Stony Brook in Norfolk MA
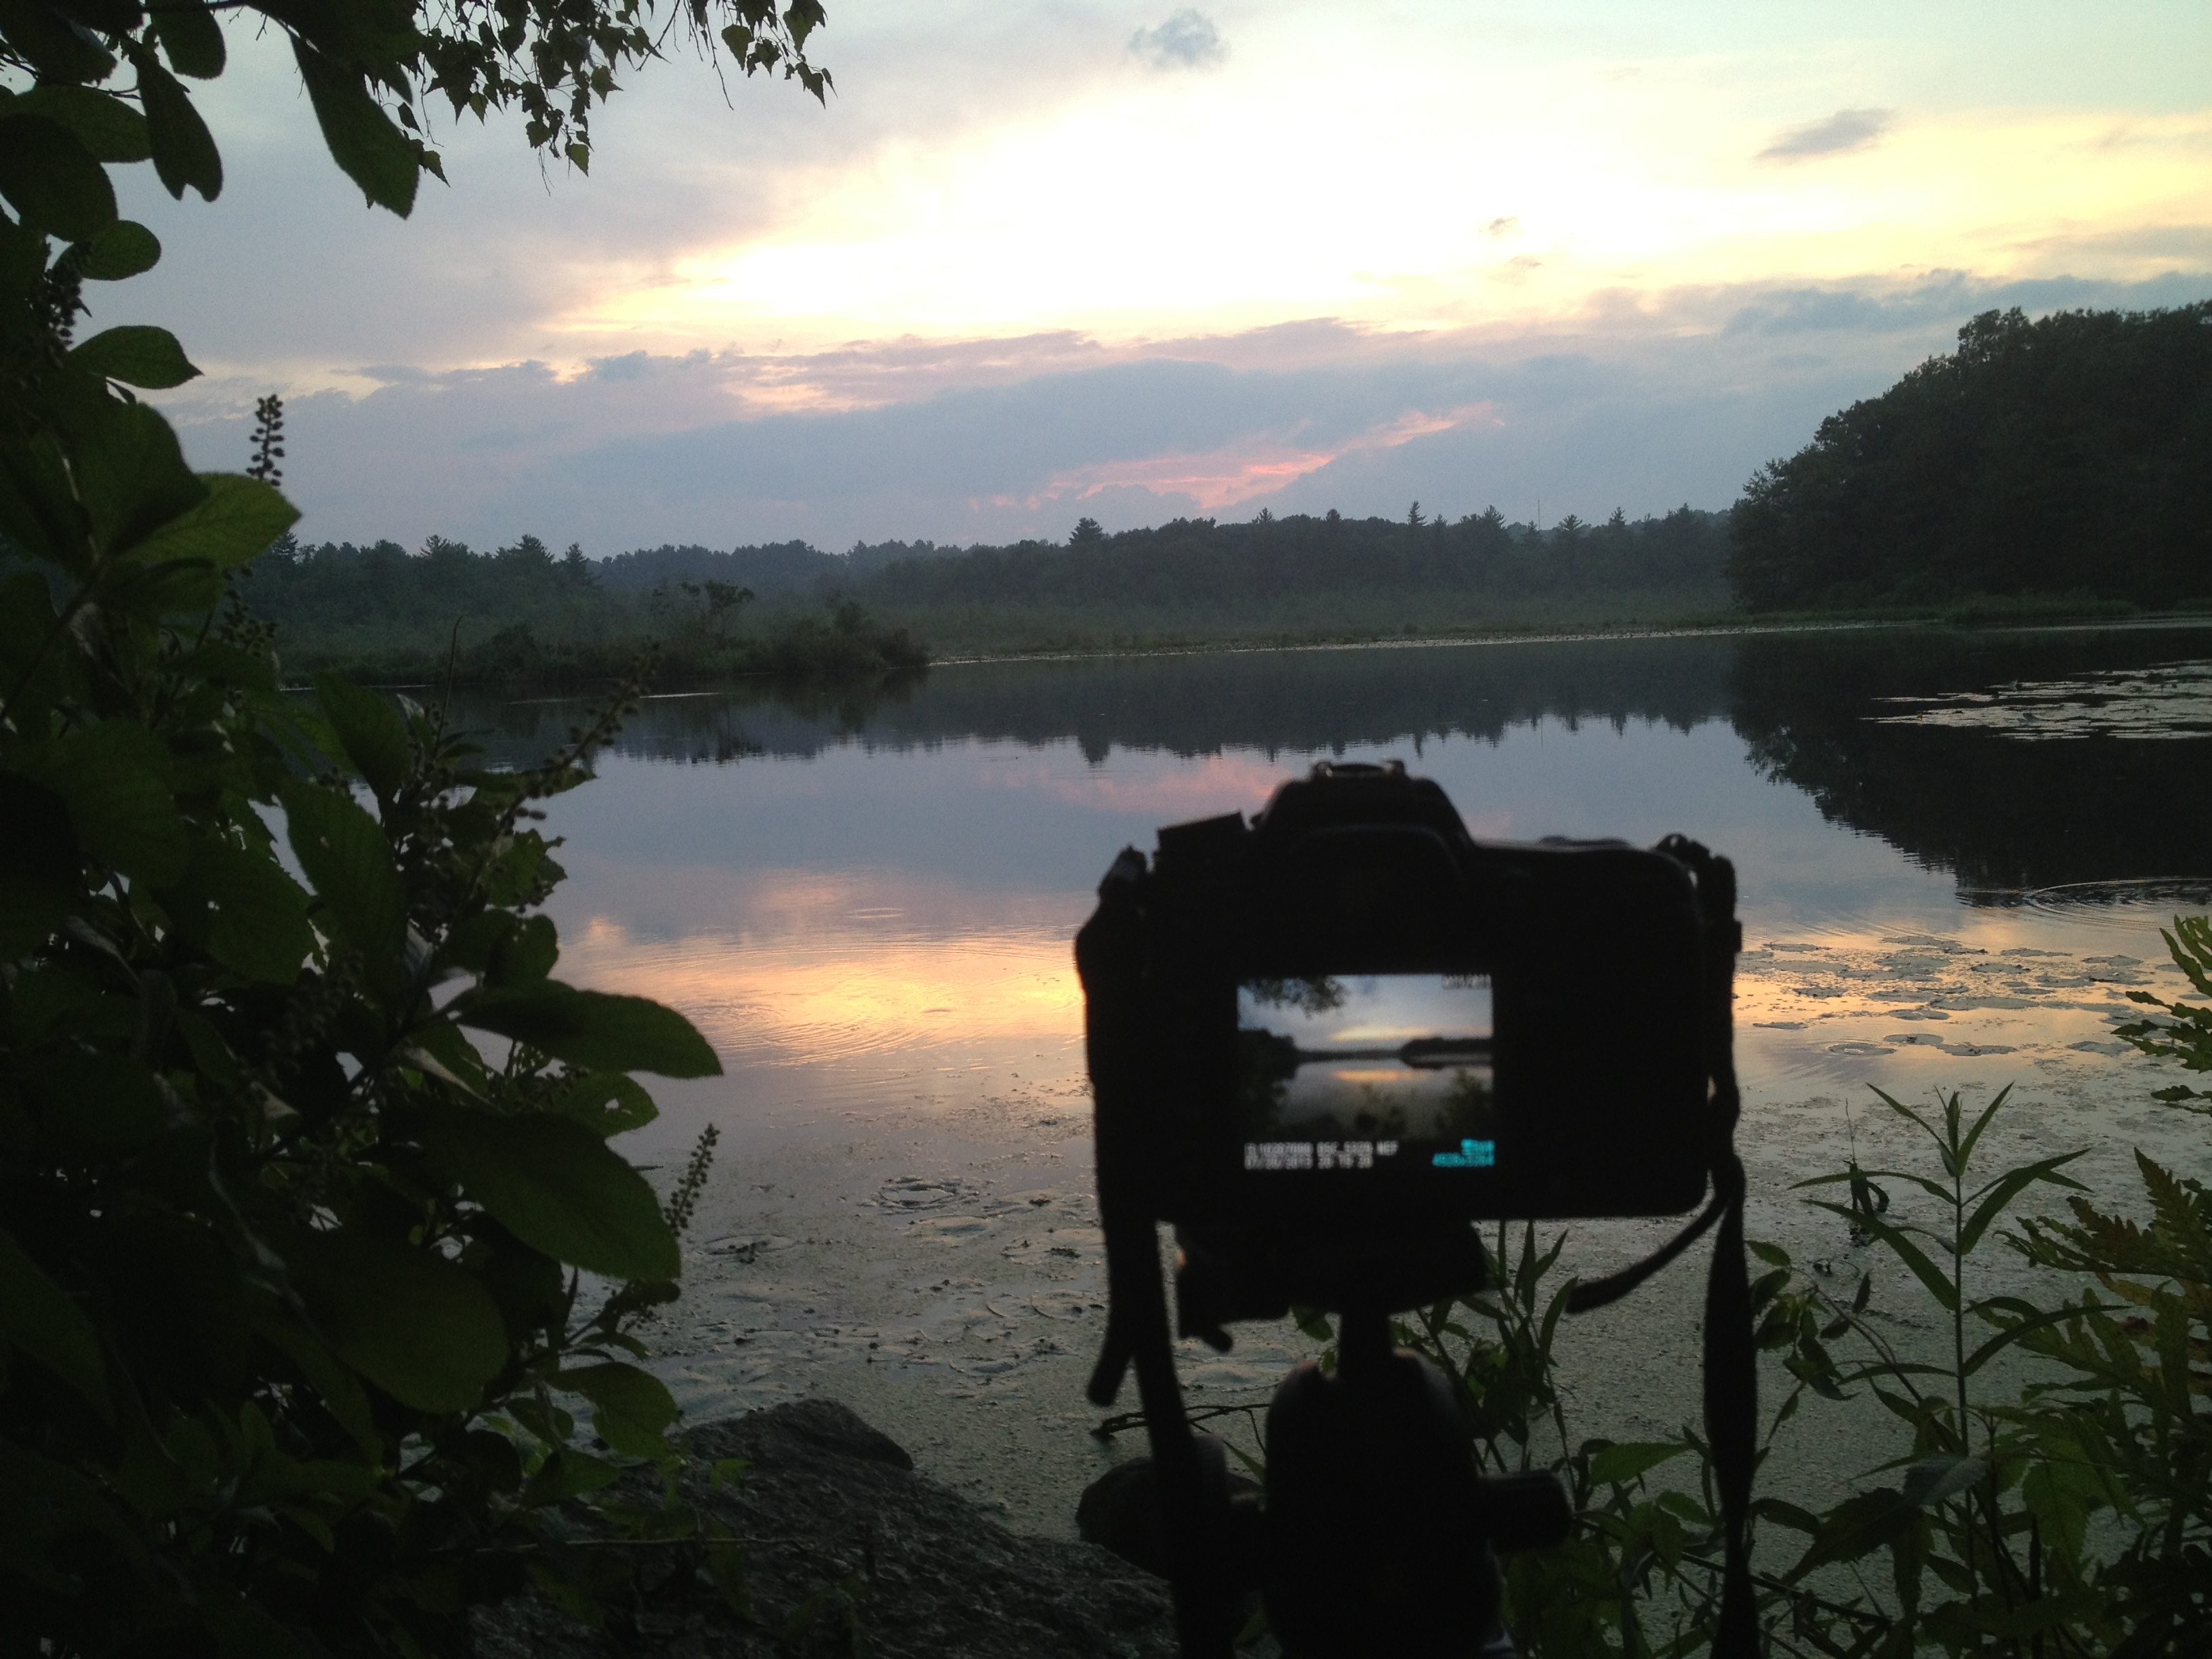
Okay so this photograph probably isn’t even close to as dramatic as the one above, but it is still able to show you a bit about my thought process when capturing photographs. I could have photographed this scene further back from a nice easily accessible lookout, but I clambered over rocks and got as close to the shore as I could.
By positioning the camera on the tripod I was freely able to adjust the settings and fine tune the exposure and composition of the shot. The settings I used here were: ISO 100, 36mm, f/10, 1/160.

Finally – Capturing Lightning Out Of My Window
Here in south eastern New England we don’t get all that many storms and due to the tall trees and densely populated urban areas it’s not easy to get a clear view of the sky when they do occur.
After hearing my phone alert me to a sever thunderstorm watch that was in effect until well after dark and a quick look at the radar confirmed that it looked like it would pan out. I quickly decided to get a plan together to capture my first lightning bolts as a photographer.
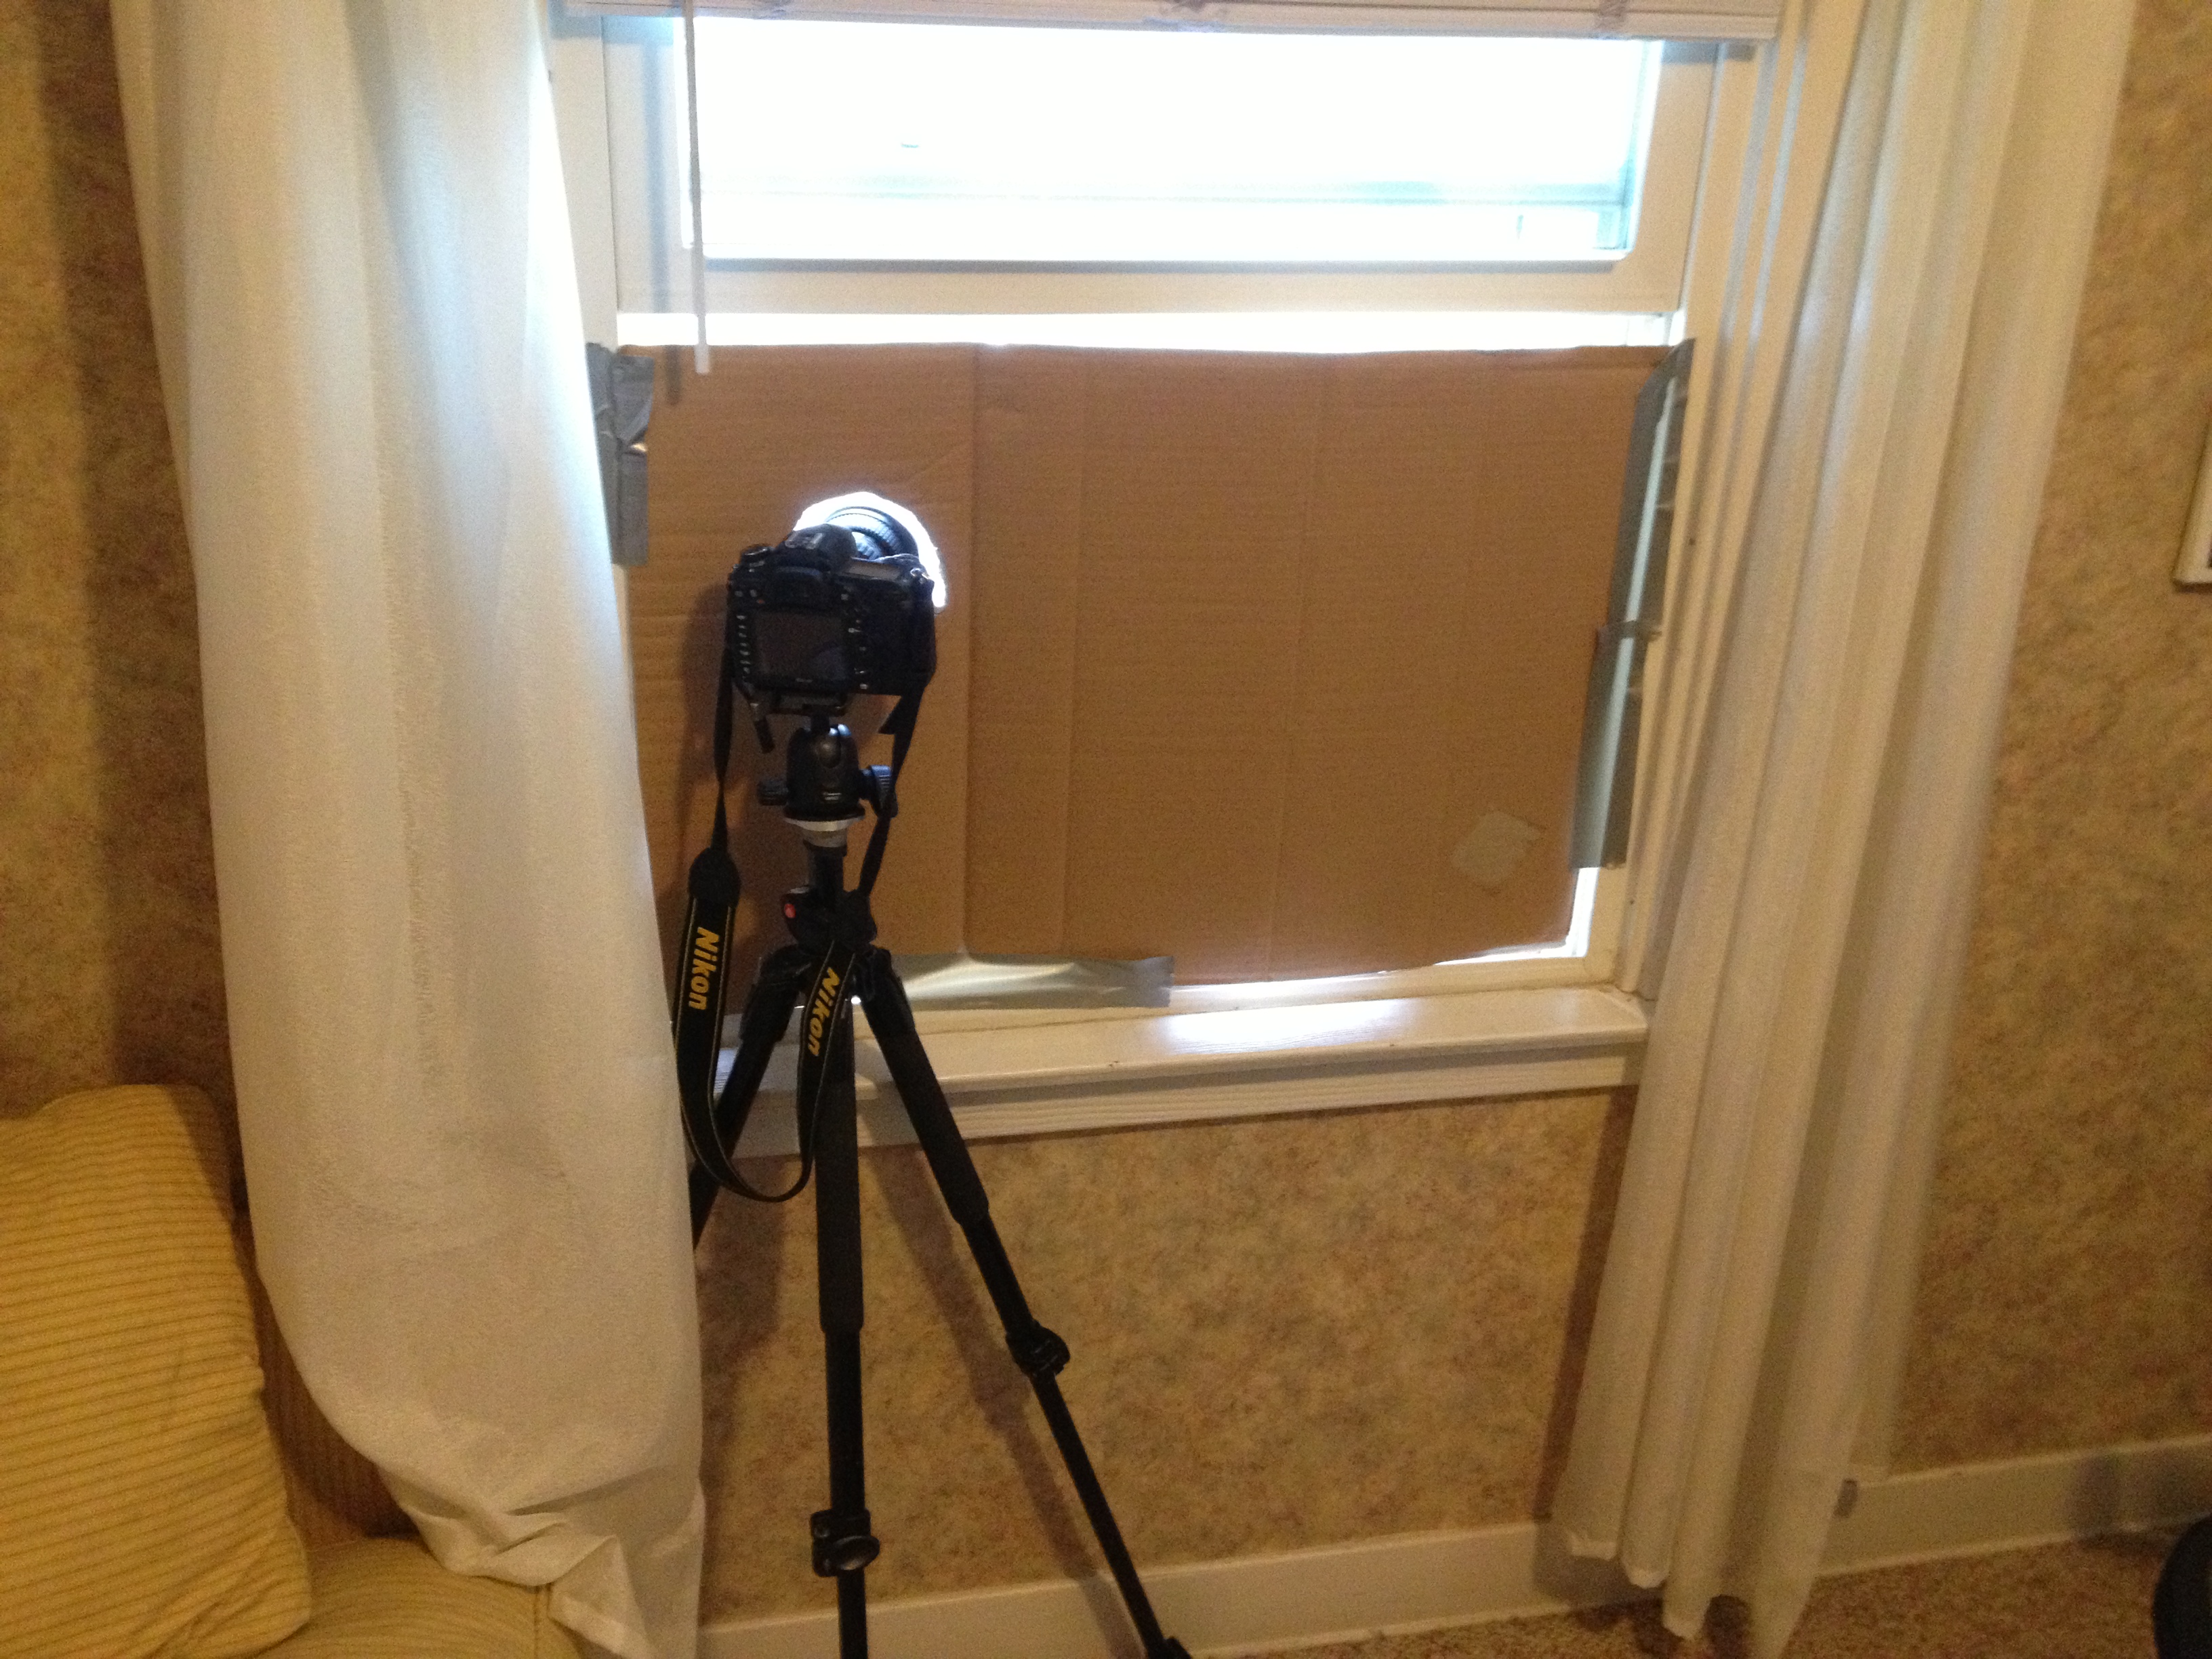
With a couple hours of notice I was able to get really creative with my set up. I found a piece of cardboard and some duct tape to make a makeshift shelter for my room and the rest of my camera. I knew I wanted to open the window and the screen to get as clear a sight line as possible, but I didn’t want the rain or mosquitos to get into the house. (If you’re curious I finished sealing the cardboard after I took this photo).
I made sure to set my focus while I still had daylight to work with as it would get difficult to do so when darkness hit. I used my ND filter to lengthen the shutter speed which would hopefully allow me better chances to capture bolts of lightning and locked down my settings as follows: ISO 100, 13mm, f/9.0, 20.0 seconds.
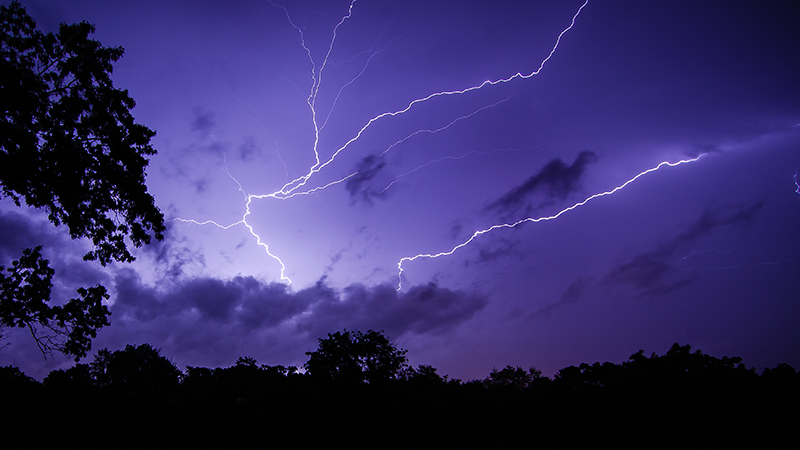
Once everything was set up all that was left to do was wait for the storm to get close. As soon as I heard the first crack of thunder I set the Nikon’s intervolometer to capture an image every 25 seconds for about an hour or so, turned out all the lights in my house, and went to bed.
A few hours later, after the storm had long passed, I woke up curious to see if my trap had worked. The end result was a handful of lightning bolts frozen in time – this is one of my favorites.
Do you have any behind the scenes stories to share?
Tell us about how you captured one of your favorite shots in the comments below!


Some Older Comments