Continued from Part One of your guide to outdoor photography. Once you’ve arrived at a good shooting spot it’s time to begin.
Shooting mode

As outdoor photography incorporates a wide selection of genres you’ll find Manual mode will offer you the most flexible and convenient grounds for setting and changing values on the go. But Manual mode isn’t for everyone, so if you’re not feeling confident enough yet, try using a semi-manual mode. Aperture Priority is great if you want to control the depth of field of your image, for example if you want the majority of the scene to be sharp and in focus. This is helpful when you’re shooting a landscape for example, simply plump for a smaller aperture (larger number) such as f/11. However if you want to soften the area around the subject, to focus attention on one part of the scene or subject; such as the centre of a flower or the tip of a mushroom, then you’re better off using a larger aperture (smaller number) such as f/5.6.
Shutter priority is ideal for long exposure landscapes when you want to incorporate some ‘movement’ into the frame, for example clouds travelling across the sky, a river flowing down stream or tree branches swaying in the wind. Opt for a slow shutter speed here (but use a ND or polarizer filter if it’s a particularly bright day so that you don’t risk overexposing). If you want to freeze a subject on the other hand, a wild animal for instance, then dial in a fast shutter speed to avoid blur.
Shoot in RAW if your camera permits, as this will allow greater ability to perfect colours, details and exposure post-shoot.
Avoid camera shake
Using a long exposure means keeping the shutter open for a lengthy period of time, and the slightest knock during this window can result in detrimental camera shake. The first step is to use a tripod or rest your camera on something sturdy such as a wall or bench. Then with your shot composed the next step is to fire the shutter using a remote control rather than pressing the button; as even the lightest of touches can result in the camera moving. Wireless and tethered controls are available, and many contemporary cameras can be fired using a Smartphone or tablet. Alternatively you can program the self-timer to start the exposure. If it’s windy, or you are particularly heavy-handed, then set a longer timer to give the tripod and the attached camera enough time to reset to a stationery position.

Saving power
If you’re out for the day, or a very long period, but don’t have a spare battery, always consider ways to save power. For starters, if it’s cold out, keep the camera insulated when not in use; wrapped in a spare sweater in the bag, inside your jacket or even under your arm. Avoid using LiveView and rather than use in-camera editing wait until you return home to edit. Minimize the time you spend reviewing shots in Playback mode and use the histogram to nail exposure. It always seem tempting to delete frames on location, particularly if you’re waiting for something to appear (e.g. wildlife, sunset, stars etc) but you’re better off saving the battery for photographing. What’s more – something that seems unworthy on the camera’s LCD may offer some redeeming features on a larger computer screen.
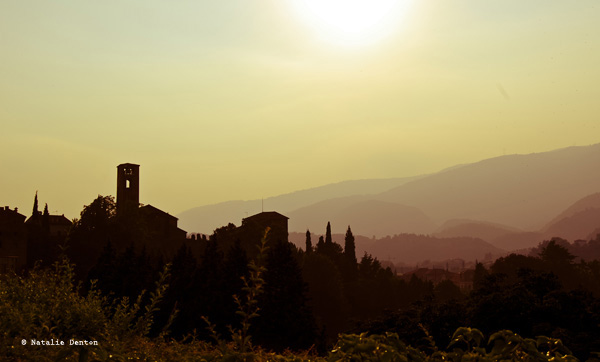
Time of day
Sunrise and sunset can make for some truly arresting images. In order to capture the golden-flame light in all its glory you’ll need to arrive at your shooting location approximately an hour and a half before the actual event. Use half an hour to prepare your kit; attach the right lens, secure your camera on the tripod, decide on the composition, ensure the horizon is straight using the in-camera spirit level (if your camera has one) and program the desired values. If you’re using a tripod, turn the lens’ image stabilisation switch to off; and opt for a suitable ISO (ideally between ISO 200-800).
The best light is born an hour before sunrise and an hour before sunset, which is why you need to be there early – once the sun has risen or set the vibrancy of hues diminish, so enjoy the 60 minute build up with its soft caressing light, and capture the ever-changing colours of the sky and its effect on the land below. To add some extra punch to those tones try using a ‘cloudy’ white balance option for pumped up reds, oranges and yellows.
The great outdoors can offer up some wonderful subjects for night photography, and by using a long exposure the light of the moon will paint in the elements of your scene. Alternatively, if there is no moon or nearby light source, use a flashlight or even the beam from your phone. Simply compose the scene, opt for Bulb mode to keep the shutter open as long as you need, and flick the beam over the nearby subjects; such as a tree, boulder, hay bale, truck, etc. Move the beam smoothly and steadily, trying not to hold it in one place for too long. When you are finished painting with light, simply end the exposure and review the result.
Editing
The hard work has been done and now you’re home with a collection of charismatic captures. While many of them are probably perfect straight out the camera, there might be a few ways you can inject a little extra interest into those not quite up to scratch. Here are a few suggestions for adding the ‘great’ into your great outdoors images.
Colours
Editing suites are fantastic for turning the bland into the beautiful; and if you’ve captured your images as RAW files, there’s even more scope for success. Make sure your screen is probably calibrated so that the colours you see onscreen are presented as the same as the ones you’ve photographed.
The majority of editing software will offer an automatic colour correction tool which is great if you feel the colour values are a little off and unrealistic. Usually you will be able to click on a white area of the image and the software will use this as a reading to change the colours in the image. You can do this manually by offsetting hues. For instance, should you feel the tones are looking a little cold, then warm them up by scaling up the yellow.
If you feel your image would benefit from some vivacious colouring, ramp up the power of the hues using the suite’s saturation slider, this works well for flower meadows or landscapes of patchwork-quilt fields. Just be careful not to go too far as it can start to look unrealistic and garish. Likewise you can pull the saturation back to make an image appear more sombre or stark, ideal for winter shots for example.

Blemishes
Dead pixels, lens spots and smudges can totally distract attention away from the main focus of your picture. The good news is they are easily rectified. Many suites like Photoshop, Elements and Lightroom offer users the ability to clone out errors. In Photoshop you simply select the Clone tool, hold down Alt and click on an area you wish to copy (i.e. identical colour and shade – the more similar it is the better it will blend in). Next move the cursor to the offending spot and click again. This will cover up the spot and most people won’t be able to notice.
Noise
Most new cameras shoot to sensitivities of ISO 25,600 (or higher), with noise making an appearance as late as ISO 6400, providing better support for low-light, night and sports enthusiasts. For those who aren’t endowed with the market’s latest launches it might be wise to administer some noise reduction software if you’ve shot at high sensitivities and noise is visible. Noise-reduction software plug-ins (add-on features that can be used within your editing suite such as Noise Ninja, Topaz deNoise or Neat Image) are fantastic. After a few simple steps the noise can be muted without over-softening the main subjects within the picture.
Composition
We’ve all been there – you’ve spent ages composing the frame in the field, only to return home to find it falls flat. Composing images effectively takes time and practice or a good eye and natural talent, but there are a few ways to enhance the composition post-shoot. The first is to bring up the thirds grid while editing. Crop into the frame so that the interesting part of the frame or the main subject lies on one of the intersecting points or lines, this will get rid of unwanted negative space and force the eye onto the subject. You can also crop out areas of the frame that clutter the image, thus directing the viewer’s focus onto the important elements. Lock the aspect ratio to ensure the proportions of the image stay the same – especially if you intend to print it.

Exposure
Tools such as Photoshop’s Curves can help photographers correct slightly over or underexposed frames. Using Curves lift the line one third of the way from the top to reveal details shrouded in shadow or drag the line one third from the bottom down to bring edge back details blown out by overexposing.

Black & White
Want to make your images more moody and deep? Simply desaturate them and heighten the contrast. Yes it’s as easy as that; drag the saturation slider down so that all traces of colour vanish from the frame and increase the contrast or tweak using Curves, so that the blacks are richer and the whites are brighter.

Save and print
Today’s digital camera sensor’s usually pack an insane amount of megapixels, which means you can print your images at a larger size and still maintain a high resolution quality. Therefore if you want to print your outdoor scenes in all their glory, print using the resolution you shot it at. Alternatively if you intend to share your frames online – either of a social network or your own website reduce the size to 72dpi for quick and easy uploading and viewing. In Photoshop you can do this simply by heading to ‘Image’ on the Menu Bar and then ‘Image Size’ from the drop down menu and change its resolution to 72dpi (and a smaller size in pixels as well for online sharing)
Now we’ve explored the majority of considerations you need to make when pursuing outdoor photography you’ve got no excuse to give it a try. Maybe you have some tips and techniques of your own you’d like to tell us about? We’d love to see them, so please share them here for your fellow photographers to see and try!

