Being a tourist would be more fun if there weren’t thousands of other tourists getting between you and the shot you want to capture.
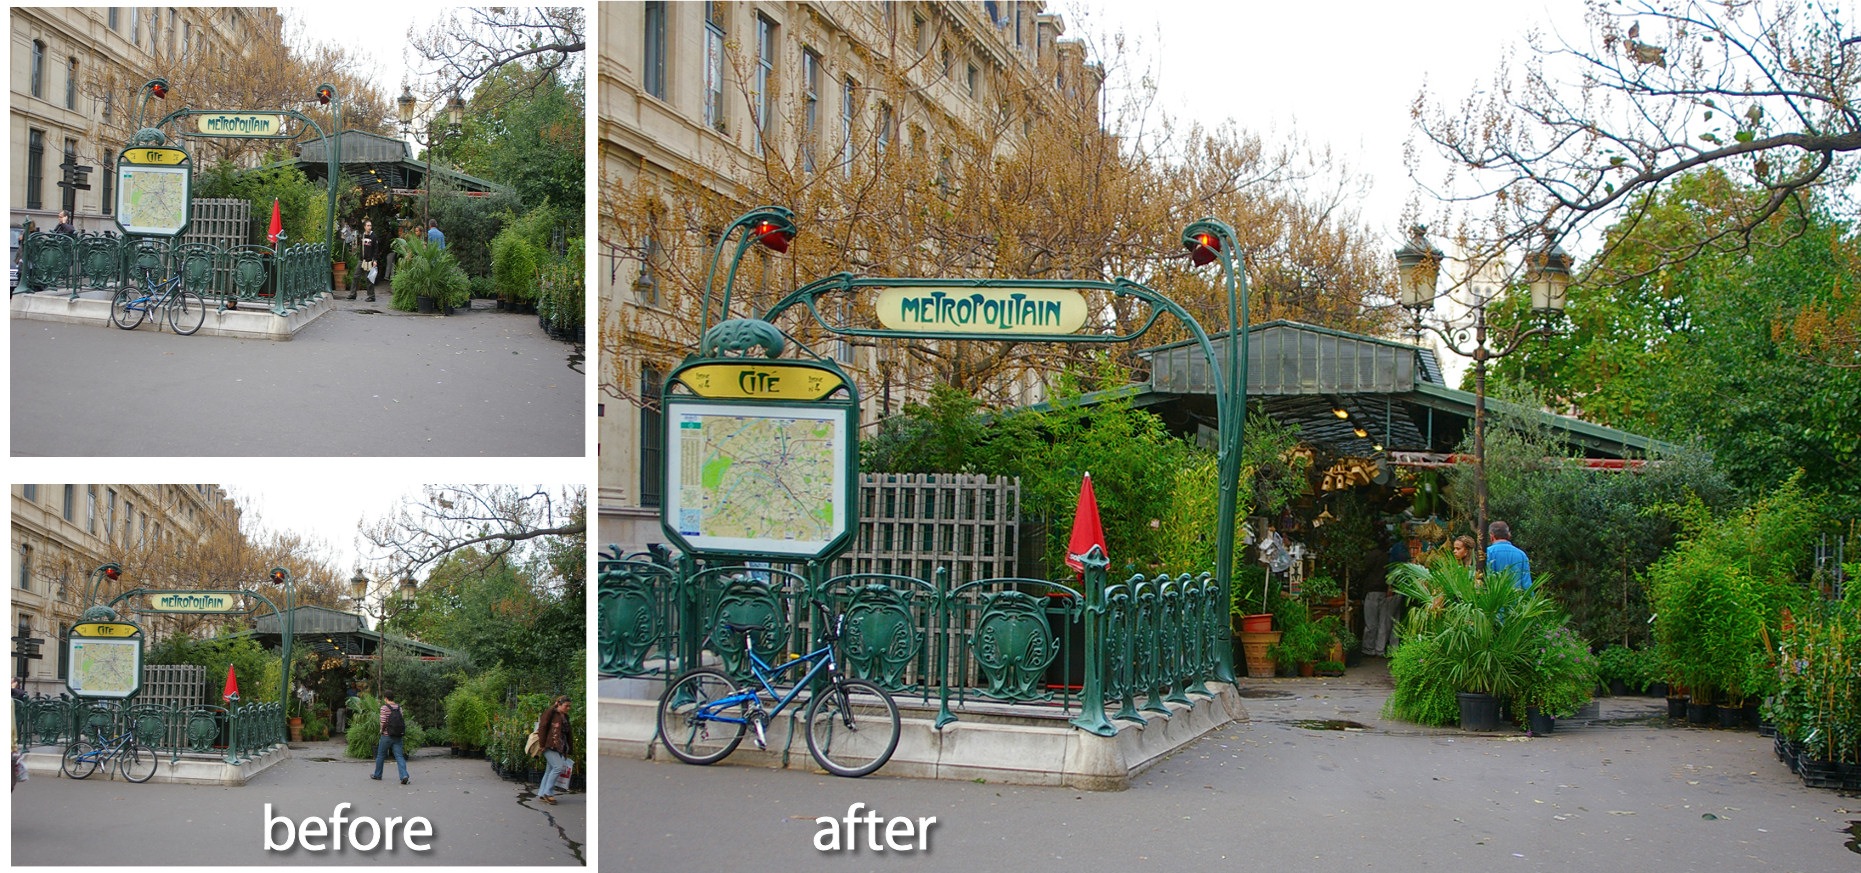
When you are visiting a popular location and if you have difficulty getting a photo that is free of people, take two (or more) photos making sure that somewhere in each you have a good clean portion of the sight you are interested in photographing.
On your return you can assemble the images in Photoshop and create one good, tourist free image.
Here’s how to do this with two images. This process relies on a feature called Auto-Align Layers which was first introduced in Photoshop CS3. If you have an earlier version of Photoshop you can manually align the layers but Photoshop won’t do it automatically for you as shown here.
Step 1
Open both images in Photoshop and drag the background layer from one into the other image so you have two different layers in one image. This will be your working image – you can close the other one as you no longer need it.

Step 2
Select both layers in the Layers palette by clicking on one and then Shift + Click on the second. Choose Edit > Auto-Align Layers, click Auto and click Ok.
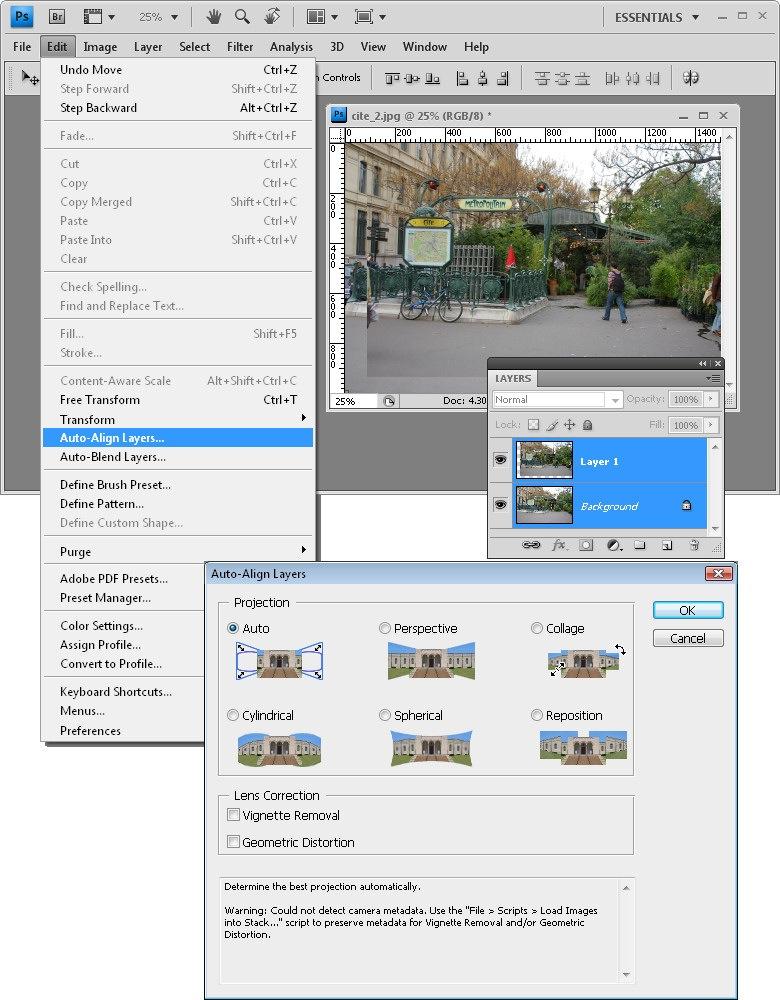
This feature automatically aligns the layers relative to each other. (You may not have noticed this tool before – it’s on the Edit menu when logic would suggest it should be on the Layers menu.).
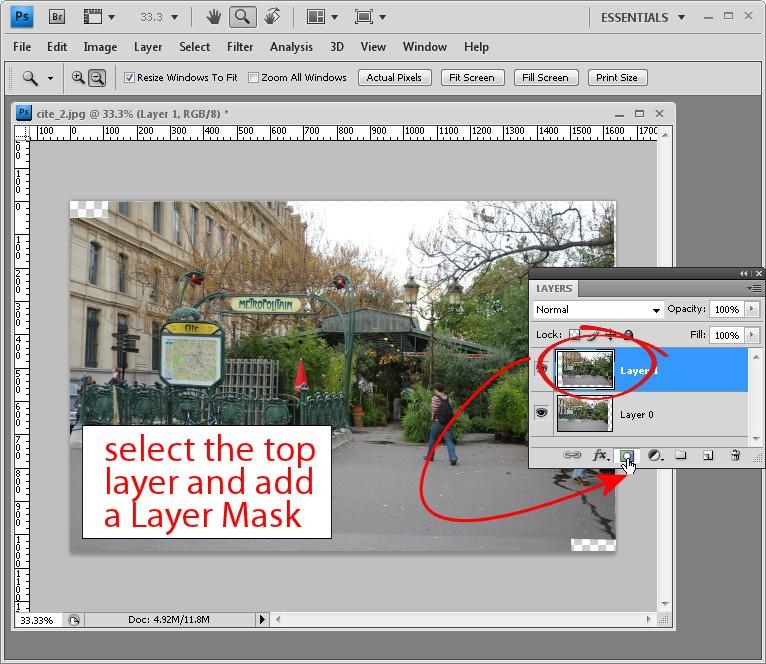
Step 3
Select the topmost layer in the image and add a mask to it by selecting the Add Layer Mask icon at the foot of the layers palette.
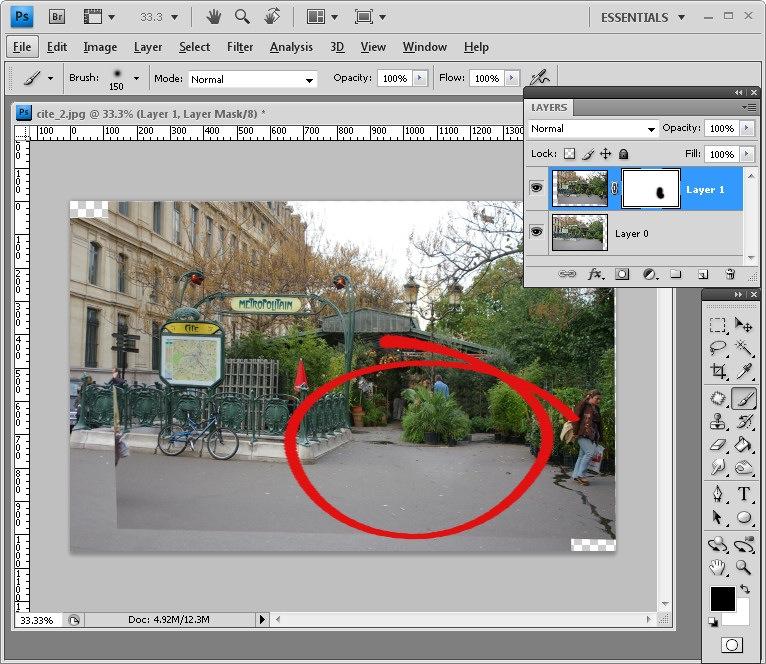
Step 4
Set black as the foreground color, select a round soft edge brush and click on the mask icon in the layers palette so it is selected.

Step 5
Paint over the person or other thing in the top layer that you want to remove. Painting in black on a mask reveals the layer underneath so you should see the image underneath through this one. (If you need to paint back in some of the image, switch to white foreground color and paint on the mask in white).
Step 6
When you’re done you can merge the layers (Layers > Merge Visible). If you still have other tourists to remove, return to step 1 and continue with another of the images you captured.
If you are done, crop the image and apply any required fixes to the image before saving it.


Some Older Comments