This will blow your mind. If you have never tried ‘free view’ 3D, then you might find it hard to imagine that you can take 3D photos with any camera and see them on any computer screen without glasses or special technology. I will show you how.
We see the world with two eyes, and that tells us the depth of a scene. Most cameras can only capture a flat plane, destroying any depth the original scene had and robbing it of a great deal of its impact. This technique lets you capture photos of certain scenes that contain the depth of the original, and with a little bit of practice most people can learn to see these photos simply by crossing their eyes.
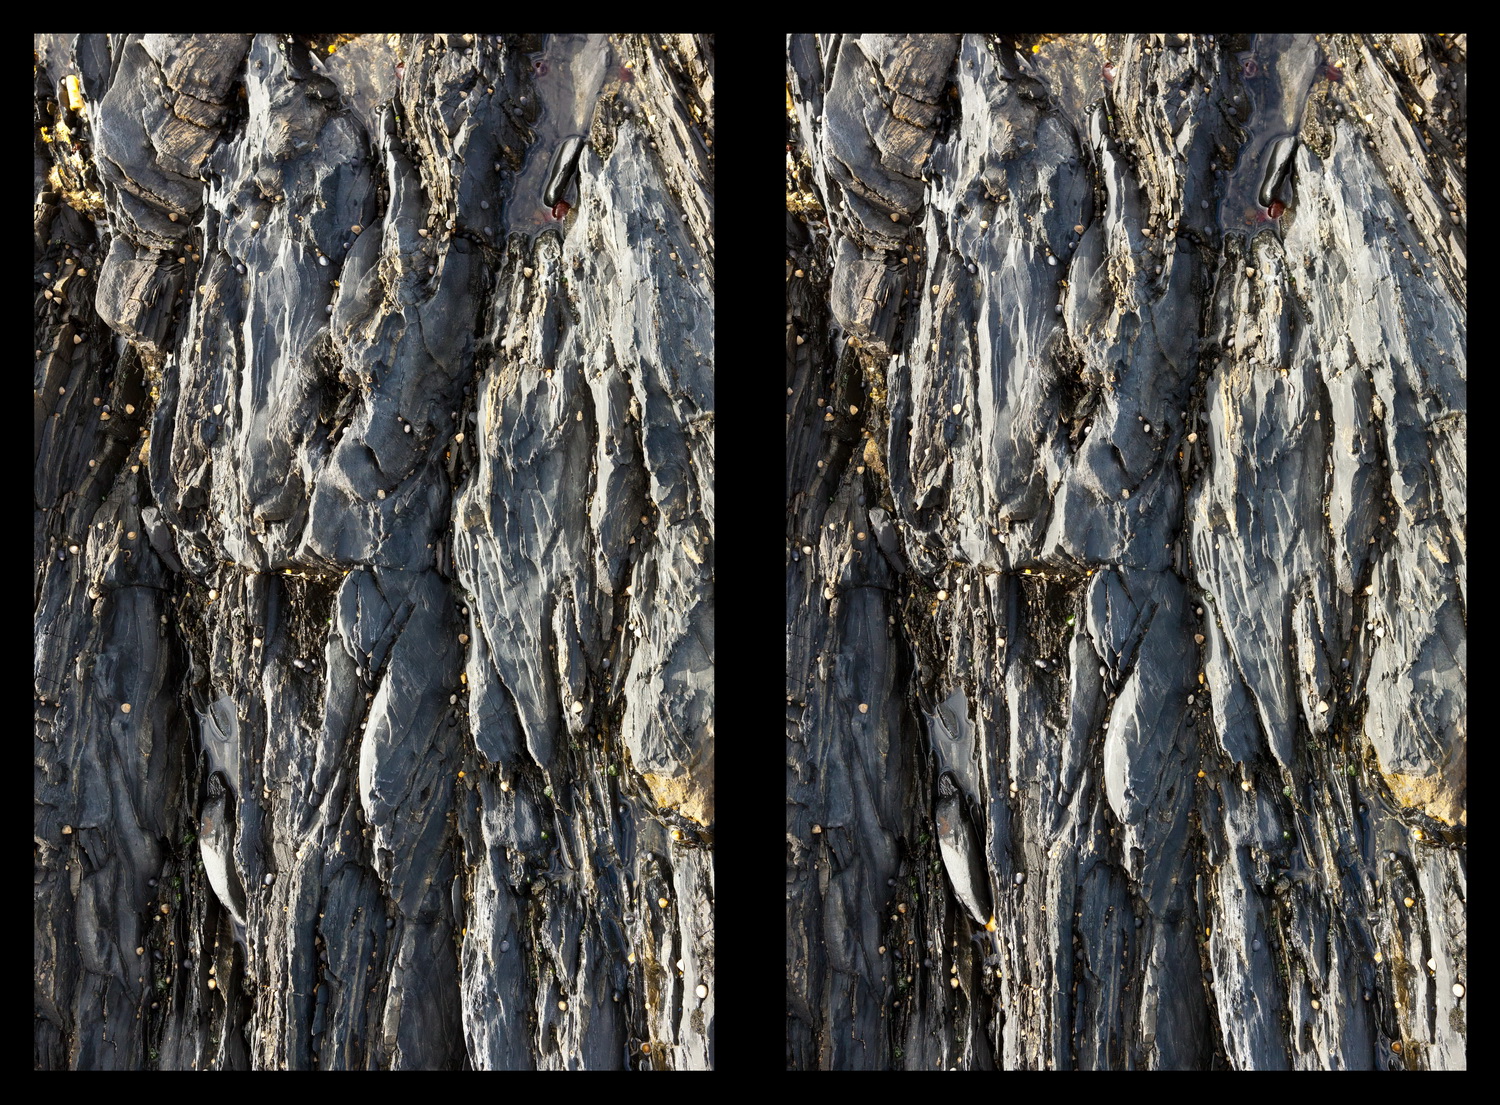
I’ve written a detailed guide on how to see 3D photos on my blog, and it has already helped thousands of people to learn how to ‘free view’ 3D photography. If you’re not familiar with the technique, go and have a read, then come back, enjoy the photo above in glorious 3D.
Now I bet you want to know how you can make these images yourself!
What I’ll Be Using For The Shot
- Canon 5D MkIII
- 24-70mm f2.8 lens
How The Shot Was Taken
Taking a 3D photo is actually really simple, but with some limitations. Most importantly: this technique will not work with a moving subject. You won’t be able to take good photos of moving water, leaves blowing in the wind, people you can’t direct, or anything else which does not stay still for a few seconds. Feel free to give it a go if you think your subject is still enough, but the effect may not work well.
The technique is called the “cha-cha” method because all you do is rock from one side to the other when taking a pair of photos.
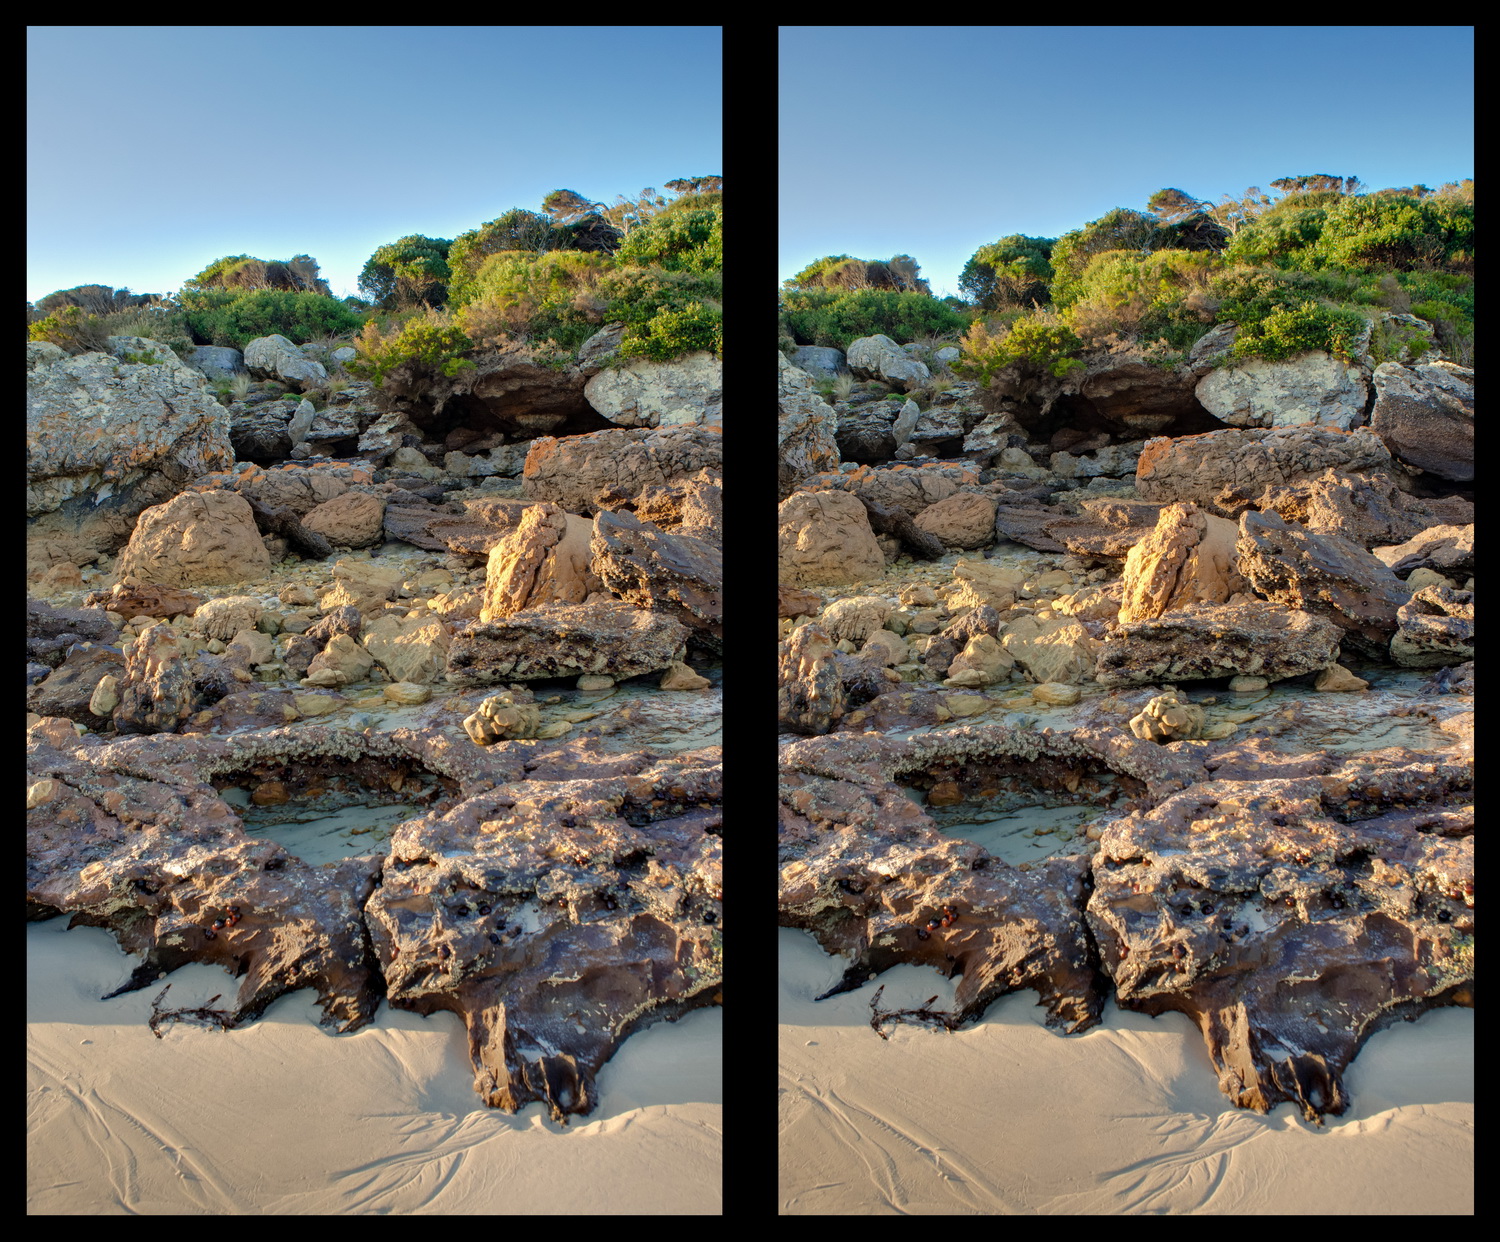
Find a subject that you think will look good in 3D. My photo looks interesting because there are rocks and outcrops and overhangs and grass and all kinds of things going on in the depth of the photo which you can’t see in the 2D version. Use a relatively narrow aperture, as out of focus parts of a 3D photo can be distracting rather than attractive. A faster shutter speed also helps to reduce camera shake, since you are hand-holding.
Compose your shot and pick out a feature that’s not too far away from you to be a reference point. This will probably be in the lower third of the photo, near the centre. Now stand with your weight on your right foot and take the first photo. Then, while watching your reference point and trying to keep it in the same place in your viewfinder, put your weight onto your left foot and take the second photo. And you’re done! The magic happens in the processing.
Portrait or landscape?
For free viewing, it’s best to take all of your 3D photos in portrait orientation. This requires you to cross your eyes less and is thus more comfortable. Also, two landscape photos side by side are very wide and will thus make the whole image appear smaller on your monitor. However, if you have a 3D TV or monitor and you are taking 3D photos to display with it, then landscape is the better choice. These displays overlay the two images, so a landscape oriented photo will fill the screen.
Processing the Shot
Now that we have two images, to share and show them as a 3D pair we need to make them one. It’s not as simple however as just sticking them side by side in one file. There are a couple of issues we need to take care of which are unique to 3D photos: Alignment and the 3D window.
Both of these issues can be handled with a nifty piece of retro-looking software called Stereo Photo Maker, and the AutoPano plugin for it. Download them both at the links below, install AutoPano, run Stereo Photo Maker and in its preferences, point to AutoPano and you’re ready to go!
- Download and install StereoPhoto Maker
- Download and install AutoPano and link it to StereoPhoto Maker as a plugin
Alignment
Taking 3D photos with the cha-cha method can cause each photo to become slightly misaligned from the other. There is also distortion introduced from pointing the camera at the same target in each photo. Even though this is necessary for the most 3D coverage with your two photos, this keystone distortion needs to be corrected. This is achieved with the AutoPano plugin.

3D Window
The edge of the frame of your photo has an apparent position in 3D space: where your monitor is. Things look weird and uncomfortable if parts of your photo appear to be touching this frame, it’s far better to make it look like they are inside it, beyond the monitor. Stereo Photo Maker has a tool to help here as well.
Step by step process
- Drag both photos onto the StereoPhoto Maker shortcut icon
- Zoom out a bit with your mouse’s scroll wheel if you need to to make it easier to fuse the pair into 3D with the cross-eye technique
- Click on the auto align button to use autopano to correct for any distortions
- Click on the Easy Adjustment button to fix the 3D images position relative to the 3D window (see below for more information)
- I find adding a border helps, so if you like, in the menu go to View – Border Options
- Check “Show Border” and adjust the border settings to your liking
- Save the image by clicking in the menu File – Save Stereo Image
Positioning the image within the 3D window is done with the “Easy Adjustment” button in the top toolbar. This opens the adjustment dialogue box, seen here, and you move the slider above the two overlaid images, increasing or decreasing their separation, thus moving them in or out of the 3D plane. It can be difficult to know exactly how to adjust this but a good rule of thumb is to look at the lower edge, and get features here to overlap. With practice and experimentation you can try different positions for the 3D window, creating cool effects with elements coming through the 3D window. It’s best to avoid anything touching the 3D window however.

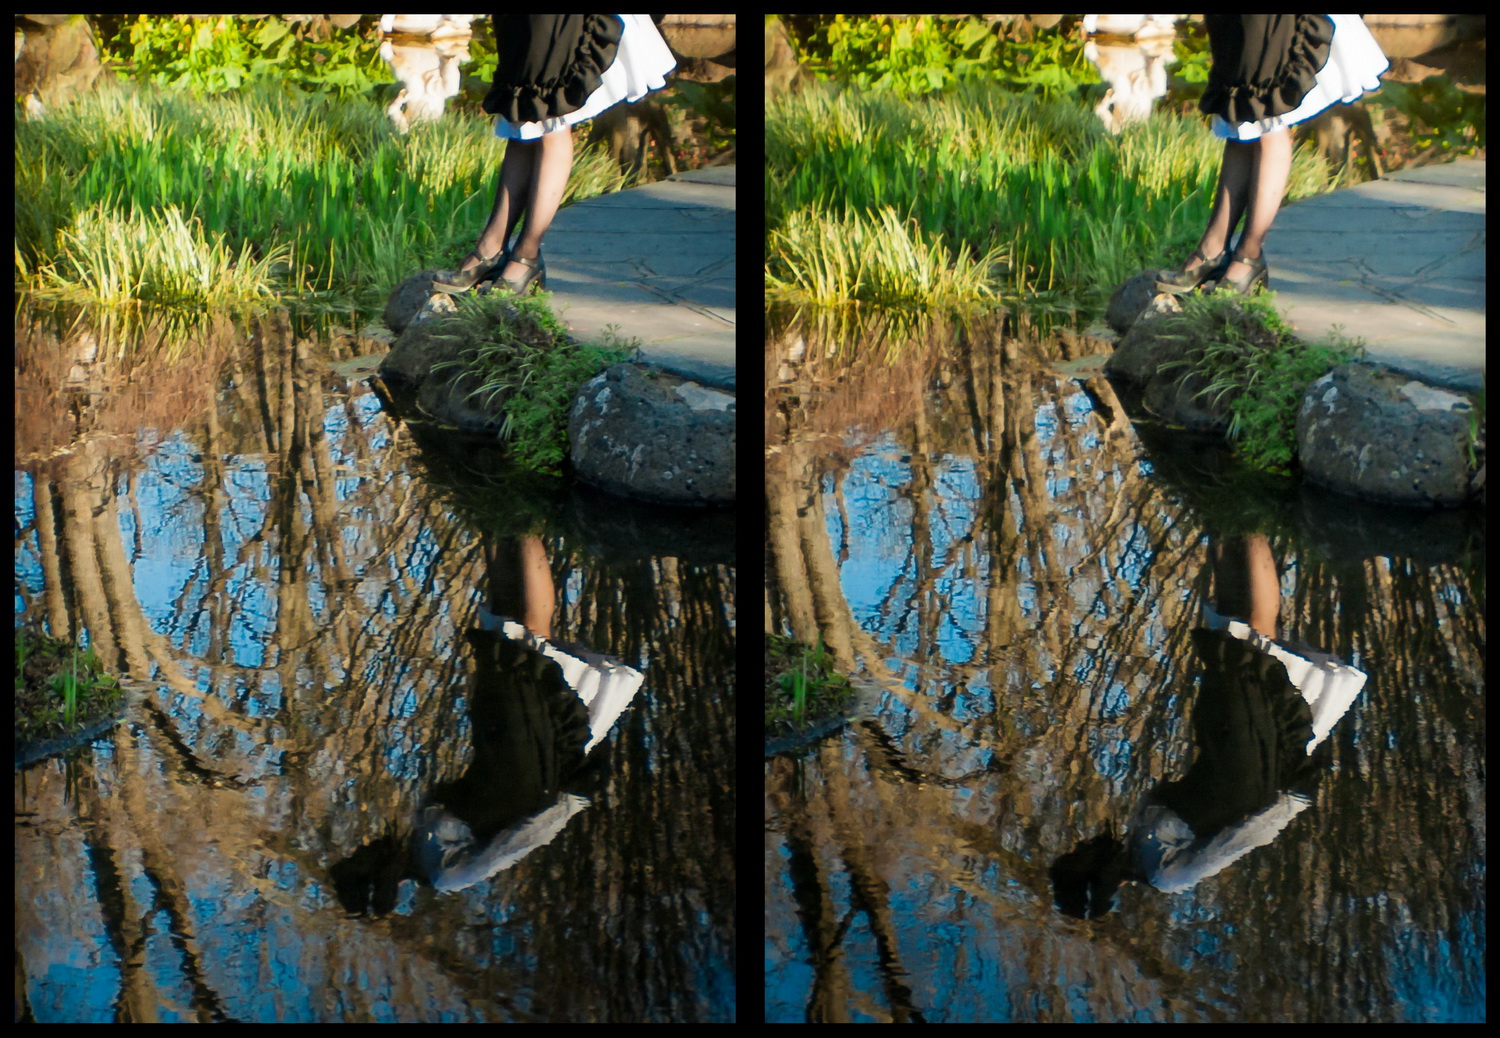
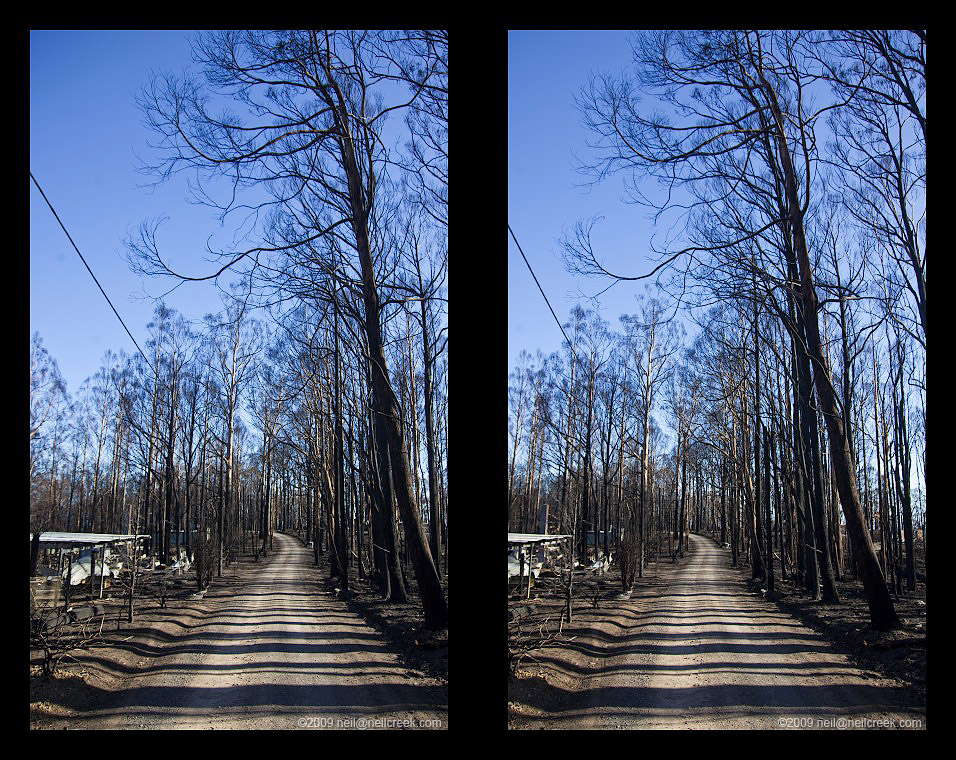
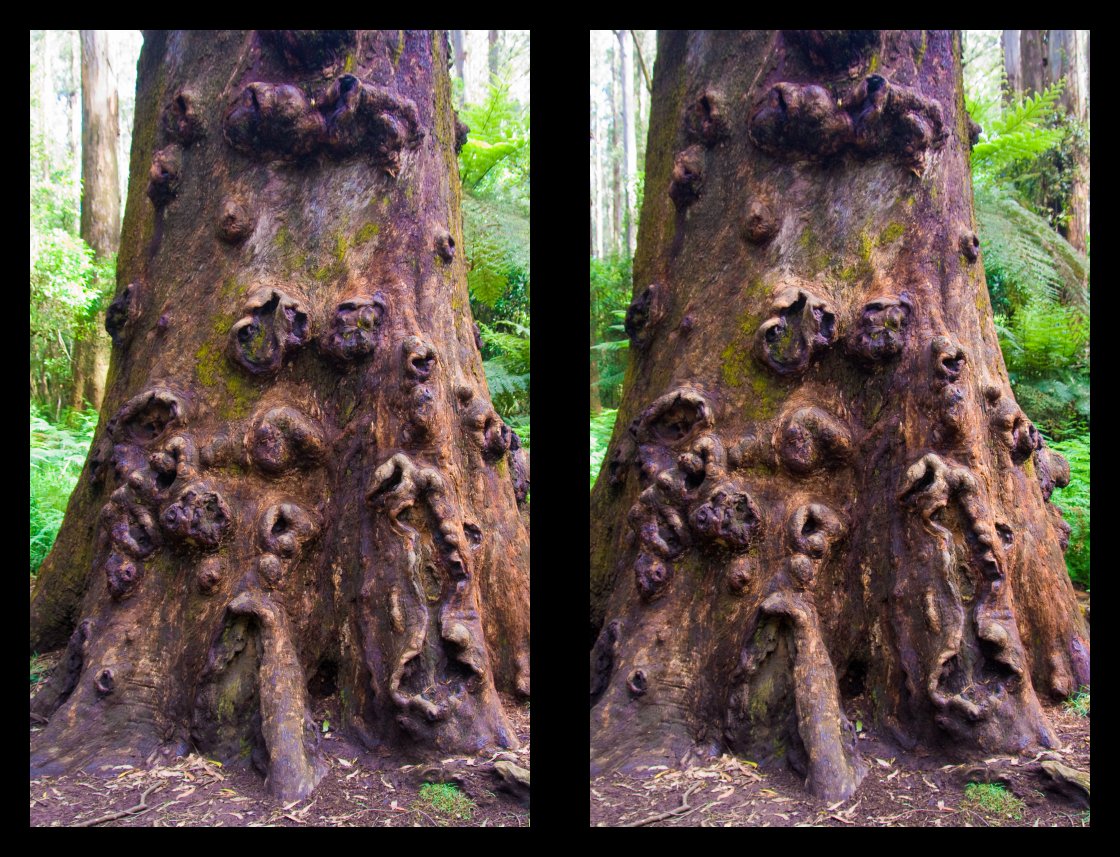
Some More Examples
Now you’ve got your feet wet, here are some more 3D photos I’ve taken over the years to show you. And don’t forget, if you liked this post, then you’re bound to enjoy Photo Magic! The book is packed with cool stuff you can create just like this, fully explained with examples, explanations and variations you can try on the looks described. Check it out here.
Enjoy dancing with your camera! Cha cha!


Update: here are 9 more Crazy Cross eye 3D Images


Some Older Comments