8 Secrets of the Zoom Tool in Photoshop
Continuing with my ‘tool’ secrets posts, here are 8 secrets of the Photoshop Zoom Tool.
1. Quick toolbar shortcuts
The Zoom tool can be selected by pressing the letter Z – it’s an easy and handy shortcut to remember because it saves you from having to click the Zoom tool to select it.

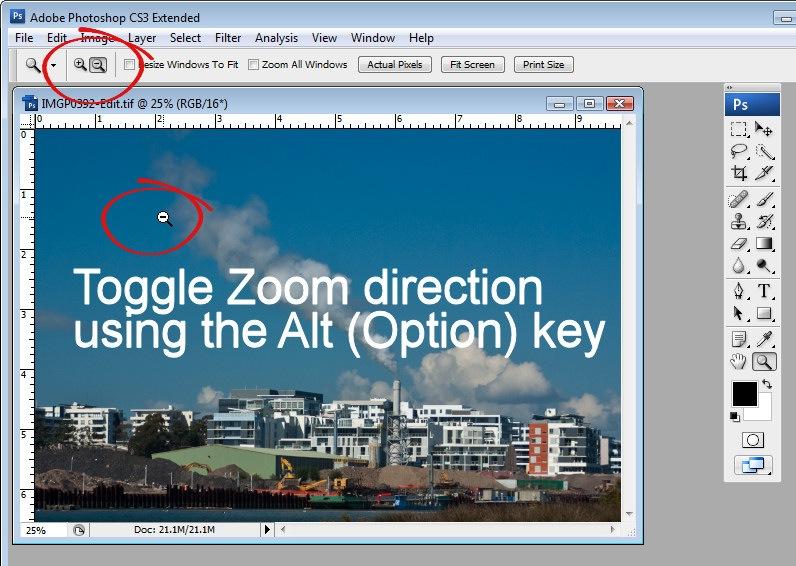
However, once engaged, the Zoom tool operates in only one direction, in or out depending on the option you have selected on the Tool Options bar. You can toggle the Zoom direction by holding the Alt key (Option on the Mac) as you zoom.
2. Zoom as you work
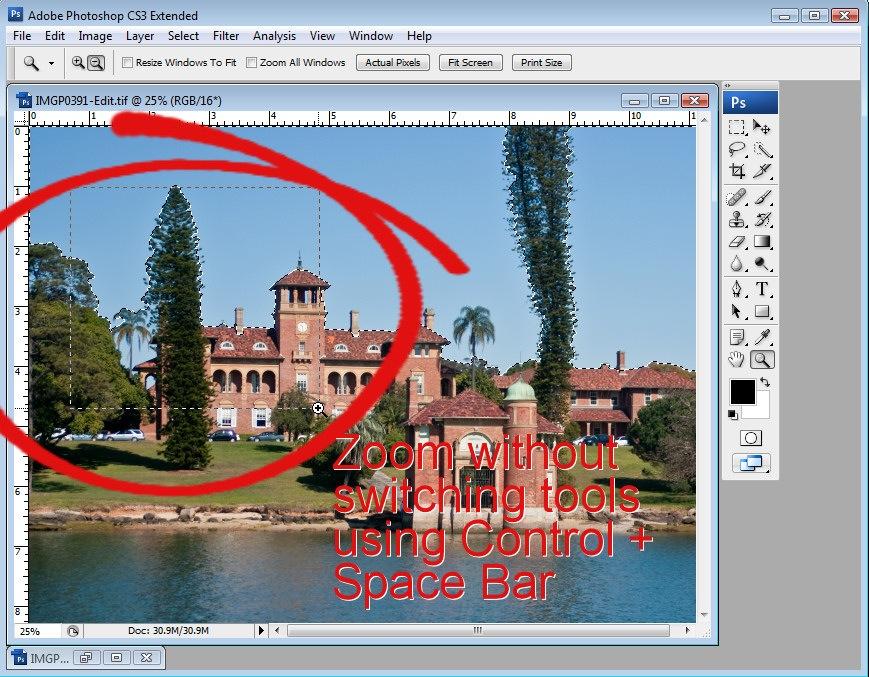
If you’re in the middle of painting, erasing or selecting an item and if you need to get access to the Zoom tool, press Ctrl + Space Bar (Command + Space Bar on the Mac) and you’ll get access to the Zoom tool’s current setting – which will be either Zoom In or Zoom Out depending on what you have selected. Use Ctrl + Alt + Space Bar (Command + Option + Space Bar on the Mac) to zoom the other way.
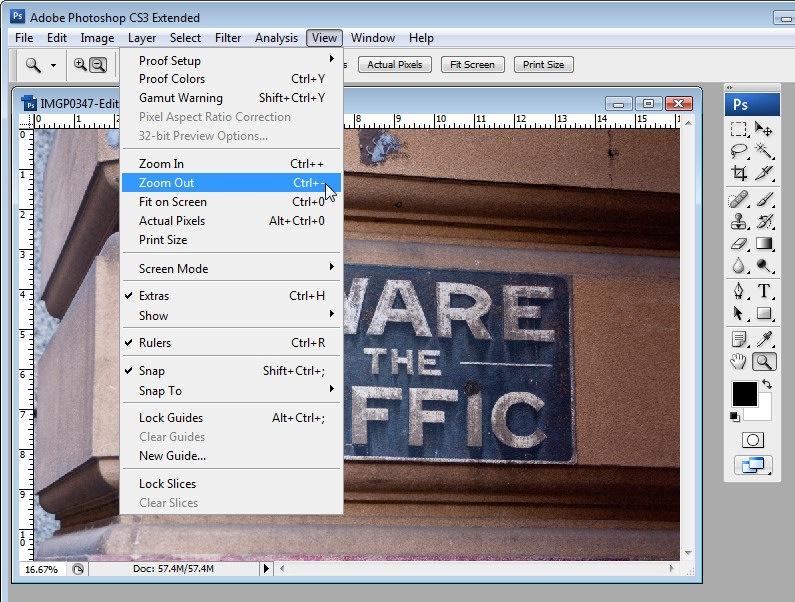
3. Zoom to a specific place
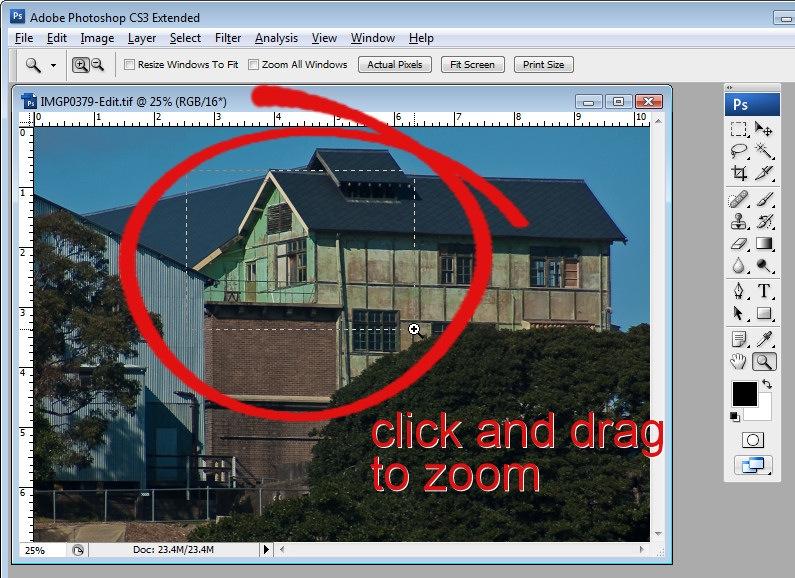
If your Zoom tool is set to Zoom In, you can zoom to a particular location in the image by dragging with the zoom tool over that location rather than simply clicking on it. If your tool is set to Zoom Out, press Alt (Option on the Mac), and drag over the place on the image that you want to focus on.
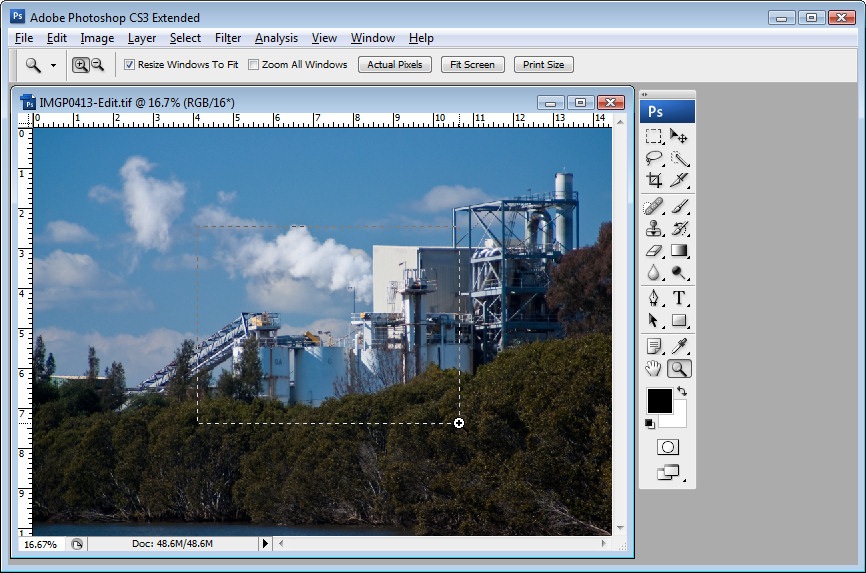
4. Size the window as you zoom
When the Zoom tool is selected, the Tool Options bar has a checkbox for Resize Window To Fit. Enable this and the window around the image will be resized to fit the zoomed image so you won’t have any space between the image and the edge of the window. With this option disabled, if you shrink the image, the window stays the same size and grey area is added around the image between it and the window edge. If you zoom in with this option disabled the window stays the same size as you zoom.
5. Other zoom options
Some Zoom options can be selected from the View menu such as Zoom In, Zoom Out, Fit On Screen, Actual Pixels and Print Size. Each of these can also be selected using keyboard shortcuts such as Ctrl + + to zoom in, Ctrl + – to zoom out. Keystrokes appear in the menu opposite each item.
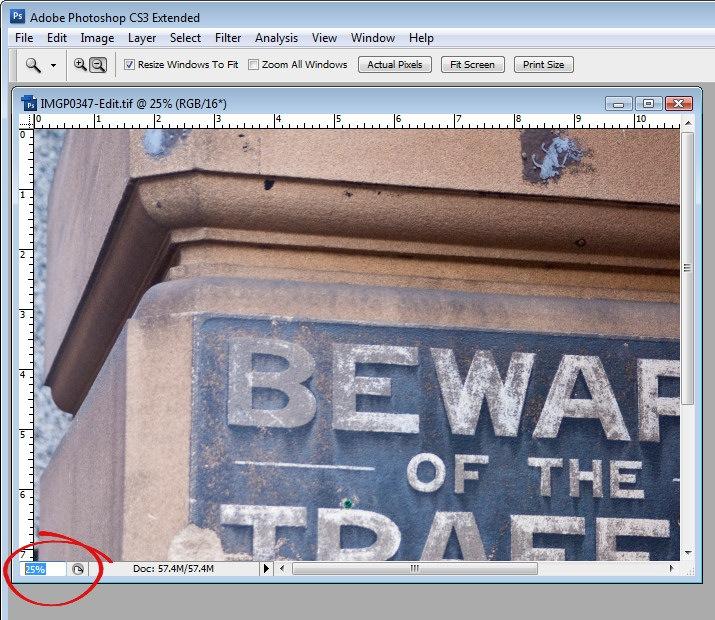
6. Zoom via the Status Bar
The current zoom percentage is shown in the left side of the image window’s Status Bar. To zoom to a particular percentage level such as 150%, type 150 in the Status Bar box and press Enter.
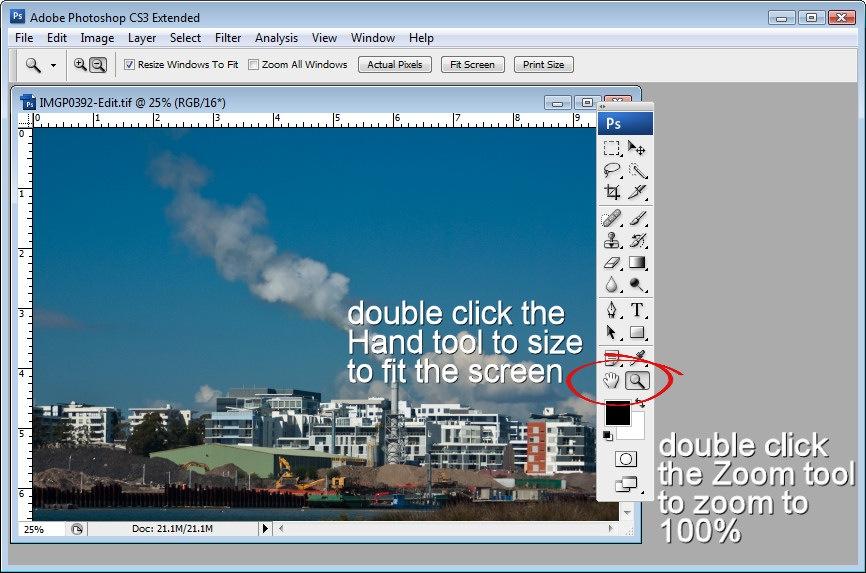
7. Hidden Zoom Options
To quickly zoom an image to 100% size, double click the Zoom tool in the Tool Palette. The Hand tool can be used to size the image to fit the screen – to do this, double click the Hand tool. Exactly how big the image is when it is set to “fill the screen” depends on the position of toolbars and palettes.
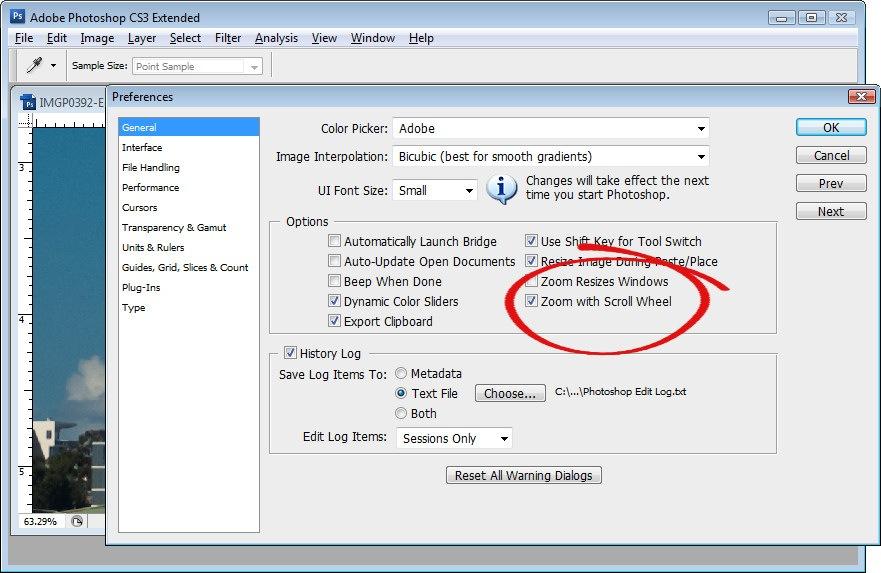
8. Zoom with the mouse
To zoom with your mouse wheel, choose Edit > Preferences > General and enable the Zoom with scroll wheel checkbox. Then you can roll the mouse wheel to zoom in and out of the image.


15 Responses to “8 Secrets of the Zoom Tool in Photoshop” - Add Yours
September 23rd, 2009 at 9:20 am
Great reminder! You forgot my two favorite. Cntrl+0: zooms the current image to fit the screen. Cntrl+Alt+0: Zooms to 100% (the same as double clicking the Zoom tool in the tool palette.
September 23rd, 2009 at 1:24 pm
My favorite:
On my mac, use “Command” (instead of Ctrl for PC users) plus “+” to zoom in, and “Command” plus “-” to zoom out. Easy!
September 23rd, 2009 at 1:47 pm
thanks for the tips!
Zoom with the mouse is the ONLY way to go!
September 23rd, 2009 at 3:39 pm
One shortcut that I didn’t know about for a while, was ‘ctrl’ + ‘0′. That makes the window go back to fit the screen. The main zoom shortcuts I like to use are just ‘ctrl’ + ‘0′, ‘ctrl’ + ‘+’, ‘ctrl’ + ‘-’ . I did like the tips for the ones I didn’t know about. Alt and scrolling with the mouse is nice. So is holding it down and making a selection box to what you want to view. I didn’t know about that one either. Or pressing z. But generally I don’t have to even use the zoom tool since I have the three different controls of zoom by just keystrokes.
But overall good tips.
September 23rd, 2009 at 4:52 pm
I was going to say you forgot the Ctrl+0 and Alt+Ctrl+0 too but it looks like Tim beat me to it :)
sort of on the same lines though, when you are zoomed in you can also use the spacebar to move around. There are enough shortcuts with the zoom tool that I never use the Z key or click on the zoom button.. just use shortcuts.
September 23rd, 2009 at 10:44 pm
without selecting the scroll wheel option from the preferences, you can try ATL+mouse scroll
September 23rd, 2009 at 11:21 pm
Thanks for this! I used to zoom with my mouse wheel, and then when I upgraded PS I was super bummed when it wouldn’t work anymore. Who’d have thought to go back and change a setting…sheesh.
September 23rd, 2009 at 11:32 pm
These are great tips. Thank you.
September 23rd, 2009 at 11:36 pm
Yeah, someone already mentioned it but my preferred method of zooming is to hold down Ctrl (on Windows) and then just using the “+” or “-” keys. Easiest way for me.
September 24th, 2009 at 1:58 am
I use the touchstrip on my tablet (H)
September 24th, 2009 at 3:18 am
Thanks! I appreciate this tutorial .. not like the others lol :)
September 26th, 2009 at 5:09 am
Silly question time. How do you cancel the zoom tool, I’ve tried double clicking but that doesn’t seem to work.
Help!
September 26th, 2009 at 10:22 am
great tips thanks :)
September 26th, 2009 at 11:11 am
Thanx Helen .. after 12yrs of Pshp you’ve made feel I just left kindergarten!! Can’t believe how lazy I have been not to have discovered a couple of these ..wow less RSI now !! Cheers.
September 26th, 2009 at 12:47 pm
Cool advice! I just use the navigator’s zoom buttons, and I drag the red box to move around the image. Sometimes I use the scroll wheel to move up and down.
I tried the “zoom with scroll wheel” option, but it is not implemented nearly as well as PhotoFiltre (I love it there), so I don’t use it.
If I use some of your tips I might save a few minutes in a big editing session. Thanks!
Leave a Reply